
Today’s buyers evaluate options in seconds: some scan prices, others compare features, and many debate monthly versus annual plans. In this split-second decision-making environment, your pricing table’s design becomes the decisive factor in conversions.
If you run a service or subscription-based business, your pricing table needs to do more than list options to convert visitors into paying customers. It should guide attention, support comparisons, and make the better plan feel like the obvious choice.
A well-designed pricing table with a monthly/yearly toggle turns a standard pricing table into something far more dynamic and user-focused. It doesn’t just display options, it actively guides the eye, emphasizes savings, and eliminates comparison friction.
In this guide, you’ll learn how to create a clean monthly and yearly pricing toggle in WordPress using a table format that looks great on any device.
Monthly/Yearly Pricing Toggle
ベーシック |
プロ |
エンタープライズ |
|---|---|---|
For individuals |
For startups |
For big companies |
$99/month |
$199/month |
$299/month |
|
|
|
ベーシック |
プロ |
エンタープライズ |
|---|---|---|
For individuals |
For startups |
For big companies |
$990/year |
$1990/year |
$2990/year |
|
|
|
How to Add a Monthly/Yearly Pricing Toggle in WordPress
Now that you know how a pricing toggle helps simplify comparisons and highlight value, let’s walk through the steps to create one using the Tableberg plugin.
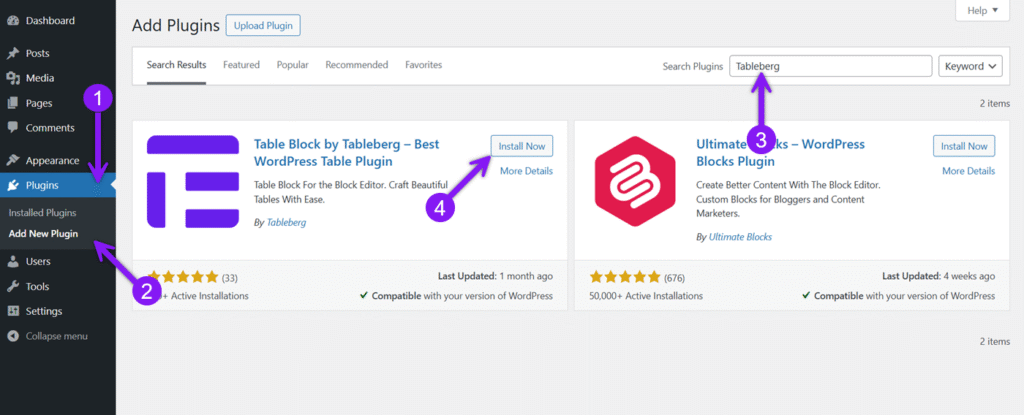
ステップ1:Tablebergのインストールとアクティベート
Head to your WordPress dashboard, go to Plugins → Add New, search for Tableberg, then click Install Now, followed by Activate. Once activated, you’ll find two new blocks in the editor: Tableberg and Toggle for Tableberg.
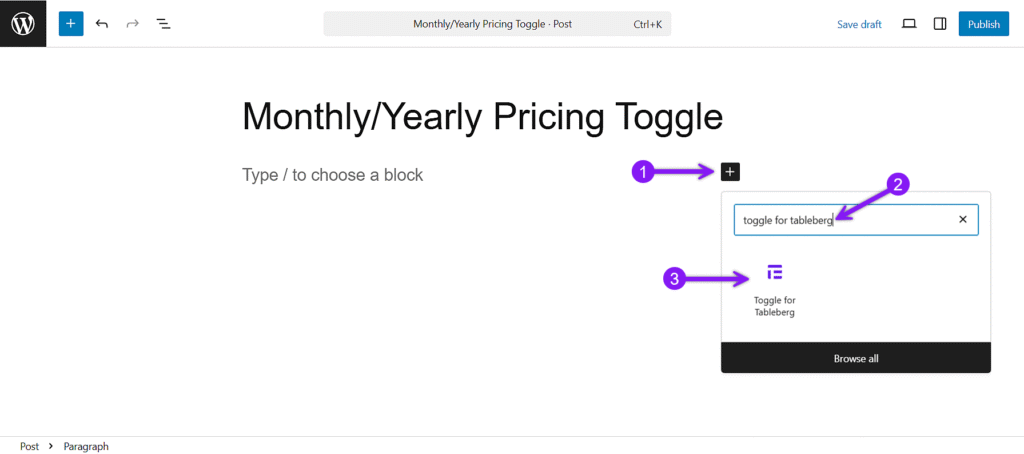
ステップ2:Tablebergブロックのトグルを追加する
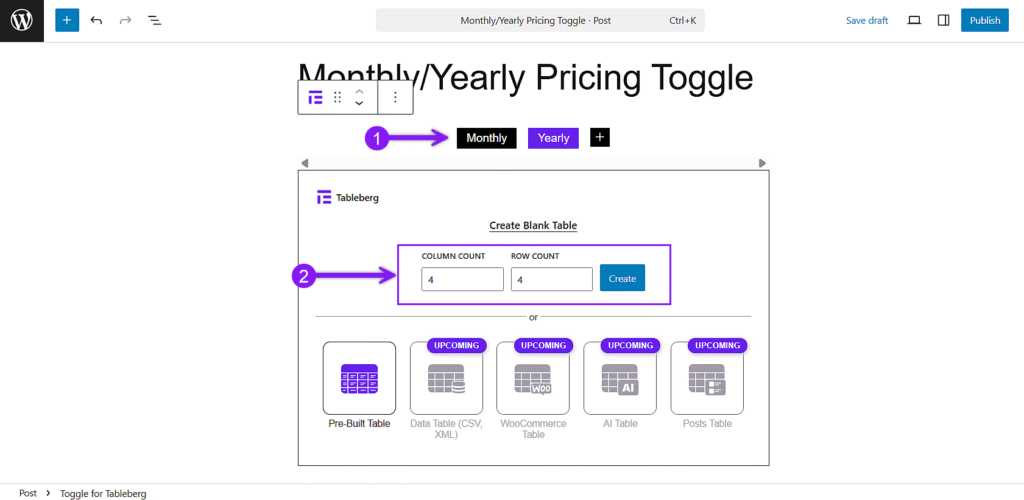
Open the post or page where you want to place your pricing table. Click the plus icon, search for Toggle for Tableberg, and insert the block. It starts with three tabs by default. Hover over any tab to remove it, or click the plus sign to add more. For this setup, keep just two tabs — one for “Monthly” and one for “Yearly.”
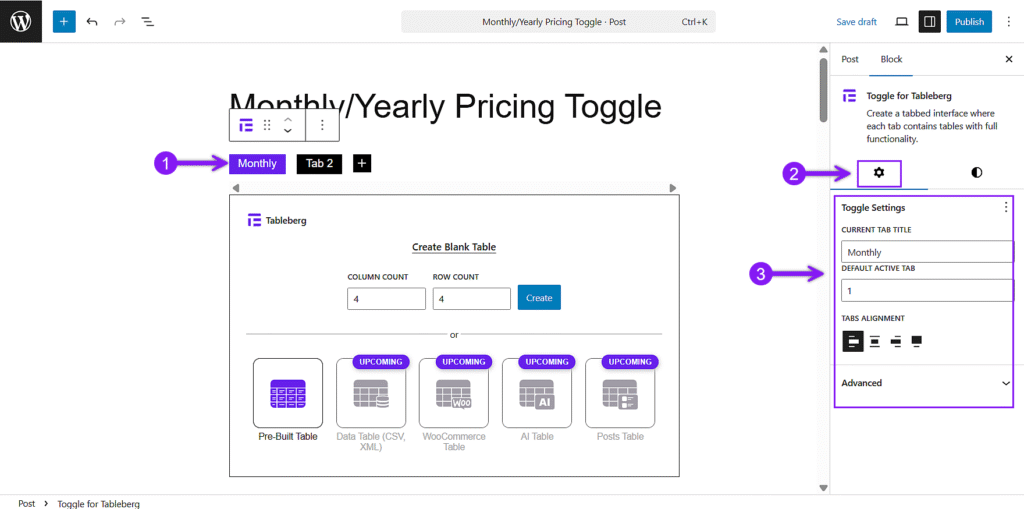
Step 3: Configure the Tab Settings
With the block selected, use the settings panel on the right to adjust both General and Style options.
In the General tab, rename each tab, choose which one is active by default, and align the tabs as needed.
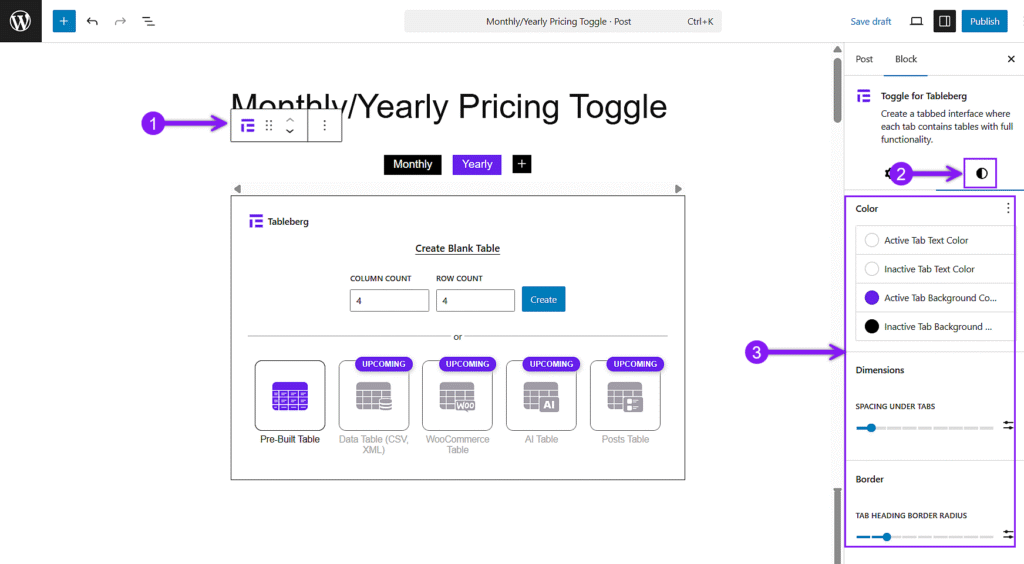
Under Style, you can adjust colors for active and inactive tabs, set spacing below the toggle, and tweak border radius to round the corners if you want a softer look.
Step 4: Add Tables Inside Each Tab
Click into the first tab and create the table. This will hold your monthly pricing table. Repeat the same inside the second tab and add your yearly version. Your structure for both tables should remain the same, with only pricing and related labels changed.
Step 5: Customize the Tables
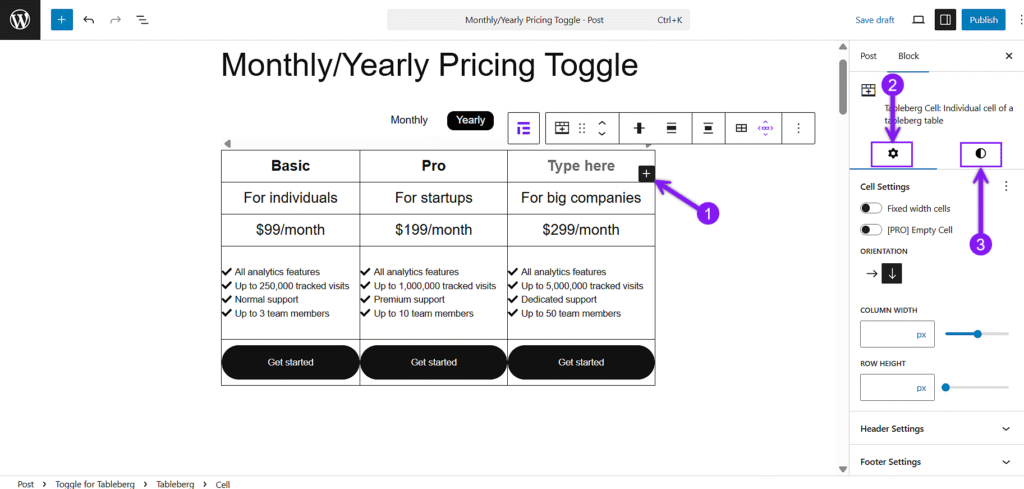
Add plan names, audience tags, pricing, features, and call-to-action buttons inside each column. Use paragraph blocks, lists, and button blocks inside the table cells.
Then open the general settings to set the header and footer, and adjust features like sticky header, sorting, and search if needed. Finally, use the style tab to fine-tune spacing, background colors, borders, and alignment for a clean, consistent look across both tables.
Step 6: Save, Preview, and Publish
Don’t forget to save your work first. Then, use the preview option to check how your toggle looks on both desktop and mobile. Make sure the tab switch is smooth and each version of the table is clear. Once satisfied, hit Publish to make it live.

最終的な感想
A monthly/yearly pricing toggle isn’t just a design trick. It’s a practical way to present flexible billing options without overwhelming your layout. With Tableberg, you don’t need extra plugins or custom code to get it right. You can build a responsive, well-structured pricing table that helps visitors compare plans clearly and choose the one that fits them best.
Take the time to set up your toggle with care, and you’ll end up with a cleaner page and a smoother decision-making experience for your users.

