
Columns are vertical divisions or containers within which you can organize and display your web content. By dividing your content into columns, not only can you create a sense of order, balance, and hierarchy but also enhance readability and engagement.
By using columns correctly, you can make your post and page layout attractive. WordPress allows you to create columns in many different ways. This article will show you how to create columns in WordPress in some of those handy ways. Let’s explore!
- 方法1: カラム・ブロックの使用
- 方法2: テーブル・ブロックの使用
- 方法3: Tablebergブロックの使用
美しいテーブルを作る
ブロックエディター付き

方法01:カラムブロックを使う
Open the post or page you want. Find and add the Columns block to your editor by typing it in the Gutenberg search box.
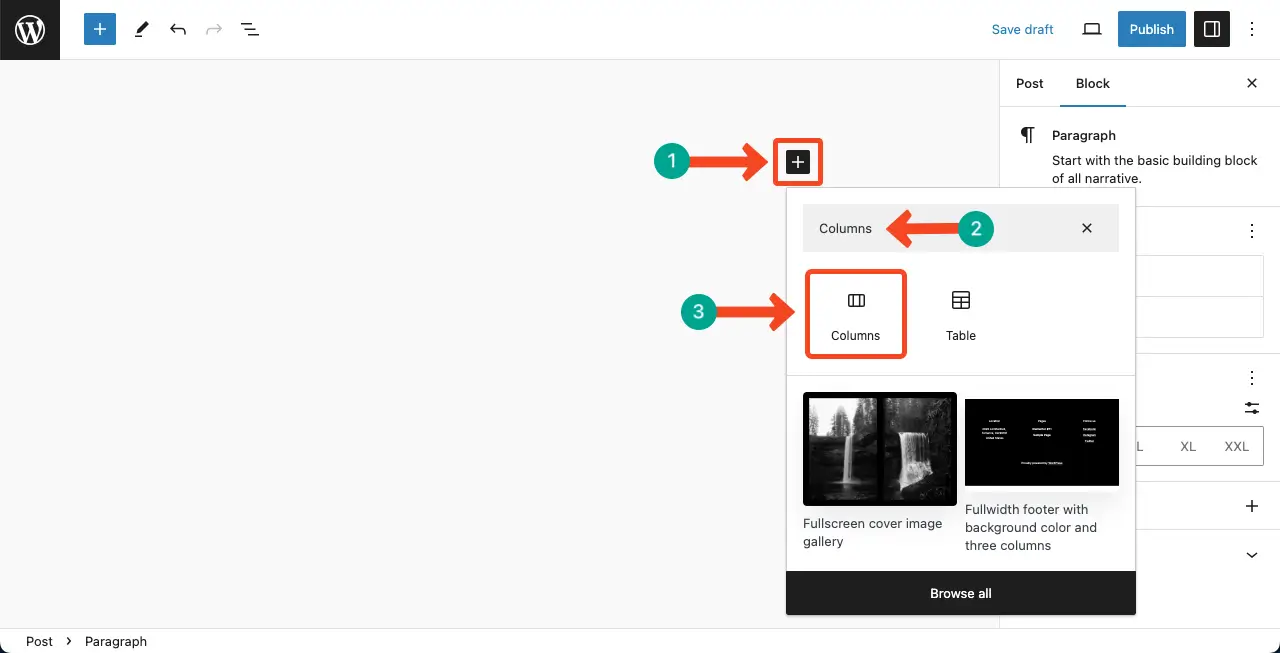
Click on the column layout you need. This will be added to your post.

Don’t get confused seeing only one column’s border on the editor. Click with your cursor on the left and right side. The other block will appear. See the video clip below.
を押す。 プラス (+) icon on any column. Select a block you want to add to the particular column. Suppose we are selecting the Paragraph block to add some text.

Similarly, we have added an image to the right column of the block.

Select the entire column block by clicking the column icon three times on the toolbar. You’ll get options to update settings and customize the block on the right sidebar.

方法02:テーブルブロックを使う
In the same way, find and add the Gutenberg default Table block to your post/page.

Here, you can specify the row number as well alongside the column number. Set the value as you wish. Hit the テーブル作成 button at the end.
Now, add content to the columns. The WordPress table block allows you to add only text content to the columns. You can’t add images, buttons, and other types of content.

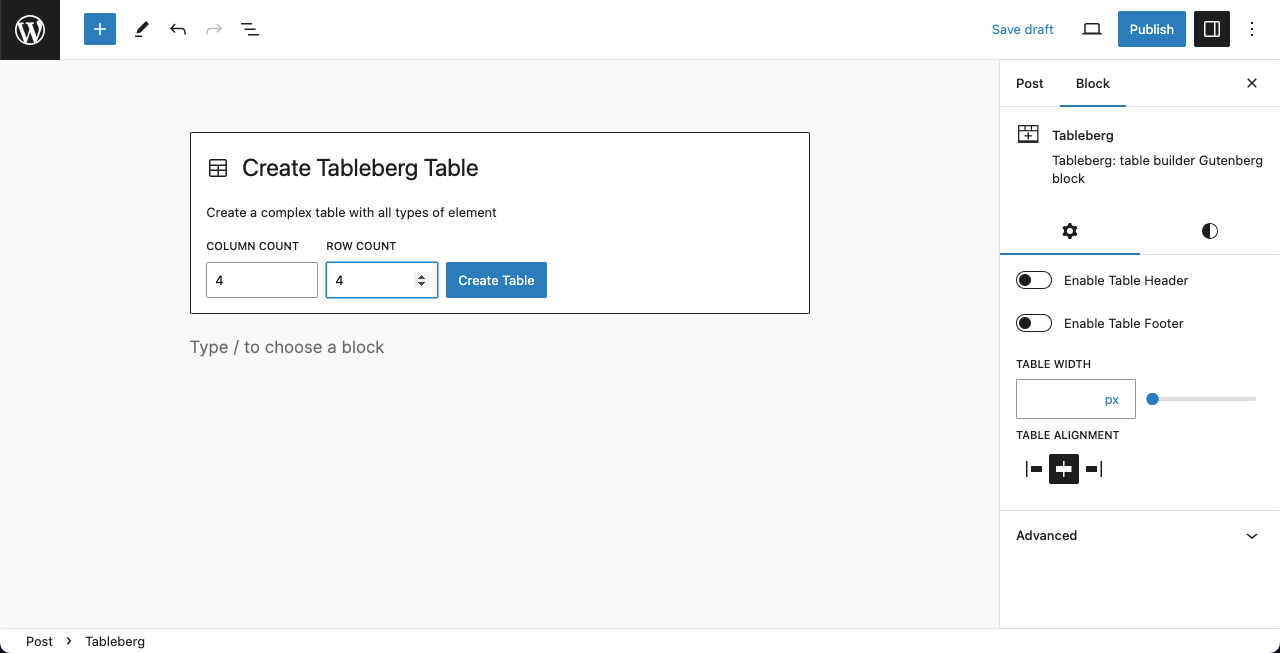
方法03:Tablebergブロックを使う
テーブルバーグ is also a table builder plugin. But it has many advanced features. For example, you can add images, CTA buttons, and more to your table columns with the plugin, which isn’t possible with the default WordPress table block.
インストール そして アクティブ化 the plugin first.

Come to your post or page editor. Find and add the TableBerg block from the Gutenberg editor in the same way.

Define the column and row number as the default table block.
You can see we have added text content to the left columns. For the middle columns, we have decided to add the イメージブロック by pressing the プラス(+)アイコン.

In the same way, we have added CTA buttons to the very right columns of the table.
Now, to customize the table, select the entire table by clicking the テーブルバーグ・アイコン on the toolbar. You’ll get the settings and customization options on the right sidebar.

You can see that we’ve increased the table width to create enough space for the content and elements inside the table columns.
Final Note
Columns aren’t only for organizing content. They can hook visitors’ attraction by creating a captivating layout once you know how to use them.
Based on your content demand, you have to choose where to use the default column block and where the table columns are. Hope you enjoyed this article.
こちらもお読みください: ベスト・ワードプレス・カラムプラグイン

