لقد ملأت جدولك، ورتبت الأعمدة، وصممت الحدود، ولكن قد يكون هناك شيء ما لا يزال يبدو غير مناسب. هذا "الشيء" غالبًا ما يكون المحاذاة. فبدون محاذاة أفقية مناسبة، حتى التخطيط النظيف قد يبدو محرجًا أو يصعب قراءته. يمكن أن يغير موضع المحتوى الخاص بك في كل خلية، سواءً كان يسارًا أو وسطًا أو يمينًا، من شكل جدولك تمامًا.
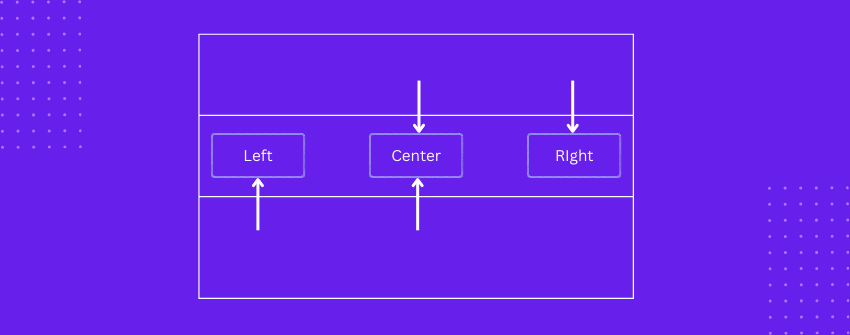
عندما يصطف المحتوى داخل الخلية بشكل صحيح، يبدو التصميم بأكمله أكثر صقلًا. تبدو أسماء الخطط في المنتصف بشكل أفضل. تبدو الأسعار أكثر قابلية للقراءة عند محاذاة اليمين. بدون هذه التفاصيل الصغيرة في مكانها، حتى الجدول المصمم جيدًا يمكن أن يبدو غير متوازن.
في هذا الدليل، سنوضح لك في هذا الدليل كيفية محاذاة محتوى الجدول أفقيًا في ووردبريس بحيث يستقر كل شيء في مكانه الصحيح. من خلال بضع خطوات بسيطة، يمكنك جعل جداولك تبدو أكثر تنظيماً وأسهل في القراءة.
الطريقة 1: استخدام مكوِّن الجدول الافتراضي في ووردبريس
يدعم مكوِّن الجدول الافتراضي في ووردبريس المحاذاة الأفقية، ولكن على مستوى الجدول بأكمله فقط. هذا يعني أنه يمكنك تعيين المحاذاة لجميع الخلايا في وقت واحد، ولكن لا يمكنك محاذاة الخلايا الفردية بشكل مختلف.
ما عليك سوى اتباع الخطوات التالية لتطبيق المحاذاة الأفقية باستخدام المحرر الافتراضي.
الخطوة 1: إضافة مكوِّن جدول إلى مقالتك أو صفحتك
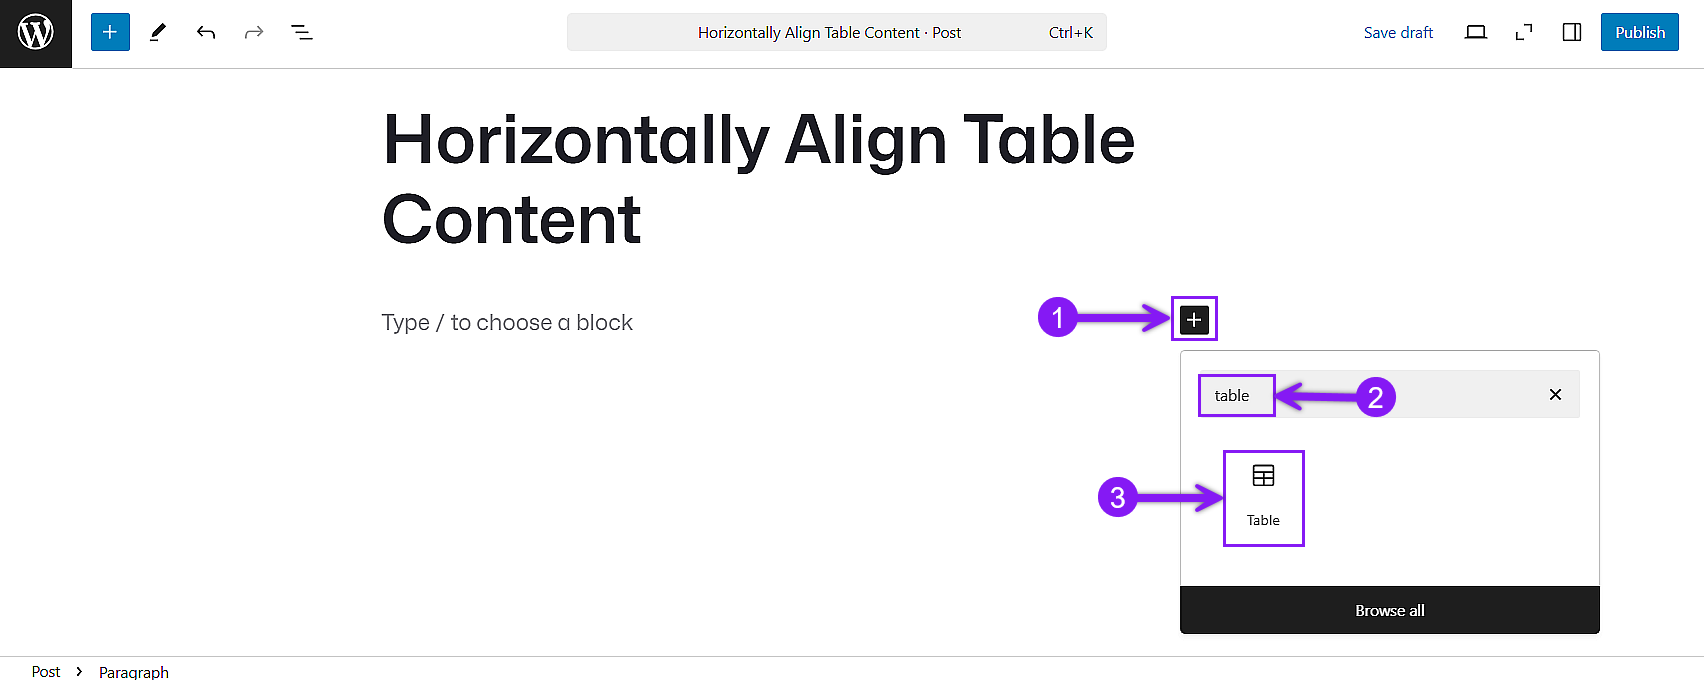
استخدم أيقونة أداة إدراج المكوِّن "+"، وابحث عن الجدول، وأدرج المكوِّن في مقالتك أو صفحتك. عيّن عدد الصفوف والأعمدة حسب الحاجة.
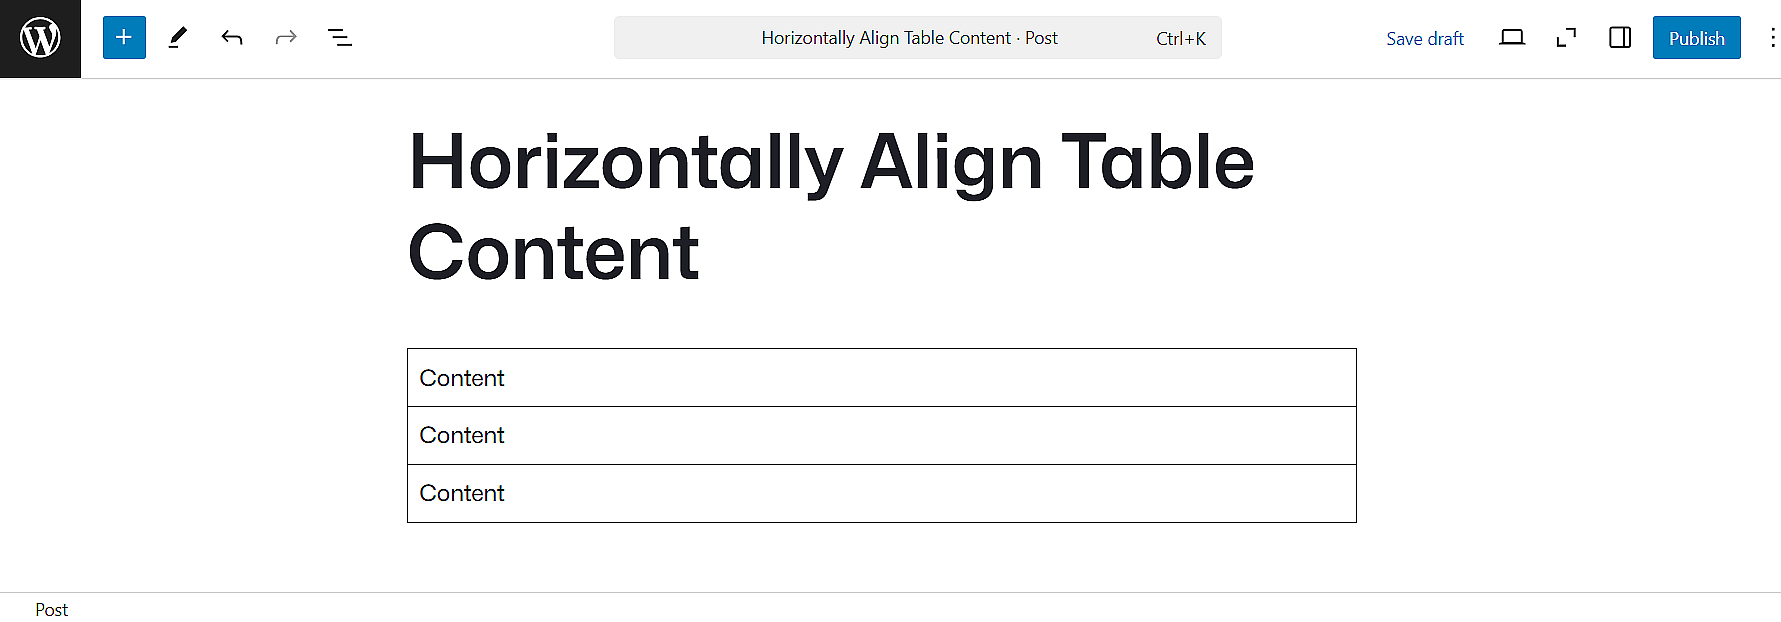
الخطوة 2: أدخل النص في الجدول
أضف المحتوى الخاص بك إلى كل خلية. تذكَّر أنَّ مكوِّن الجدول الافتراضي لا يسمح إلا بالنصوص، ولا يتم دعم أنواع أخرى من المحتوى، مثل الصور أو الأزرار هنا.
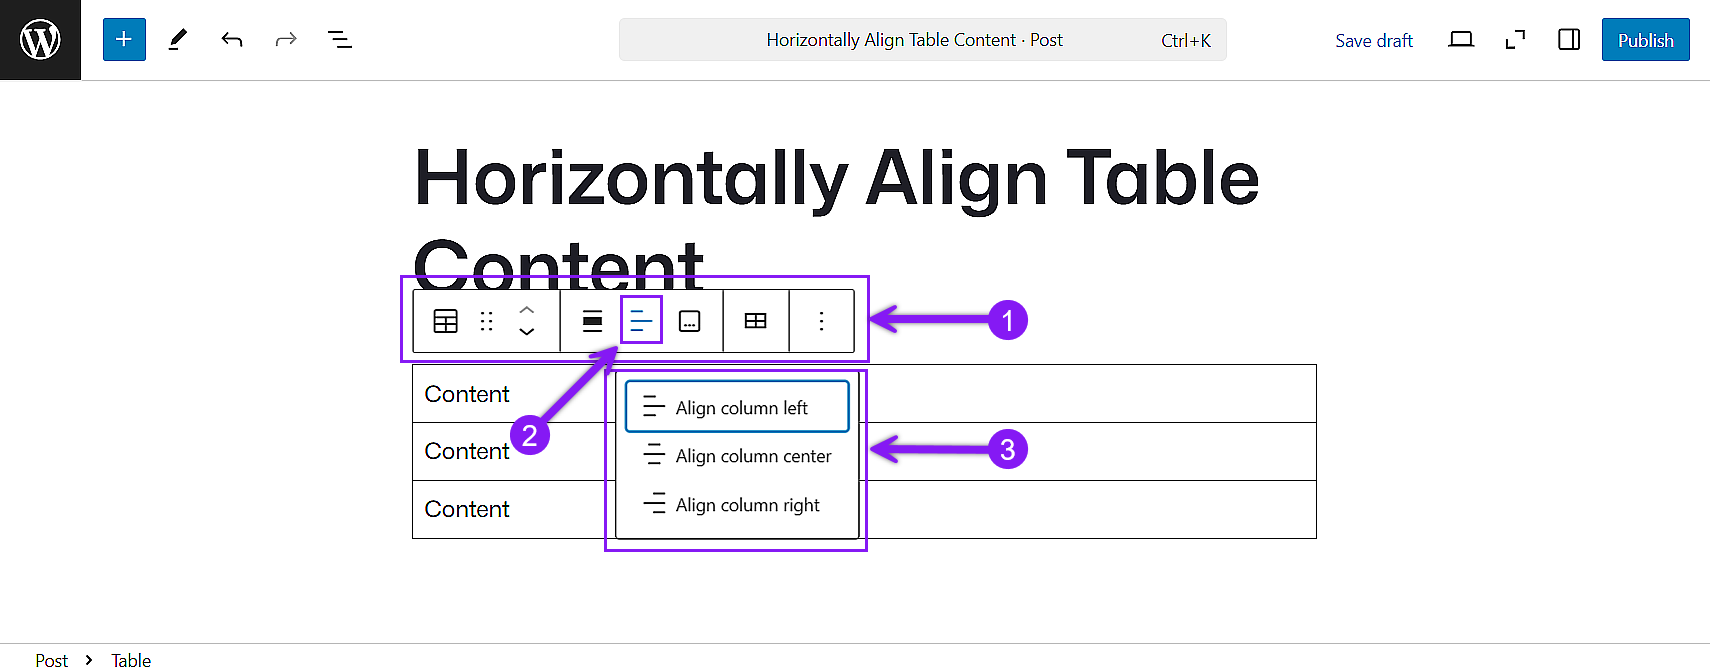
الخطوة 3: تعيين المحاذاة الأفقية
انقر في أي مكان داخل الجدول. من شريط أدوات المكوِّن في الأعلى، حدِّد أيقونة المحاذاة. اختر ما بين يسار أو وسط أو يمين، وسيتم تطبيق التغيير على جميع الخلايا في الجدول.
الطريقة 2: استخدام البرنامج الإضافي Tableberg
إذا كنت بحاجة إلى المزيد من التحكم في تخطيط الجدول الخاص بك، فإن Tableberg المكوِّن الإضافي هو الخيار الأفضل. فهو يتيح لك إدراج أنواع متعددة من المحتوى داخل كل خلية وضبط المحاذاة الأفقية لكل منها على حدة.
لمواءمة المحتوى مع Tableberg، اتبع الخطوات التالية.
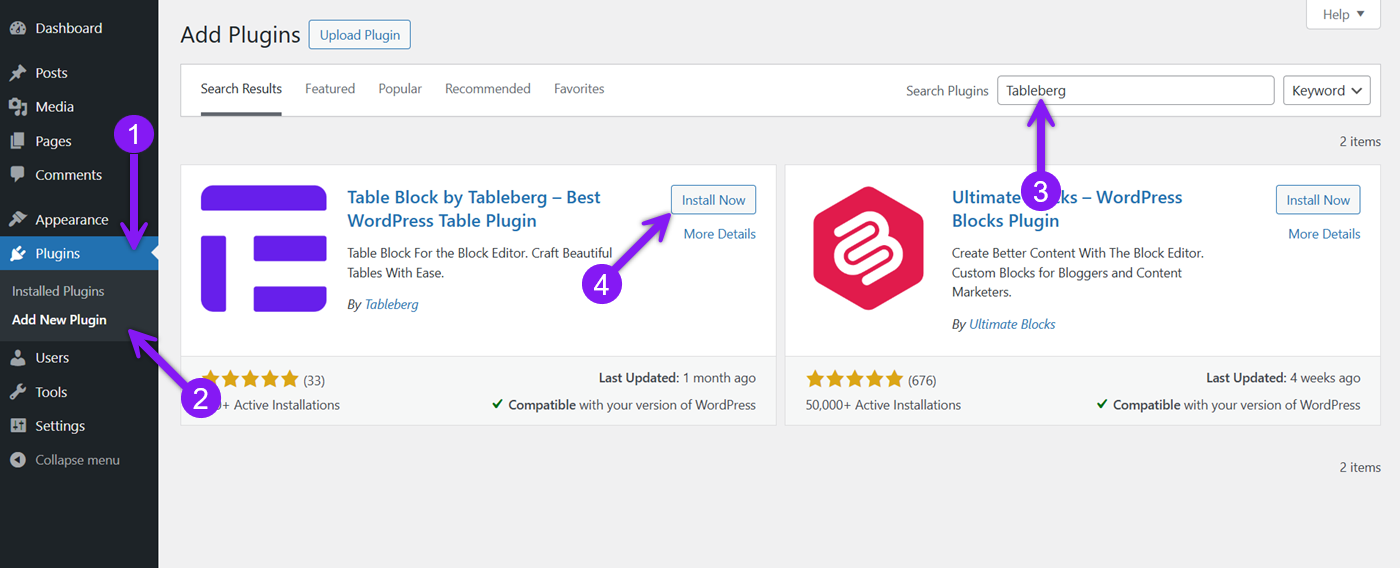
الخطوة 1: تثبيت وتفعيل البرنامج الإضافي Tableberg
سجِّل الدخول إلى لوحة تحكم ووردبريس، وانتقل إلى الإضافات ← إضافة جديد، وابحث عن "Tableberg"، وانقر على تثبيت الآن، ثم انقر على تثبيت الآن، ثم تفعيل.
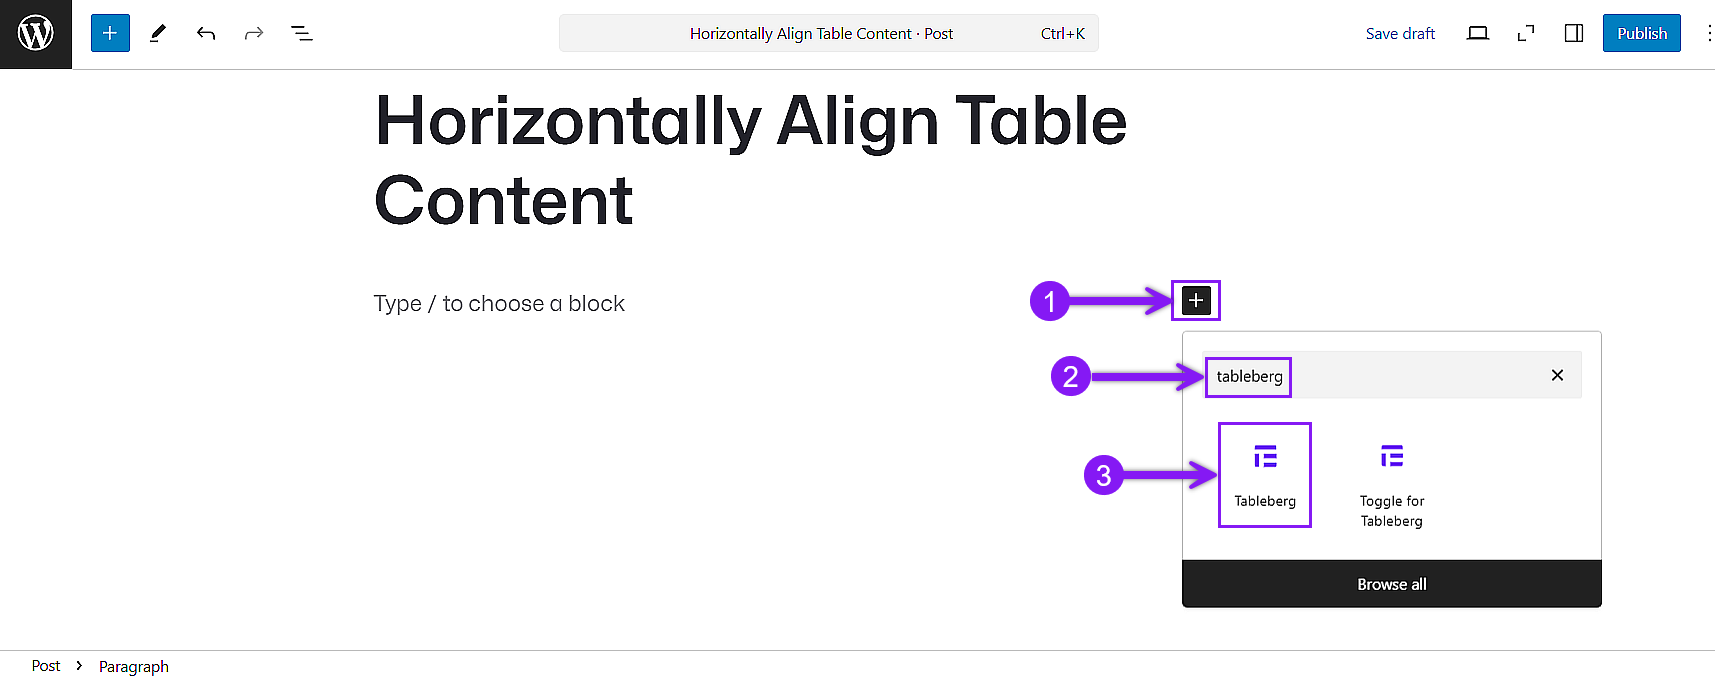
الخطوة 2: إدراج كتلة Tableberg
انتقل إلى الصفحة/ المقالة الموجودة أو أنشئ واحدة جديدة أولاً، ثم انقر على أيقونة أداة إدراج المكوِّن "+"، وابحث عن Tableberg، وأدرج المكوِّن. اختر العدد المفضل لديك من الصفوف والأعمدة.
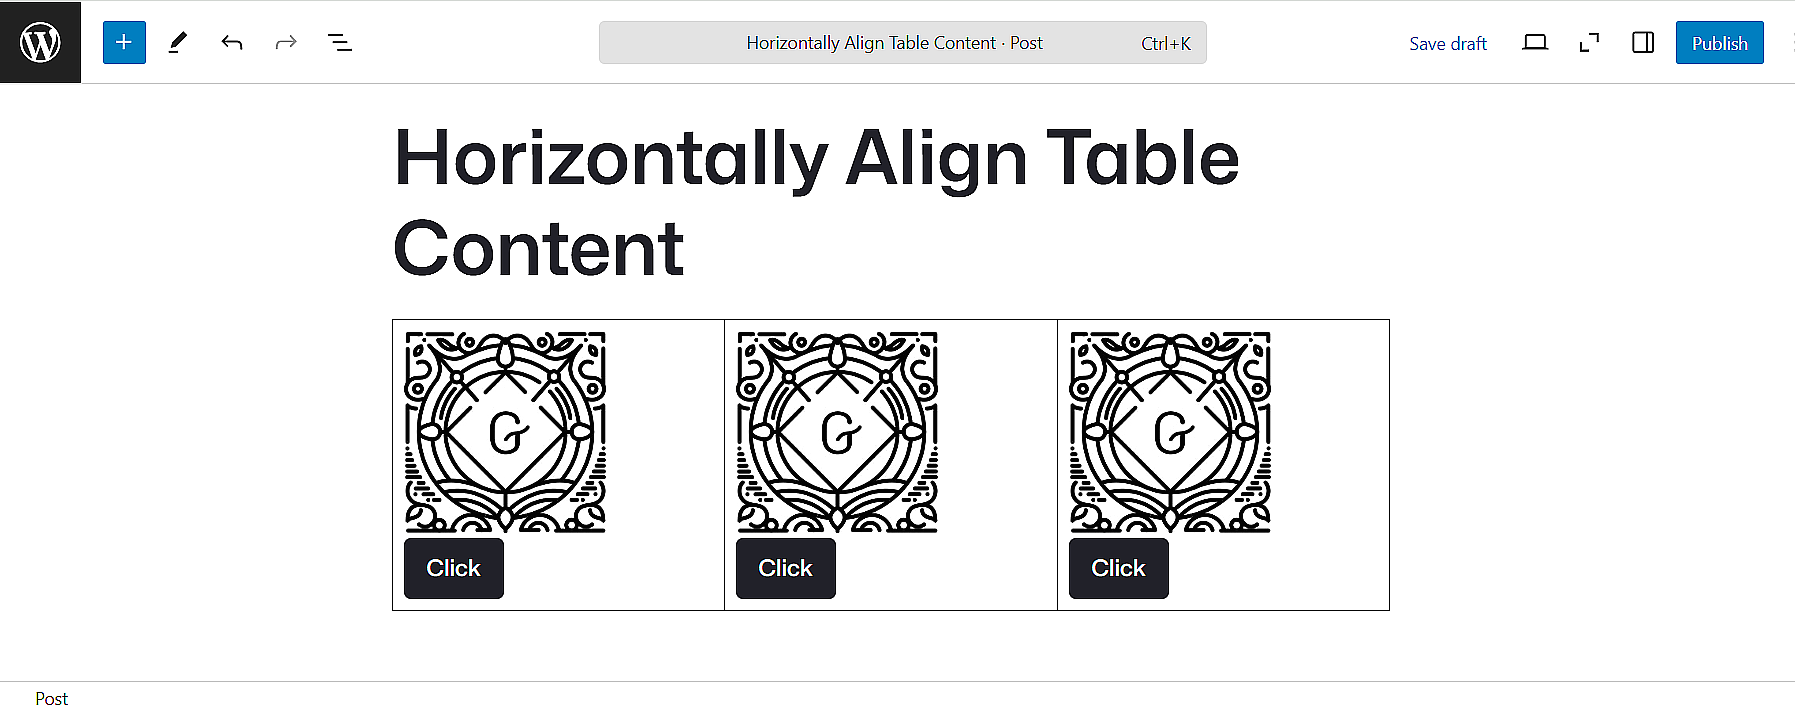
سالخطوة 3: إضافة محتوى إلى كل خلية
انقر داخل أي خلية وابدأ في إضافة المحتوى الخاص بك. استخدم أيقونة أداة إدراج المكوِّن "+" لإضافة أنواع مختلفة من المحتوى. يسمح Tableberg بمحتوى غني مثل الصور، والأزرار، والنصوص، والأيقونات، والمزيد. بشكل افتراضي، سيتم محاذاة المحتوى الخاص بك بشكل أفقي إلى اليسار.
الخطوة 4: ضبط محاذاة كل عنصر
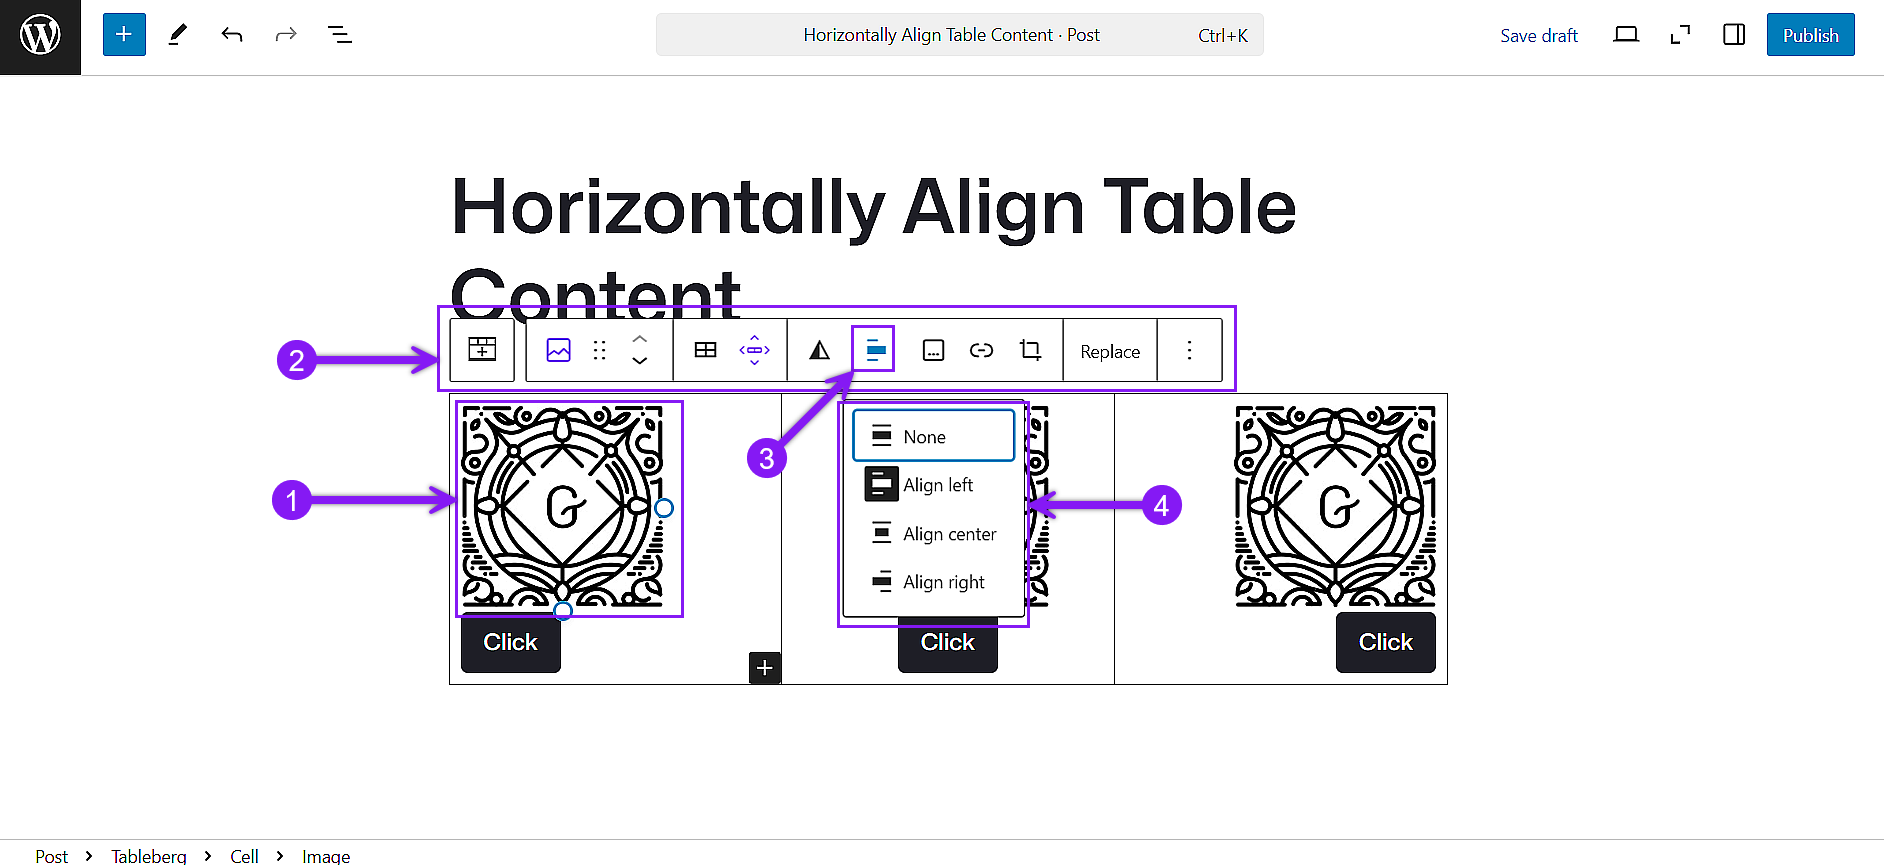
انقر على حد الخلية المعينة التي تريد تطبيق المحاذاة عليها. عندما يظهر شريط أدوات الكتلة، استخدم خيار "محاذاة أطفال الخلية" لتعيين المحاذاة إلى اليسار أو الوسط أو اليمين. سيؤدي ذلك إلى ضبط موضع جميع المحتويات داخل تلك الخلية.
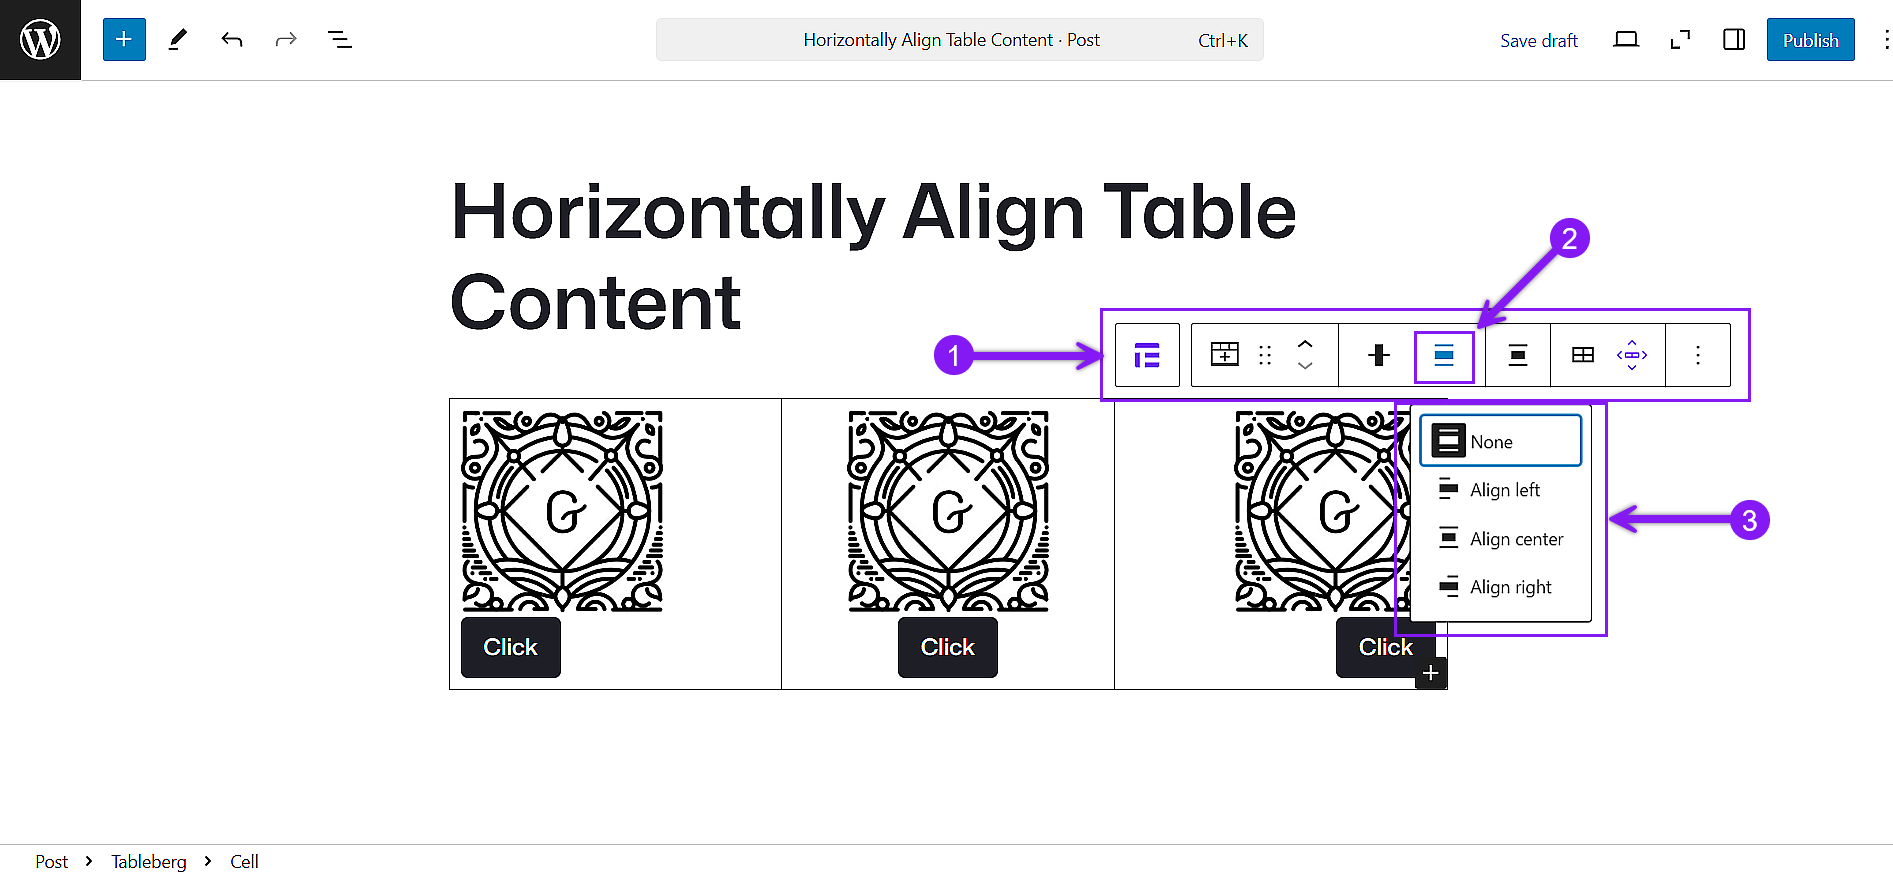
للإضافة، يأتي كل جزء من المحتوى داخل الخلية أيضًا مع إعداد المحاذاة الخاص به، والذي يظهر في شريط الأدوات عند النقر على تلك الكتلة المحددة. يمنحك هذا تحكمًا كاملًا في كل عنصر يتم وضعه داخل الخلية.
خاتمة
سواء أكنتَ تنشئ جدولاً أساسيًّا أم تخطيطًا كامل التصميم، فإنَّ المحاذاة الأفقية هي المفتاح لجعل المحتوى الخاص بك يبدو مقصودًا ومنظَّمًا. يوفِّر مكوِّن جدول ووردبريس الافتراضي محاذاة سريعة لجميع الخلايا في وقت واحد، ولكن عندما تحتاج إلى تحكم فردي، فإن Tableberg هي الأداة التي تنجز المهمة. فهي تسمح لك بمحاذاة كل عنصر على حدة، مما يمنح جداولك الوضوح والتوازن الذي تحتاجه لتوصيل المحتوى الخاص بك بفعالية. في النهاية، يمكن لبعض اختيارات المحاذاة البسيطة أن تحدث فرقًا بين تخطيط تقريبي وجدول يعمل بالفعل.
اقرأ أيضاً:

