
ウェブサイトを通じて商品やサービスを販売したい場合、価格表の作成は必須です。しかし、顧客がページを離れることなく簡単に比較できる複数の料金プランを表示するには、テーブルにトグル機能を追加する必要があります。
トグル機能により、ユーザーは異なる料金オプションのセットをナビゲートまたは切り替えることができ、インタラクティブなインターフェイスを作成できます。例えば、ユーザーは月額プラン、年間プラン、ライフタイムプランを切り替えることができます。
このブログ記事では、Tablebergを使ってトグル付きのWordPress価格テーブルを作成する方法をステップバイステップでご紹介します。それでは始めましょう。
ステップ1:Tablebergのインストールとアクティベート
まず テーブルバーグ プラグインをインストールしてください。まだインストールしていない場合は、プラグインを入手してください。 これ.
インストールとアクティベーションが完了したら、価格テーブルの作成を開始できます。
注:Tablebergには 無料版トグル機能はプロ版でのみ利用可能です。
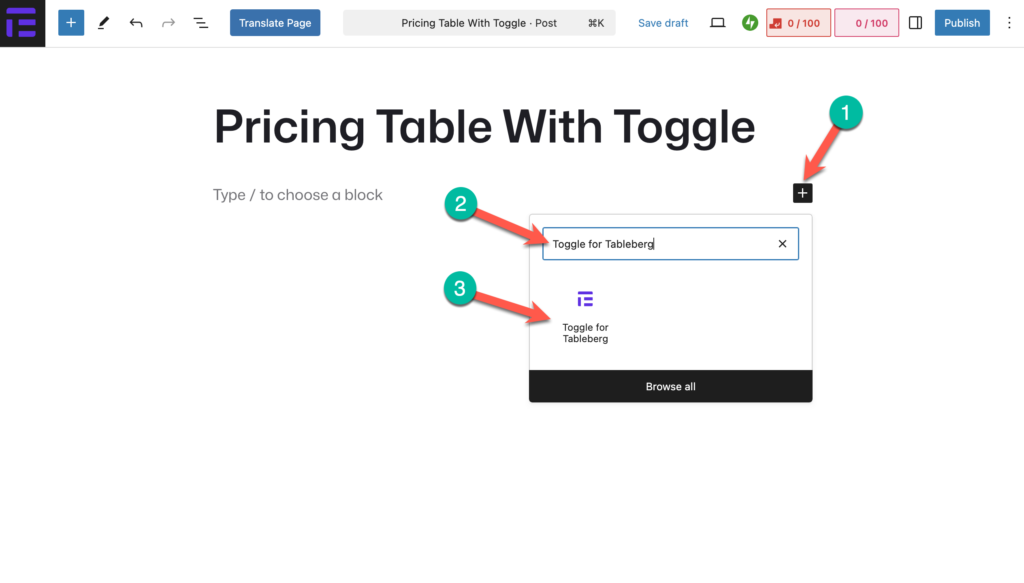
ステップ2:Tablebergブロックのトグルを追加する
Tableberg Proには、パワフルな Tableberg用トグル テーブルをタブで簡単に整理できるブロック。
このブロックを追加する:
- WordPressのエディターを開き +ボタン で新しいブロックを追加する。
- 検索 Tableberg用トグル を選択する。
- トグル・ブロックがエディターに追加されます。
ステップ3:最初のタブで価格テーブルを作成する
インサイド Tableberg用トグル ブロックでは、ゼロからテーブルを作成することも、あらかじめビルドされたテーブルを選択することもできる。このチュートリアルでは、ビルド済みのテーブルを使用します。
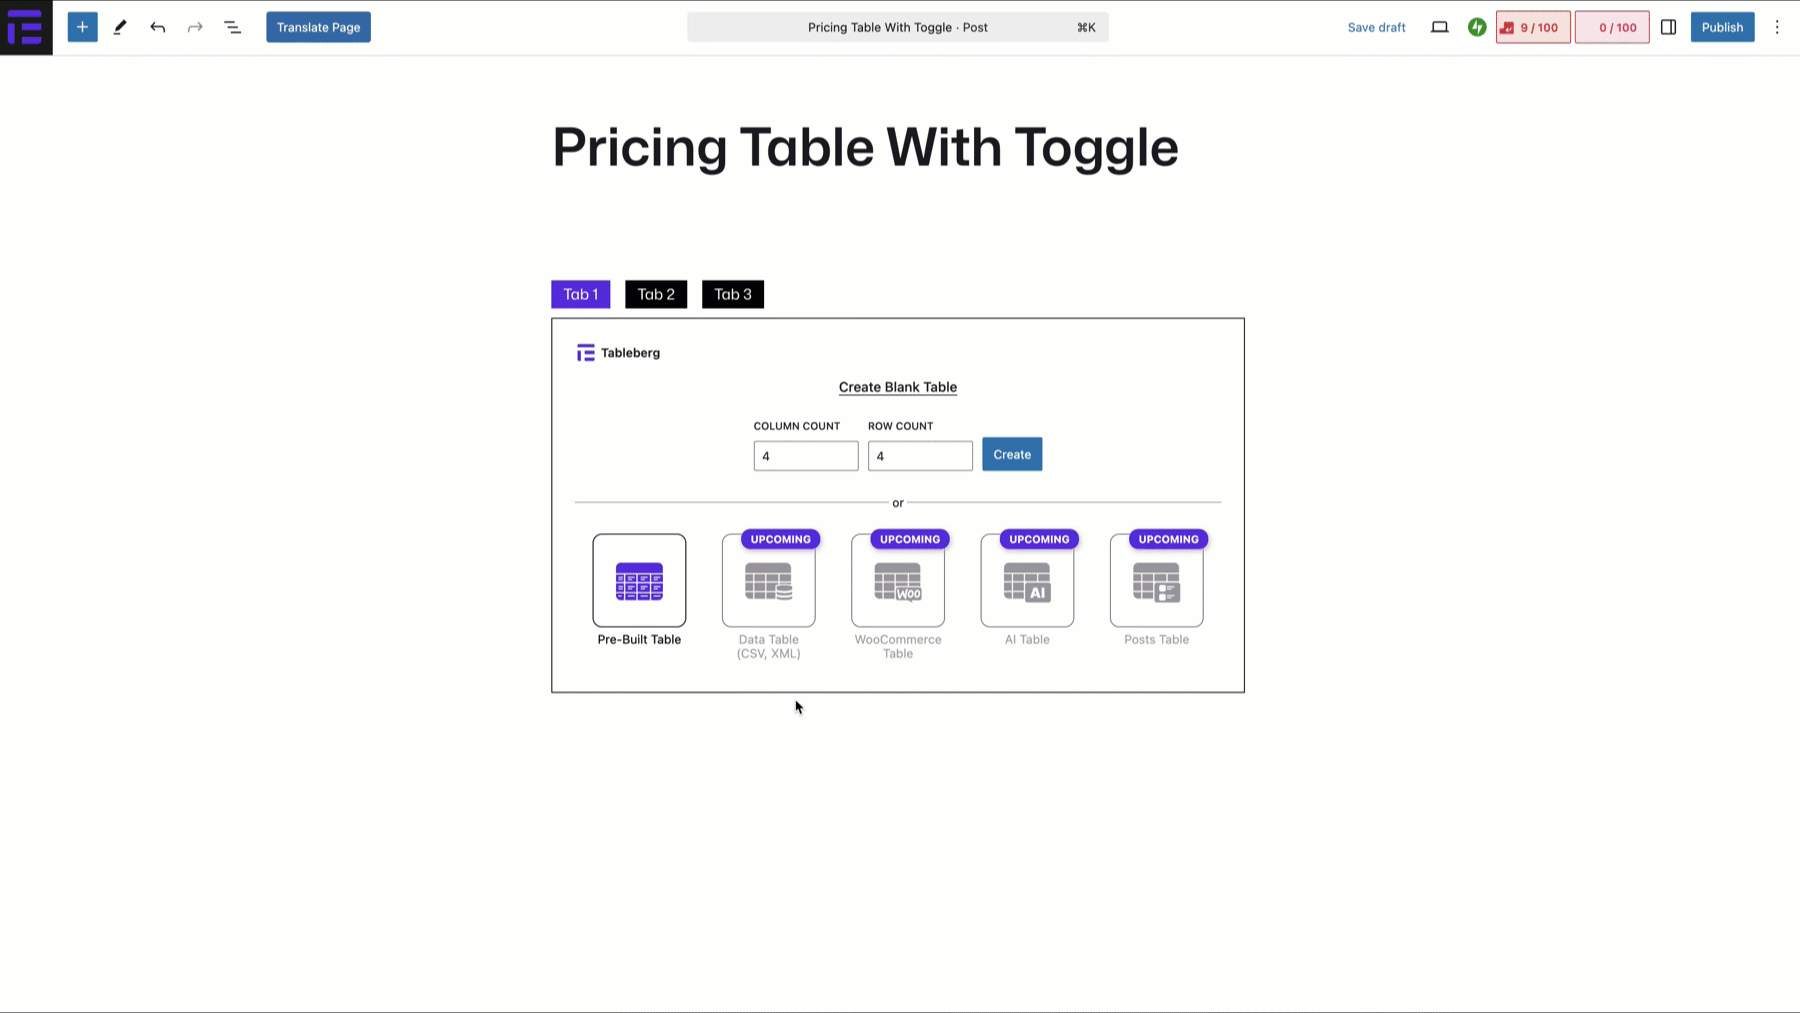
- インサイド Tableberg用トグル ブロックでは
- をクリックする。 +ボタン を検索してください。 テーブルバーグ ブロックに入った。
- 価格表の行と列の数を定義します(例:3つのプランの場合は3×3)。
- テーブルレイアウトは即座に生成される。
ステップ4:テーブルにコンテンツを追加/編集する
さて、いよいよ価格表にコンテンツを追加または編集する番です。
# 列タイトルの追加
- 最初の行をクリックし、料金プラン名(例:ベーシック、スタンダード、プレミアム)を入力します。
- 中央に配置し、フォントサイズを大きくして見やすくする。
# 料金プランの追加
- 2行目に、各プランの価格を入力します。
- を使用する。 Highlight option 価格設定の差別化を図る。
# 製品特長一覧
- 各欄には、それぞれのプランの特徴を列挙する。
- Tablebergでは リストブロック テーブルの中に直接
# CTAボタンの追加
- を使用する。 ボタンブロック Tableberg内でコールトゥアクションボタン(例:"今すぐ購入 "または "スタート")を作成します。
- ボタンのテキスト、色、スタイルをカスタマイズできます。
ステップ5:新しいタブに別の価格テーブルを追加する
をクリックしてください。 タブ2 のToggle for Tablebergブロックに、別のタブに新しいテーブルを追加します。その後、上記と同じ手順を繰り返し、新しいタブに別の価格テーブルを作成します。
これらの手順を完了すると、トグル機能付きの価格テーブルが完成します。テーブルをプレビューして、すべてがスムーズに動作していることを確認してください。
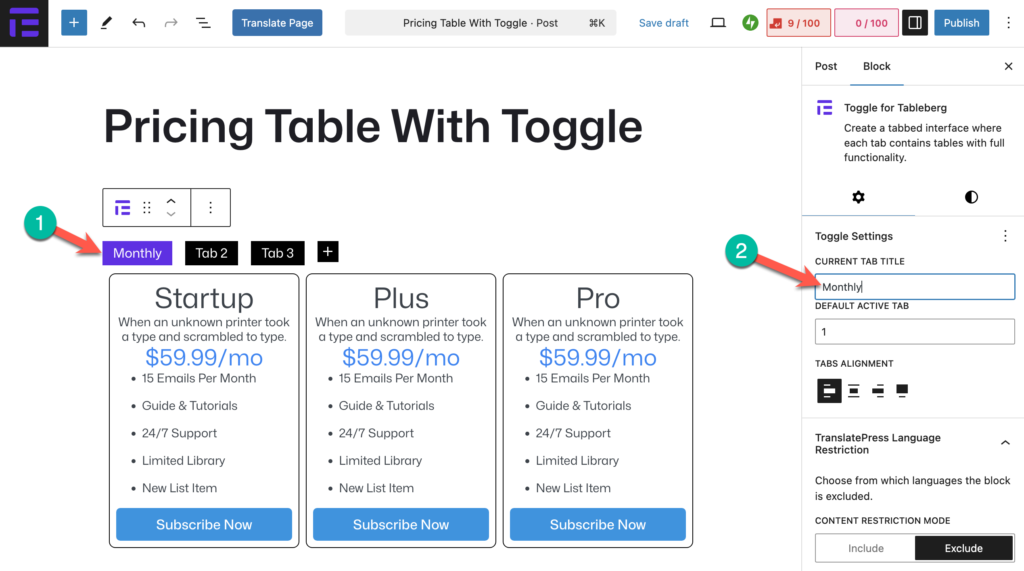
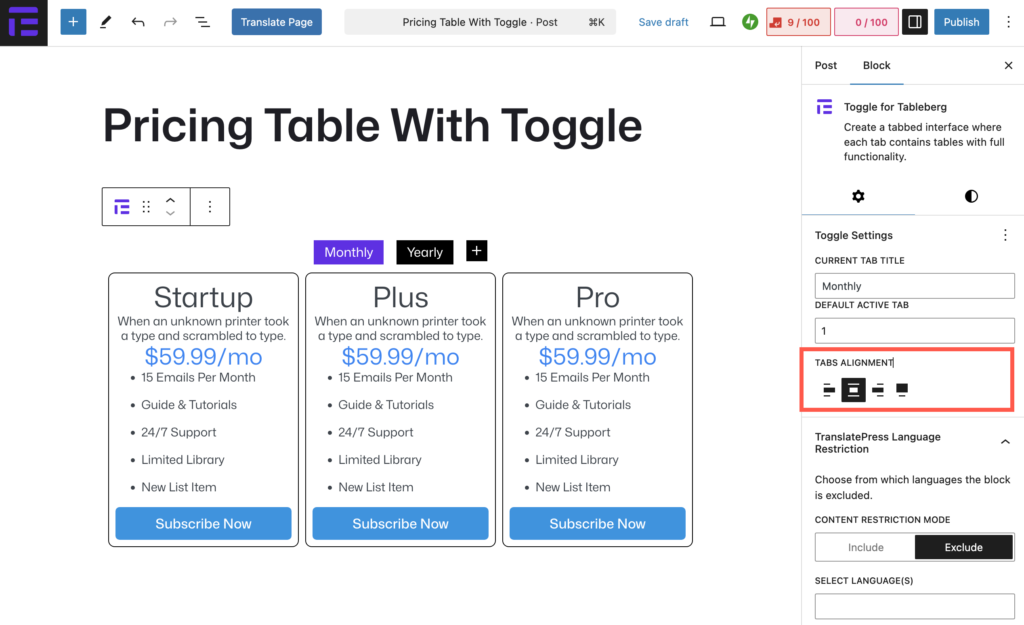
ステップ6: Tablebergブロックのトグルをカスタマイズする
価格表をより視覚的にアピールし、ブランドと一致させるには、次のようにカスタマイズできます。 Tableberg用トグル ブロックに入った:
トグルの名前を変更する:各タブをクリックし、月額、年額、ライフタイムなどの料金プランに合わせてラベルを変更します。
タブの配置を変更する:ブロック設定パネルから、デザインの好みに応じて、タブを左寄せ、中央寄せ、右寄せのいずれかを選択します。
タブのスタイル:スタイル]タブで、トグルの背景色、テキスト色、ボーダーをカスタマイズして、サイトのデザインと視覚的に一致させます。
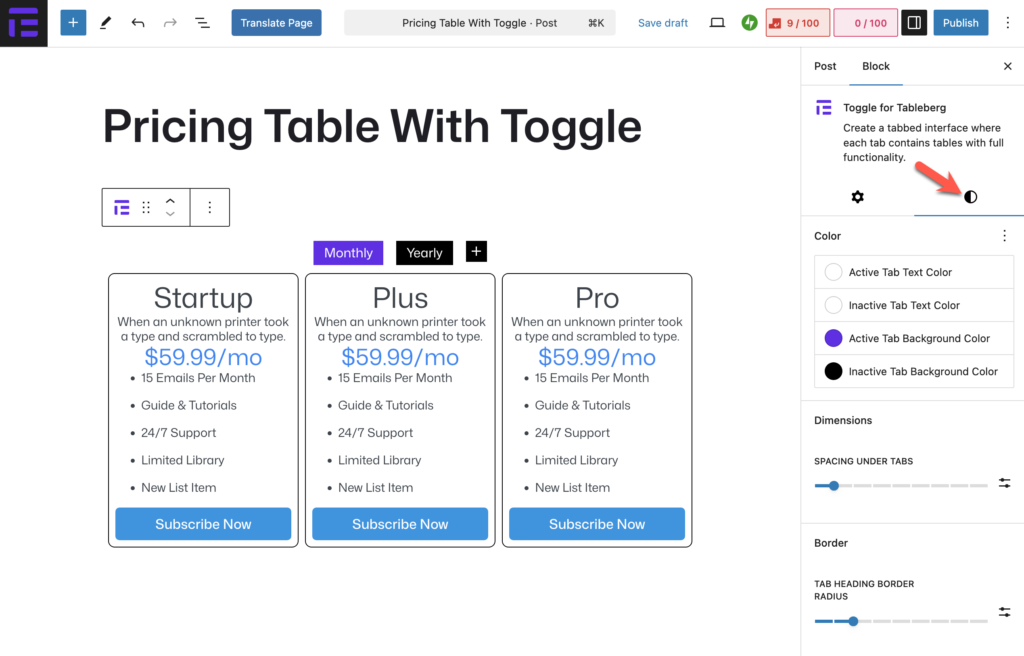
このようなシンプルなカスタマイズは、ユーザーエクスペリエンスを大幅に向上させ、価格テーブルがウェブサイト全体のルック&フィールとシームレスに調和するようにします。
結論
シームレスなユーザーエクスペリエンスのためには、トグル機能付きの価格テーブルを作成することが不可欠です。トグル Tablebergのプロ用トグル ブロックでは、プラグインを追加することなく、WordPressで直接インタラクティブな価格表を作成できるようになりました。
試してみて、下のコメント欄で感想をお聞かせください!

