
テーブル・ヘッダーはテーブルの一番上の行である。各列の情報のタイトルを提供します。一方 テーブルの作成私たちは、それぞれの列が含む情報を視覚的に伝えるために、手動で最上段を太字にする傾向がある。
The table header does the same thing. Plus, it carries a kind of HTML code beneficial for your content from the SEO perspective. We’ll now show you how to add a header to a table in WordPress.
美しいテーブルを作る
ブロックエディター付き

方法1:デフォルト・テーブル・ブロックにヘッダーを追加する
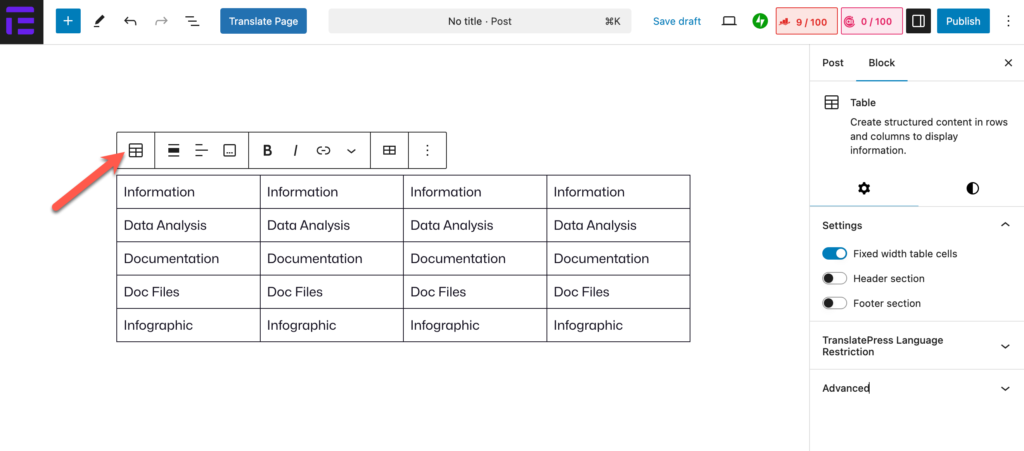
ステップ1:テーブル・ブロックを選択する
メソッドでテーブルを作成し終わったら デフォルト・テーブル・ブロックツールバーのテーブルアイコンをクリックしてテーブルを選択します。
ステップ2:ヘッダーセクションを有効にする
You’ll get the 設定タブ を右サイドバーの右サイドバーの Header section under the Settings tab.
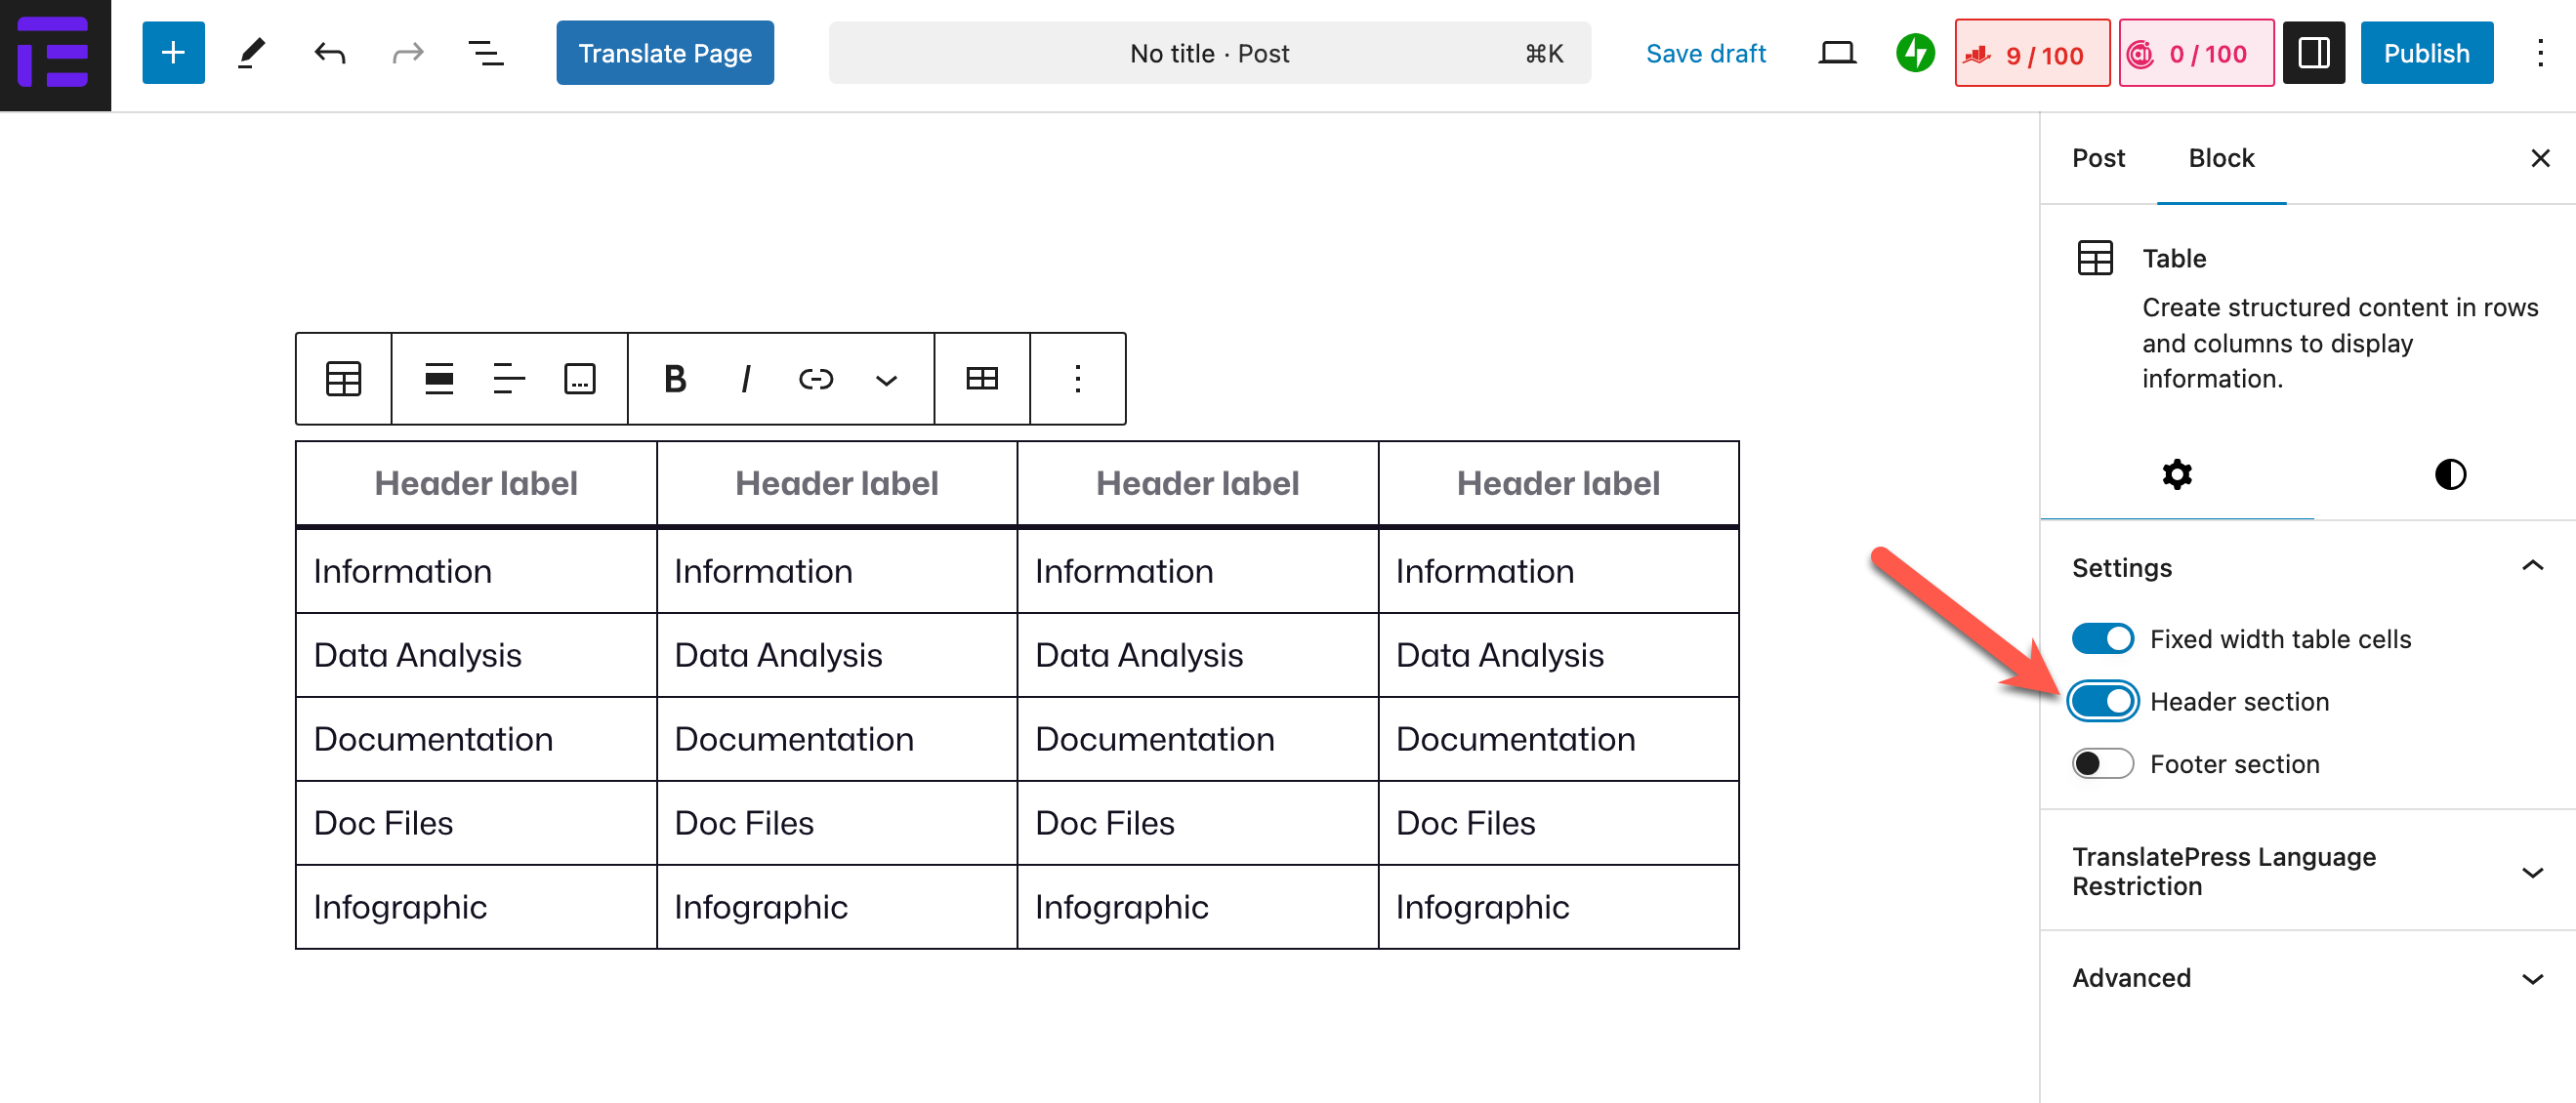
を見るだろう。 header section appeared on the table.
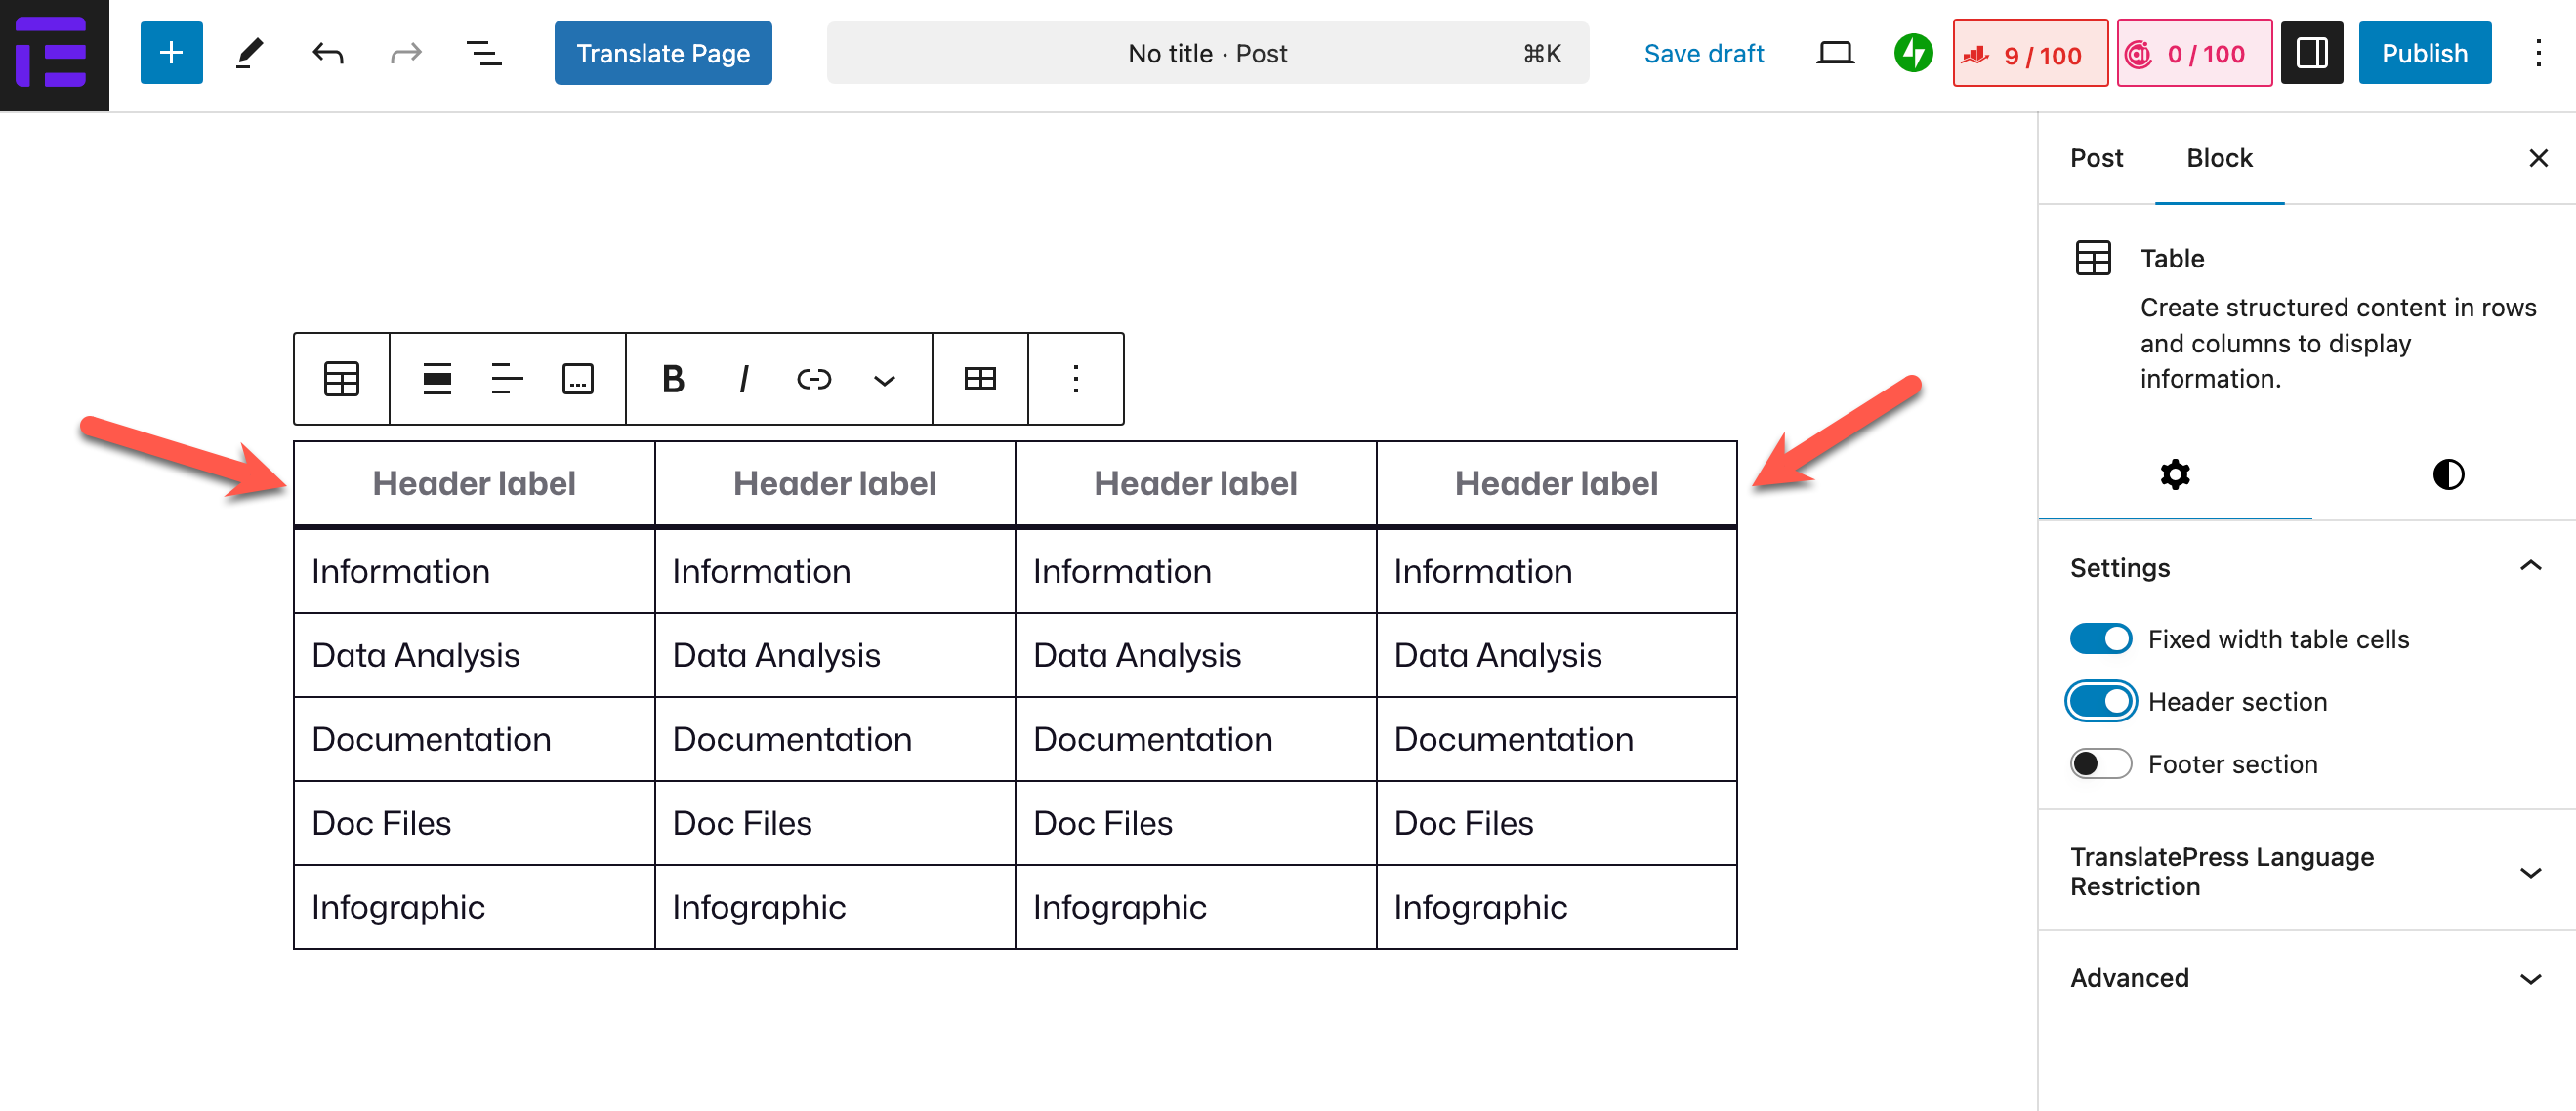
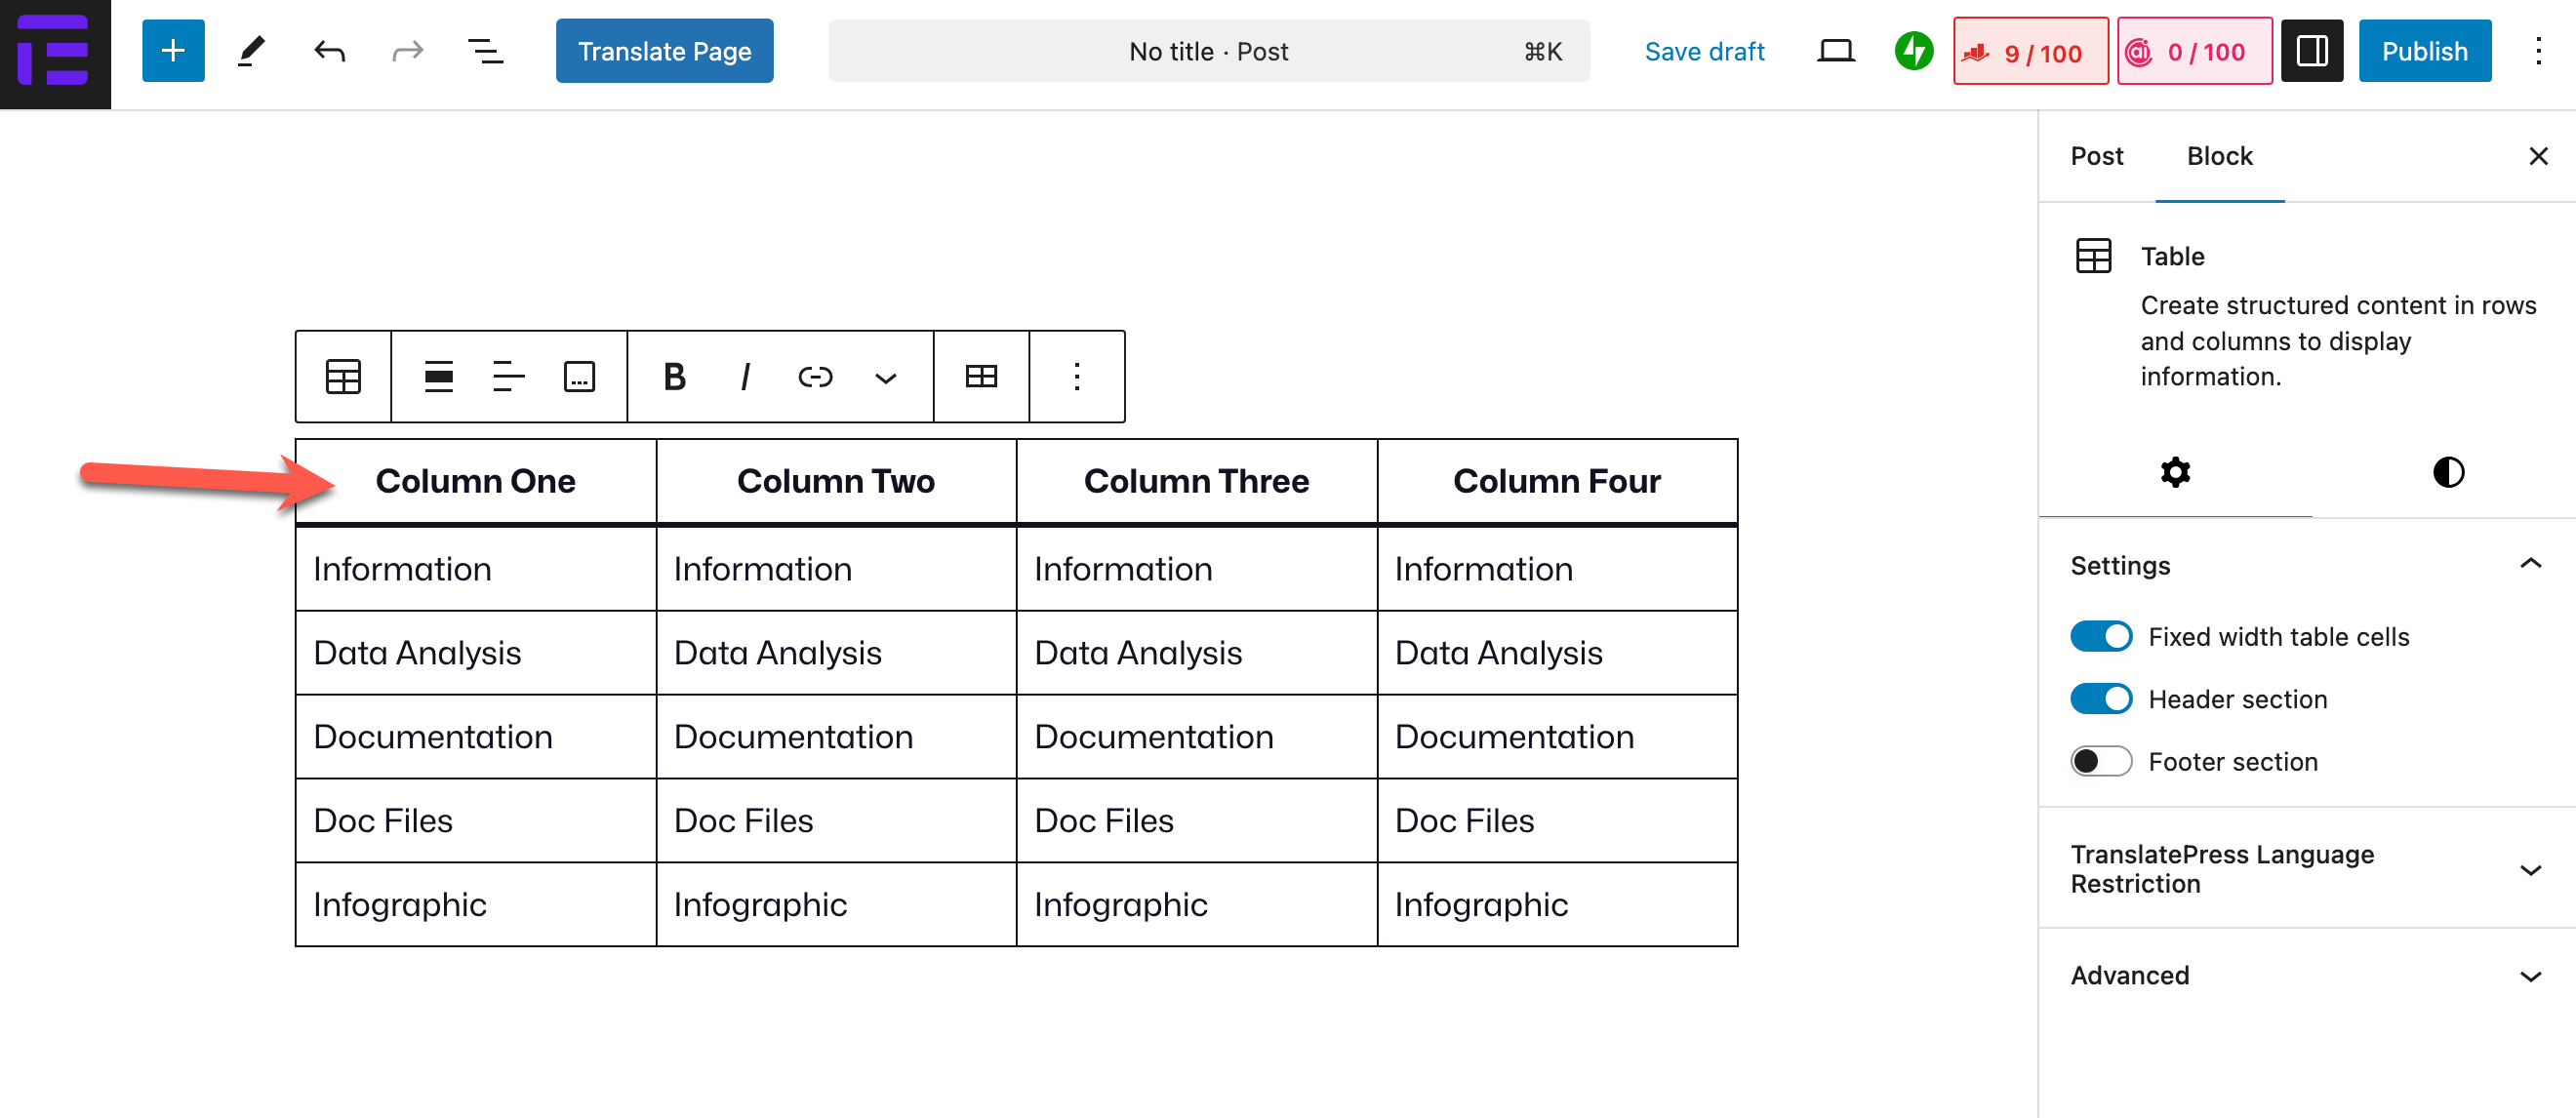
ステップ3:ヘッダーにラベルを追加する
You can see we’ve added titles to the header cells of the table. You don’t need to bold them manually because they automatically get bold.
方法2:Tablebergブロックにヘッダーを追加する
If your table is created with the テーブルバーグ プラグインを使えば、同じようにヘッダーを追加できる。
こちらもチェック: デフォルトのテーブルブロックをTablebergブロックに変換する方法
をクリックしてテーブルを選択します。 Tablebergアイコン ![]() (1).より 設定タブ (2)で ヘッダーの挿入 (3) オプション。
(1).より 設定タブ (2)で ヘッダーの挿入 (3) オプション。
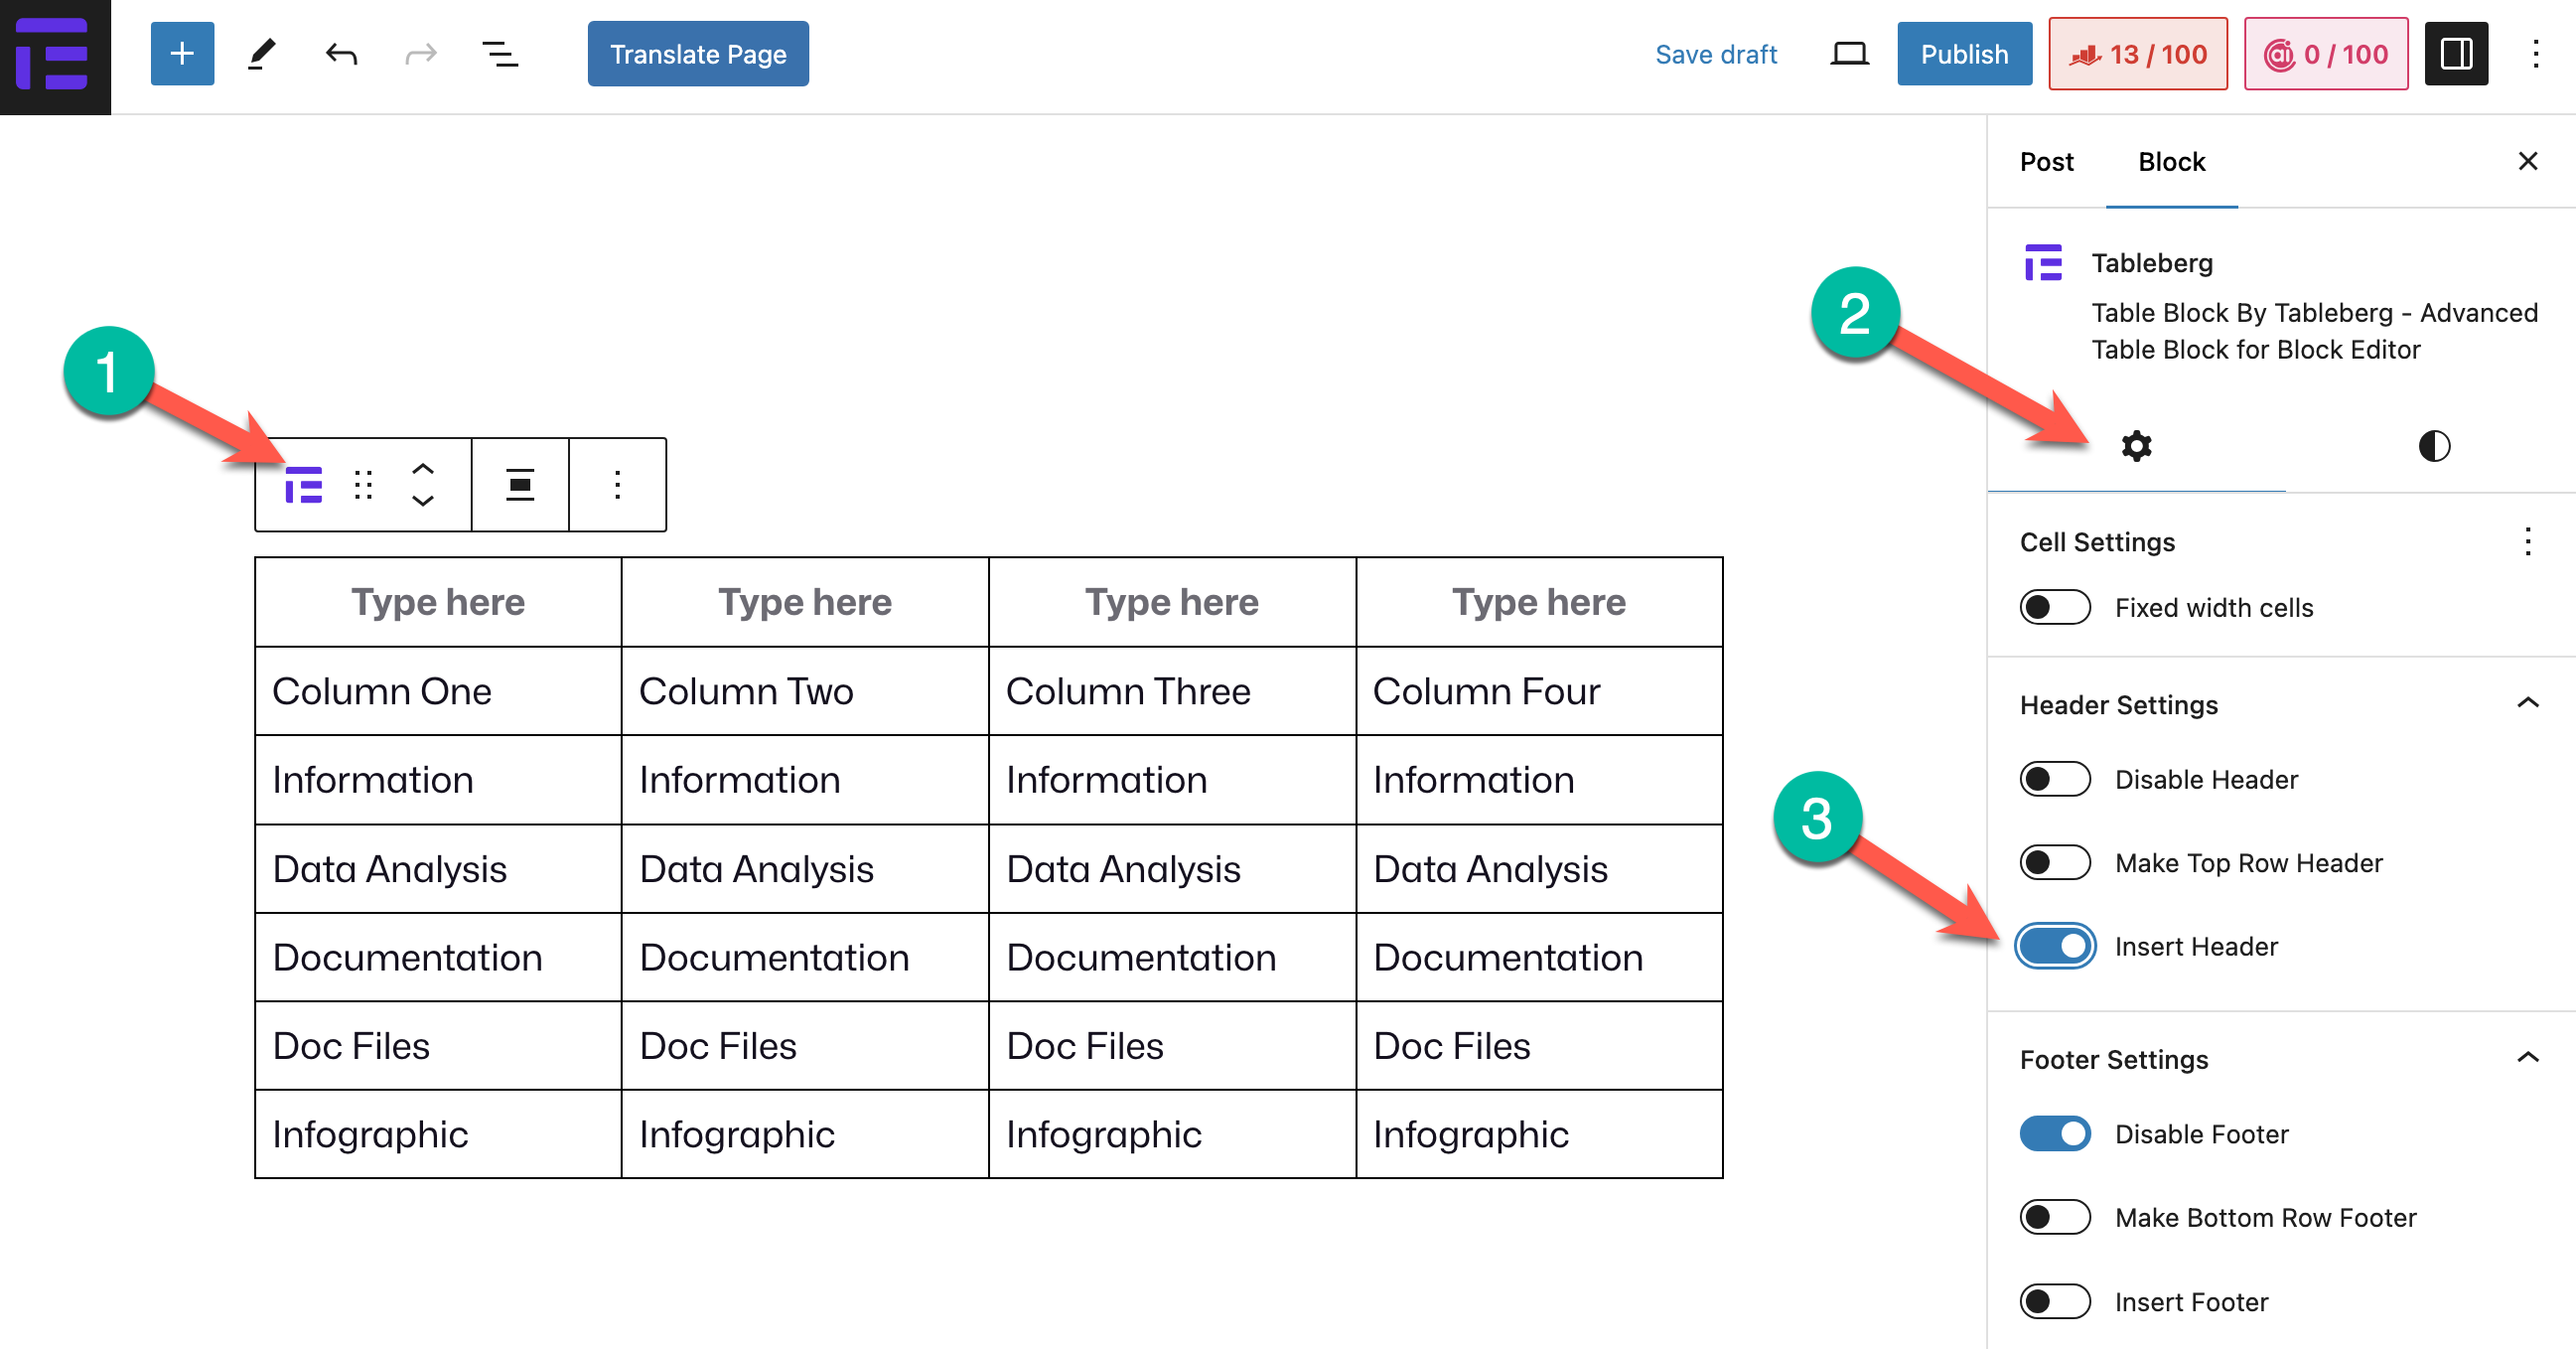
You’ll see the header section enabled for the table. You may just add some text to label the columns or add other blocks as you wish.
最上段をヘッダーにすることもできます。単に 最上段ヘッダーの作成 オプションがある。
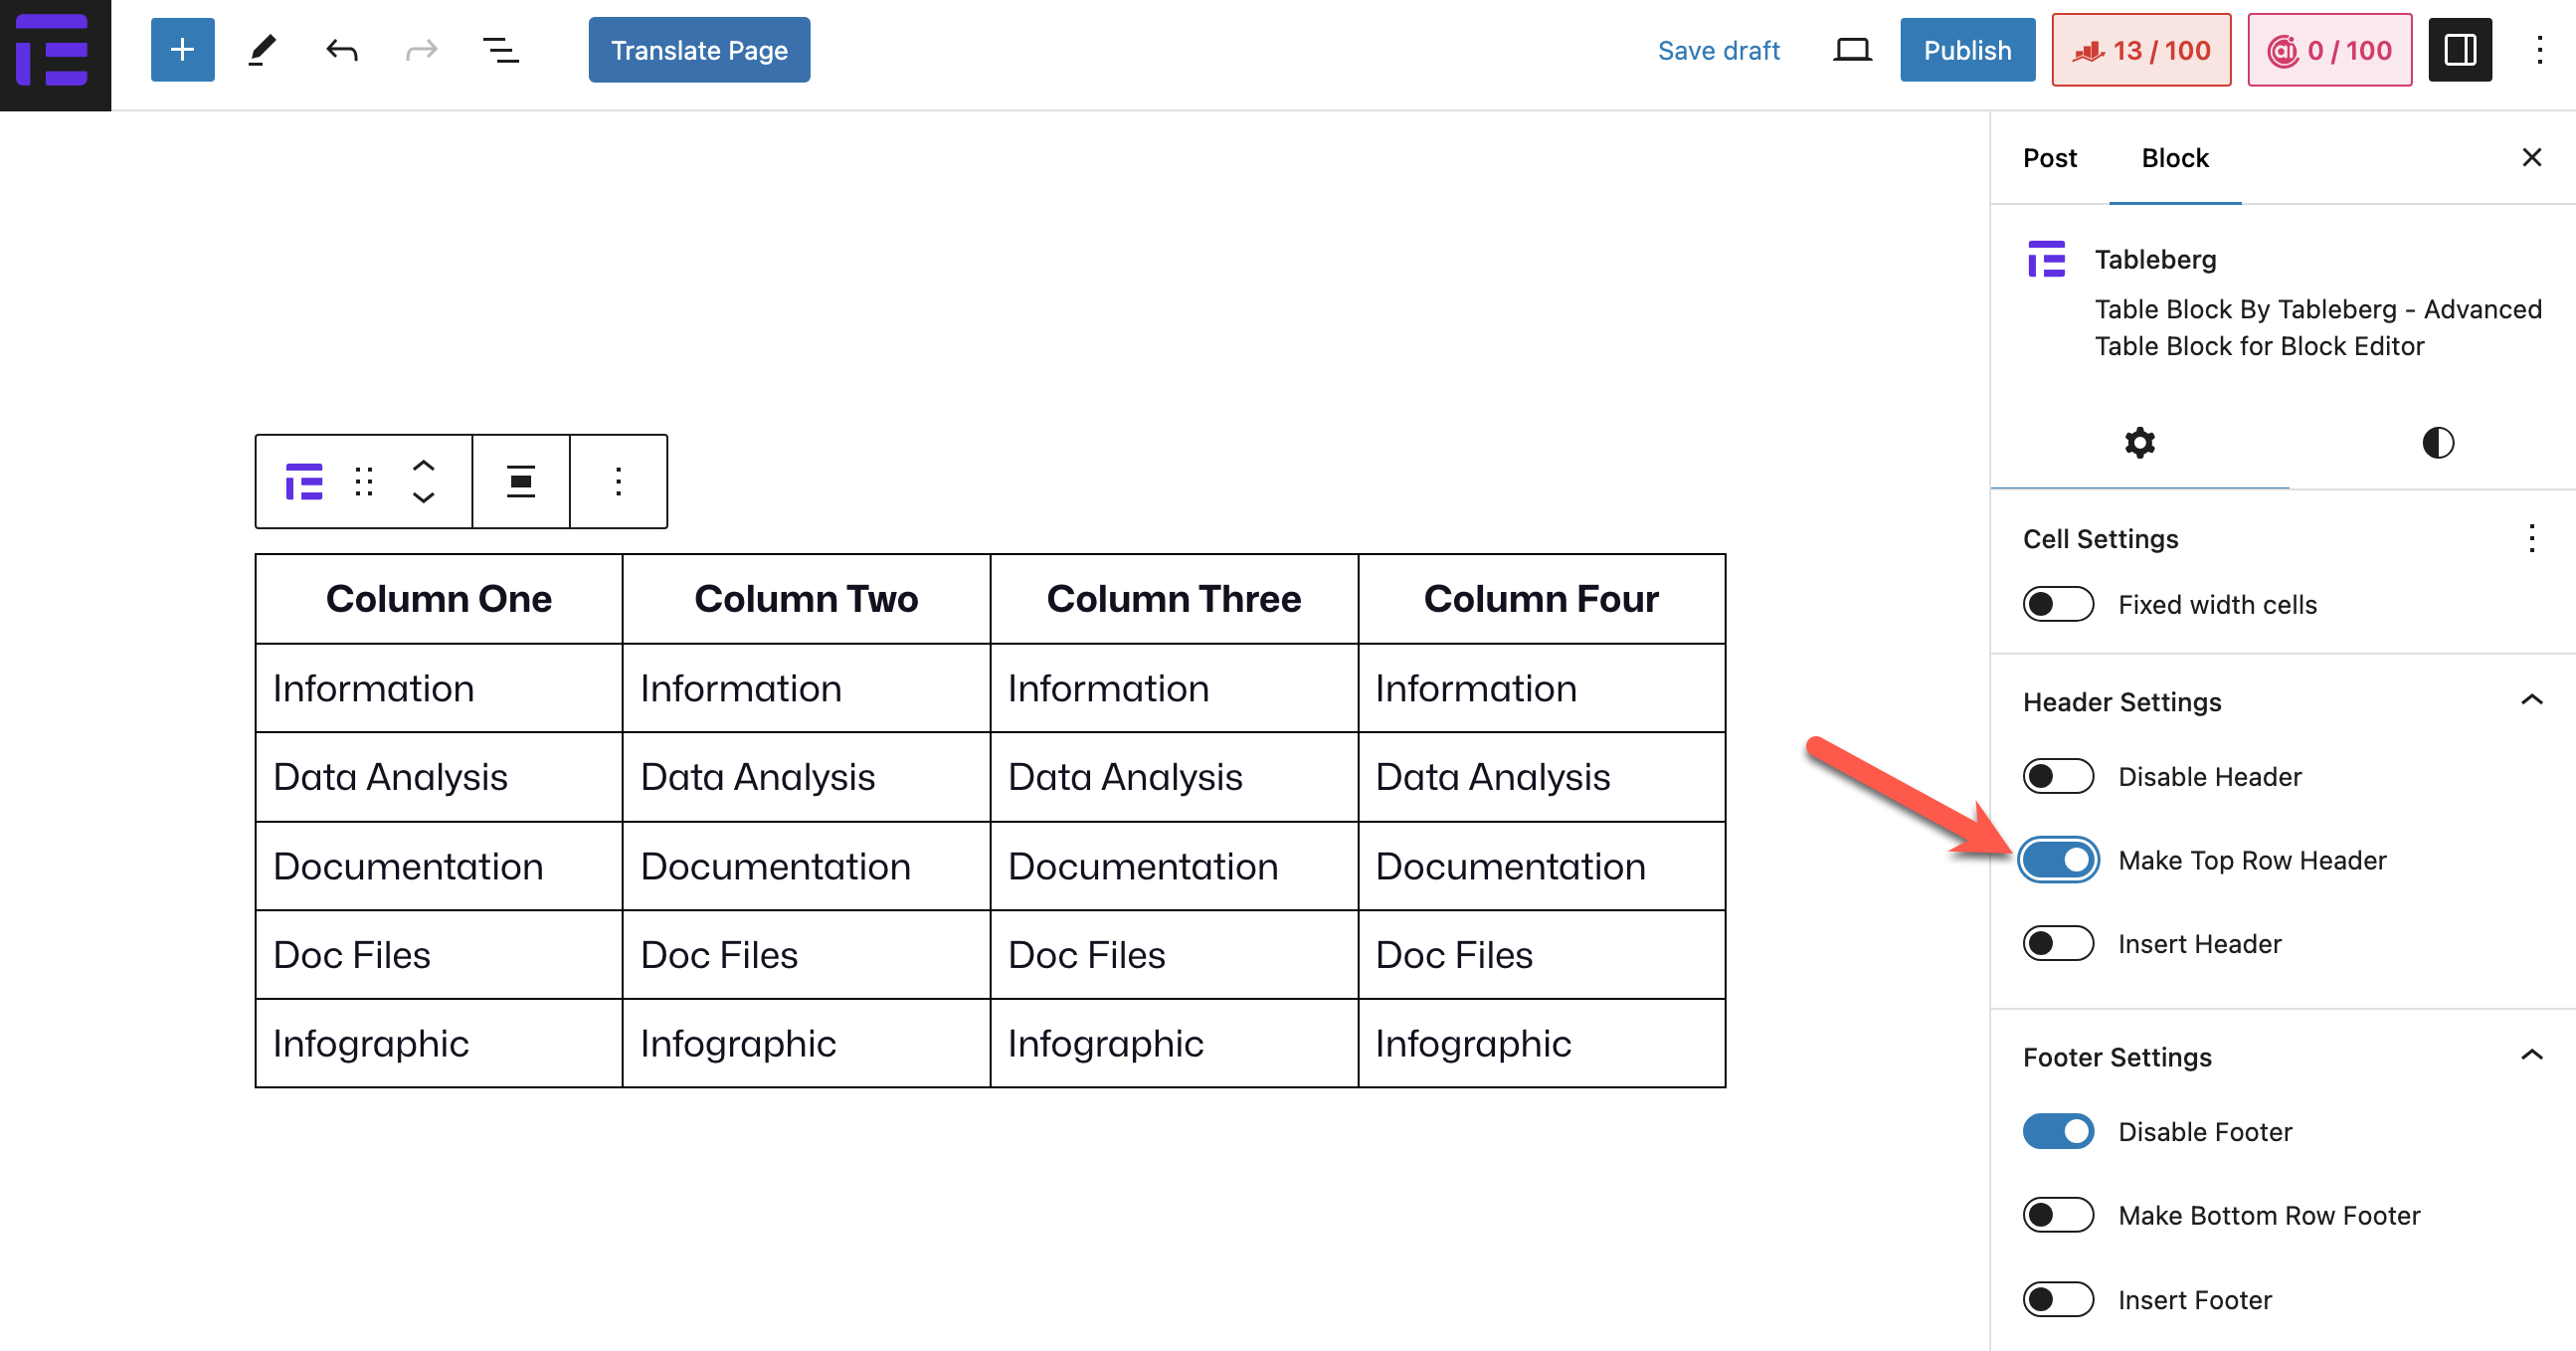
一番上の行がヘッダーになる。
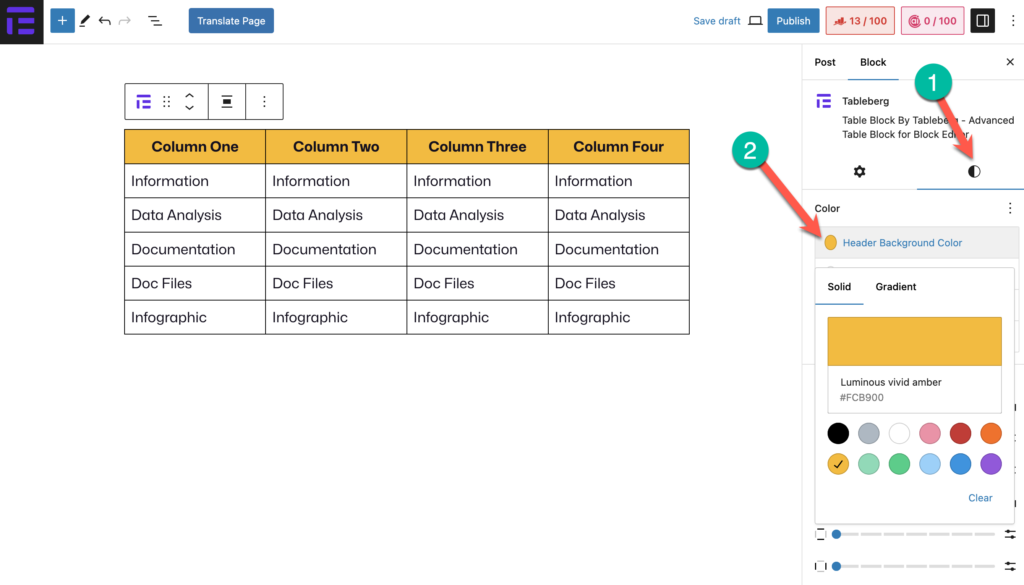
必要であれば、テーブルヘッダーの背景色を変更することもできます。その場合は スタイルタブ (1) を変更する。 ヘッダーの背景色 (2).
こちらもお読みください: WordPressでテーブルヘッダーをスティッキーにする方法
結論
Thus, you can add headers to your WordPress tables. Remember to keep your headers descriptive but concise so they don’t take up much space. Unless they are clear and meaningful, users will fail to understand the column’s purpose of the table at first glance.

