
Why do we need a table? Because sometimes, listing things out in plain text is not enough. How do we create a table? You can do that by using the built-in Table block, a plugin with advanced features, or by adding custom HTML, depending on the editor or page builder you are working with. Tables are the easiest way to keep your information structured and organized.
But as your table grows, so do the challenges. More rows mean more scrolling. More columns make it harder to spot the details that matter. What started as a clean layout can quickly become overwhelming for users trying to find one specific piece of data.
This is where sortable tables become especially helpful. Instead of forcing users to read through everything, you can let them sort the data by what they care about, like price, date, name, or rating, with a single click.
In this article, we will walk you through how to create a sortable table using Tableberg and show how to control sorting direction based on your layout.
Create a Sortable Table in WordPress
In the following steps, we’ll show you how to create a table using Tableberg. You’ll also learn how to make the table sortable with just a few settings.
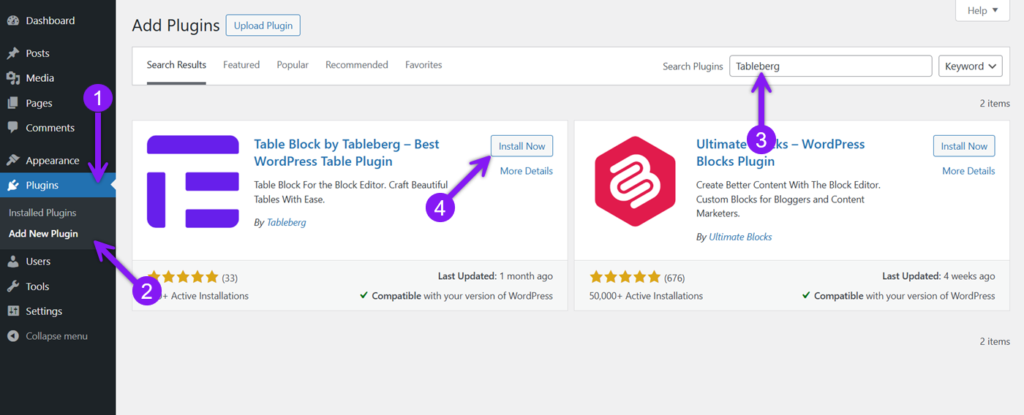
Step 1: Install and Activate Tableberg
Go to your WordPress dashboard, open the Plugins menu, and click on Add New. Search for Tableberg, then install and activate the plugin.
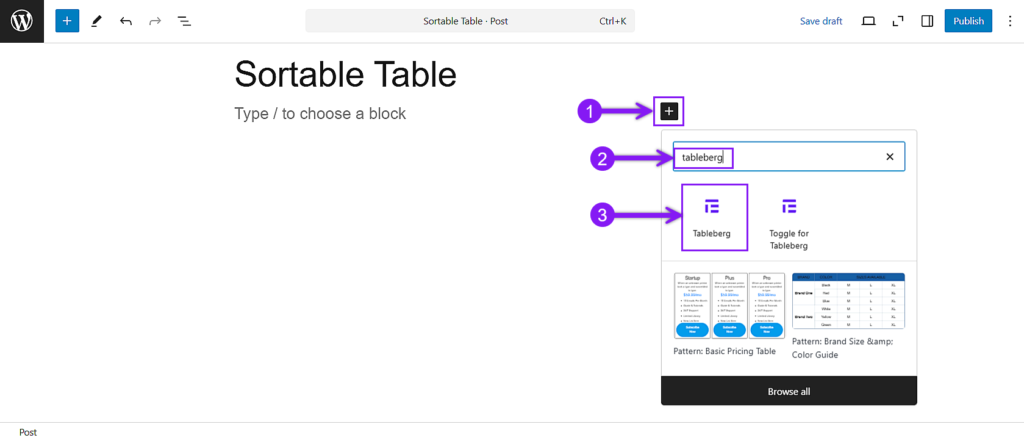
Step 2: Insert a Table into Your Post
Open the exact post or page where you want to have the table. Now, use the block inserter to locate the Tableberg block, add it to your content, and choose the number of rows and columns you need.
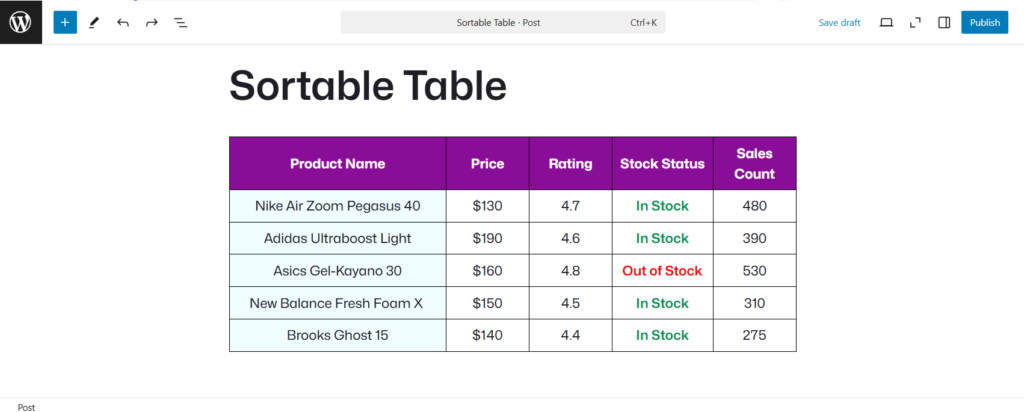
Step 3: Enter Your Table Content
Click into each cell and put your data inside it. Tableberg lets you use text, images, star ratings, buttons, ribbons, icons, lists, and other block elements inside any cell. Prepare your table the way you want.
Step 4: Enable the Sorting Feature
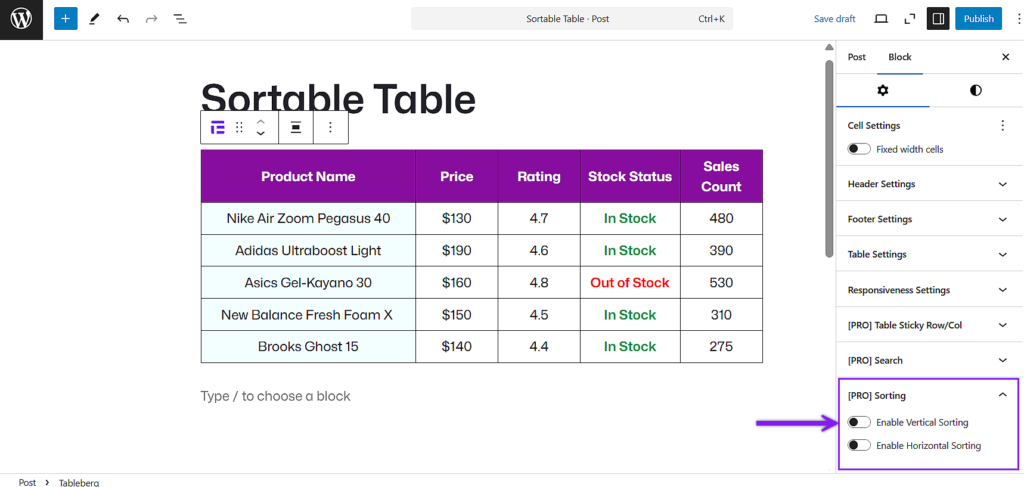
Click the outer edge of any cell of the table and click the tableberg icon on the toolbar to make sure the entire table is selected. In the right-hand block settings, scroll down until you find the Sorting feature.
Step 5: Choose Sorting Direction
Once the sorting feature is found, you’ll see two available options: Vertical and Horizontal. Vertical sorting allows users to reorder rows by clicking column headers. Horizontal sorting sorts across rows and works best when your labels are in the first column. Choose the mode that suits your table layout.
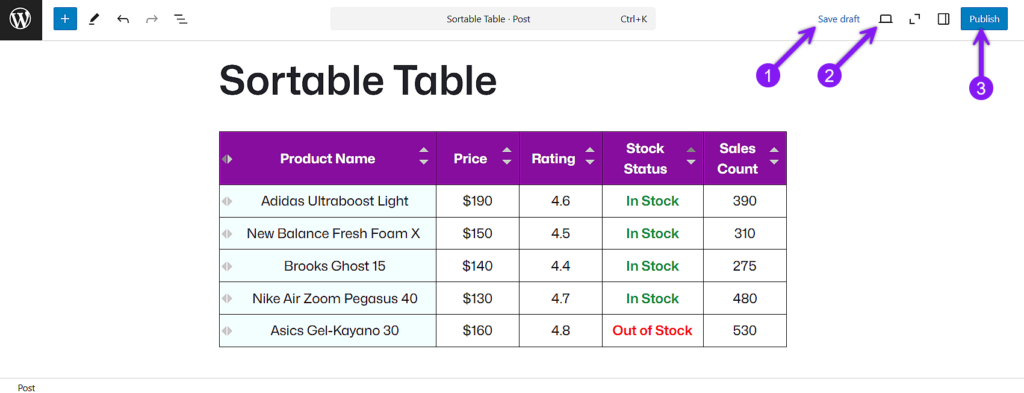
Step 6: Preview and Test the Sorting
First, save your work, click Preview, and then test your sorting by interacting with the table. Try different columns or rows based on the mode you’ve selected to make sure everything works as expected. Once you’re satisfied with everything, update or publish the post.
Conclusion
Tables are one of the most effective ways to present organized information on a website, but they can quickly become difficult to navigate as the content grows. Sortable tables make this easier by allowing users to rearrange data based on what matters to them. With Tableberg, you can add this feature without using any external tools or code, and even control how sorting works depending on your table layout. And in this article, we have shown exactly how to create a sortable one using Tableberg from start to finish.

