
Timelines have evolved far beyond simple historical records. Today, they serve as vital organizational tools across industries, turning chaotic schedules into clear visual narratives. Their true value lies in their ability to show not just what happens, but when and why.
The timelines that are commonly used are sometimes horizontal, vertical, spiral, or chart-based, and specialized plugins do exist for them. But, table-based solutions offer unmatched practicality for WordPress users.
This guide exists to demystify timeline creation in WordPress. We’ll walk through transforming basic tables into professional-grade timelines through smart structuring and thoughtful design choices. Let’s take a look.
Why Use a Table-Based Timeline?
When your timeline needs more than just dates and titles, a table layout offers a more structured and practical solution. It allows you to break down each event into detailed segments and present them in a clean, organized format. Here’s why it works so well:
Build It Your Way
You decide how many columns to use and what each column represents—be it time, description, speakers, or categories.
Crystal-Clear at a Glance
Each row represents one event, and each column keeps details neatly separated. Readers can scan the full timeline without digging for information.
Edit Like a Text Message
Whether you’re adding a new phase or adjusting event order, editing a table is simpler than reworking a graphic or fixed-layout timeline.
Room for Extras
You’re not limited to plain text. Tables let you include extras like links, icons, lists, or visual markers directly inside the layout.
Looks Good Everywhere
A well-structured table adjusts smoothly across devices, especially when built with a block-based approach inside WordPress.
Create an Event Timeline in WordPress
Timelines make it easier to present events in order, whether you’re managing a launch, a schedule, or a project. With Tableberg, you can build one directly in the block editor using a customizable table, styled and structured to fit your needs. Let’s get started.
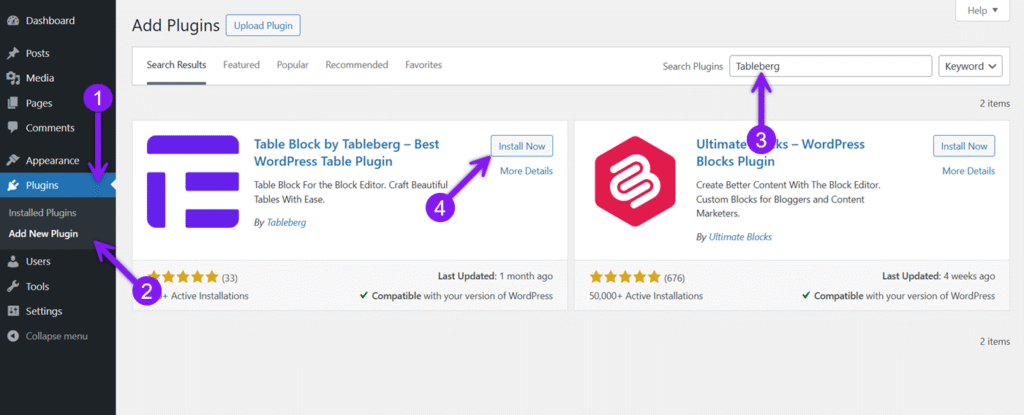
Paso 1: Instalar y activar Tableberg
Go to your Plugins page and search for “Tableberg.” Install and activate it like any other plugin. Once active, the Tableberg block will be available inside the Gutenberg editor.
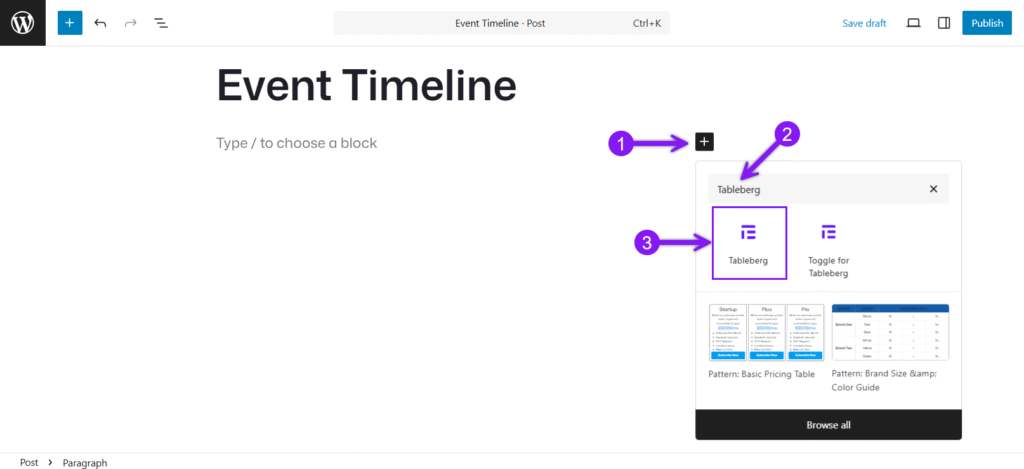
Paso 2: Insertar el bloque Tableberg
Create or open a post or page and use the block inserter (+ icon) to add a new block. Search for Tableberg and insert it. Afterwards, you’ll be prompted to choose the number of columns and rows. Set your timeline’s rows and columns based on your content scope.
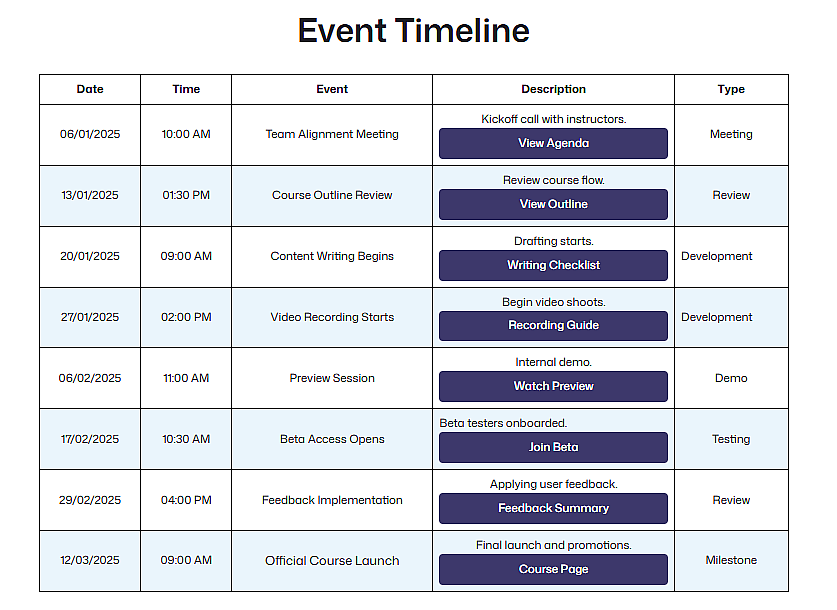
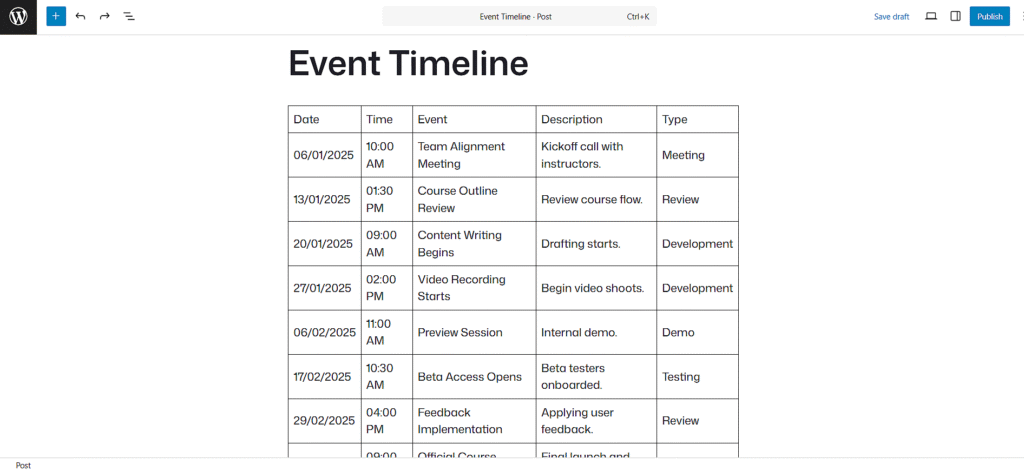
Step 3: Enter Your Timeline Content
Next, click into each cell and start adding the details. Include items like date, time, event title, short descriptions, or labels for event types. Remember to use simple labels, clear descriptions, and icons or bold text to highlight key points.
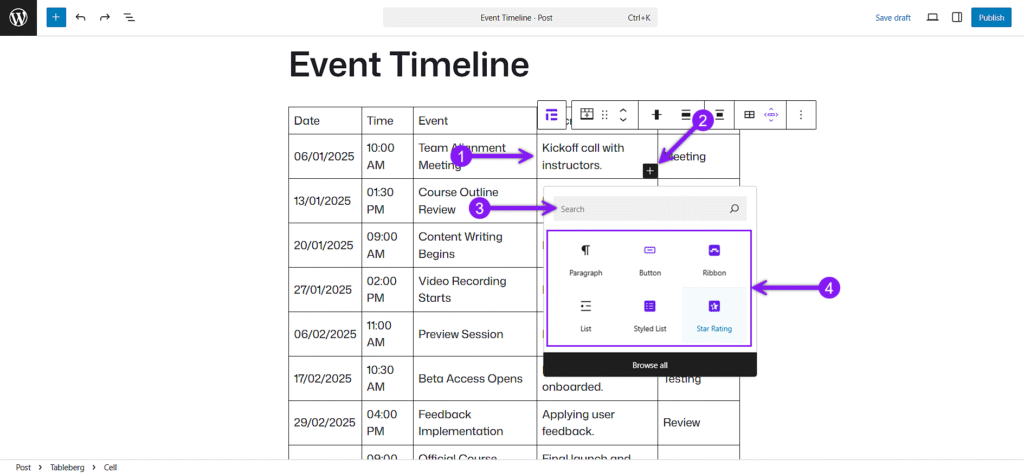
Step 4: Add Sub-Blocks Inside Cells
Click into a cell and use the block inserter to add a sub-block inside that cell. Use these to show tasks, link to resources, or mark important events. You can insert lists, buttons, ribbons, star ratings, or icons to make your timeline exclusive.
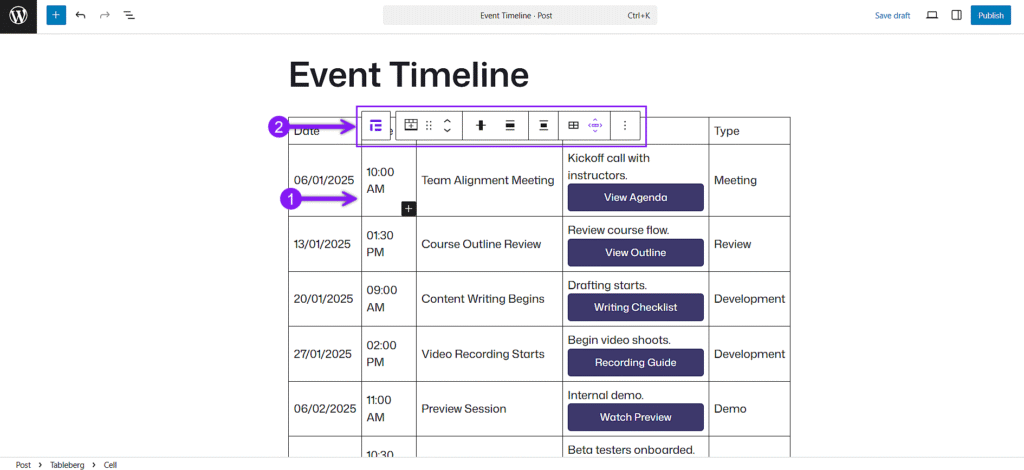
Step 5: Adjust Settings and Style Your Table
The block toolbar above the table lets you change alignment, insert or remove rows and columns, reorder and duplicate them, and merge or split cells as needed.
You’ll see two main areas to customize your table. The sidebar settings panel gives you controls for table width, header and footer adjustments, rows, columns, or cells colors, borders, padding, and more. You can use these settings to center important columns, highlight rows, or adjust spacing.
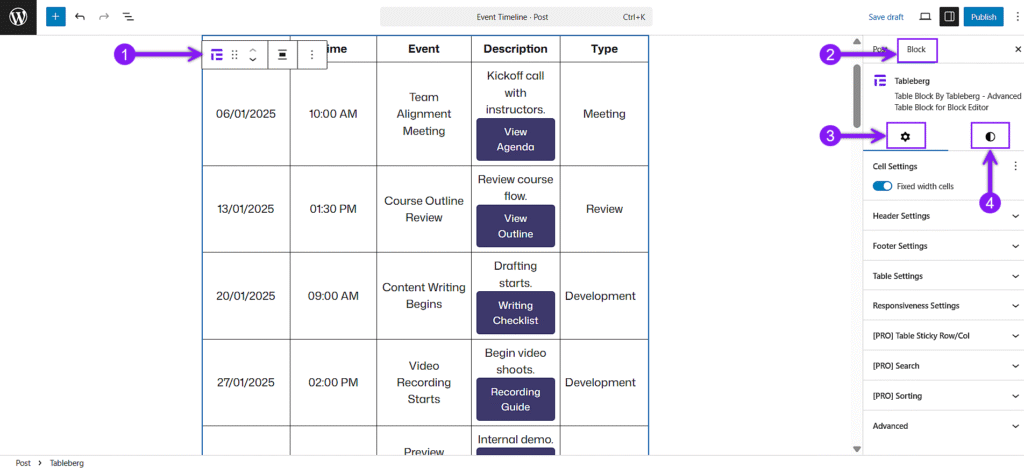
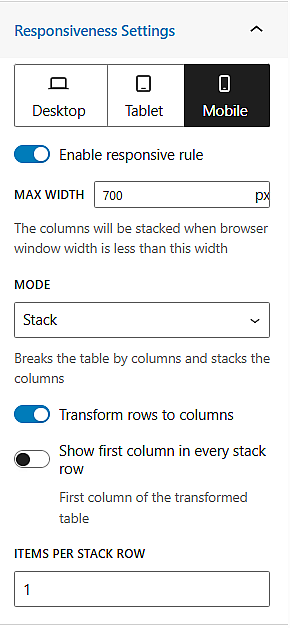
Remember to utilize the responsive settings to make sure your timeline looks clean across mobile, tablet, and desktop devices.
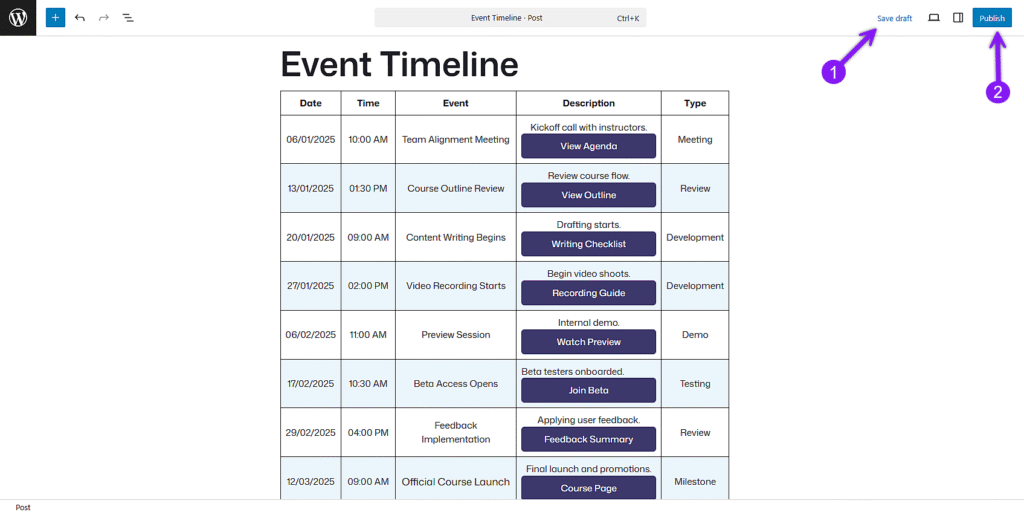
Step 6: Finalize and Publish Your Timeline
Once you’re satisfied with the timeline, use the Save Draft or Publish button to make it live. You can come back anytime to edit, expand, or restyle your timeline as your schedule or project evolves.
Conclusión
Timelines don’t need to be complex or visually overwhelming to be effective. When built with structure in mind, a simple table can communicate order, progress, and clarity better than many flashy alternatives.
If your content needs to show what’s happening, when, and why, this approach does the job with full control and flexibility.
And once you’ve built one, expanding it, restyling it, or reusing the format becomes effortless.
All it takes is a smart table and a few thoughtful choices.
Lea también:
