
When your content is structured well, users tend to stick around longer. Nested tabs let you keep things tidy, interactive, and user-friendly, which is a perfect fit for documentation, pricing tables, and FAQs.
They work by allowing users to switch between different sections without leaving the page to keep everything accessible in a compact space. Instead of a cluttered page filled with endless scrolling, what you get is a neatly structured layout where multiple layers of information stay within reach easy to navigate.
Now, you’ll be happy to know that you can add nested tabs in WordPress without any complexity. All it takes is the right tool, and Ultimate Blocks is precisely that. Our article helps you find the answer about how to add nested tabs in WordPress in the simplest way possible.
Add Nested Tabs in WordPress
For Gutenberg users, Ultimate Blocks is the ideal choice for adding nested tabs with ease. However, with 26 different blocks built for different purposes, Ultimate Blocks isn’t just for tabs. It’s an all-in-one solution that equips you with the right tools for structuring content, improving clarity, and adding interactive elements in Gutenberg.
Step 1: Get the Plugin Ready
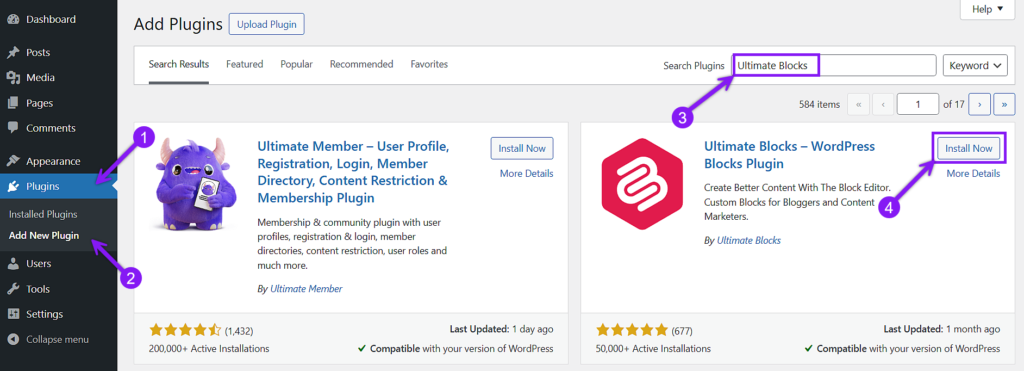
First, you need to head over to your WordPress dashboard. From there, click on ‘Plugins’ in the left-hand menu, then choose ‘Add New’. In the search bar, type in Ultimate Blocks, and the result should pop up within seconds. Once the plugin appears in the result, click Install Now. Give it a second to work, and when it’s done, activate the plugin, and you’re all set.
Step 2: Insert the Tabbed Content Block
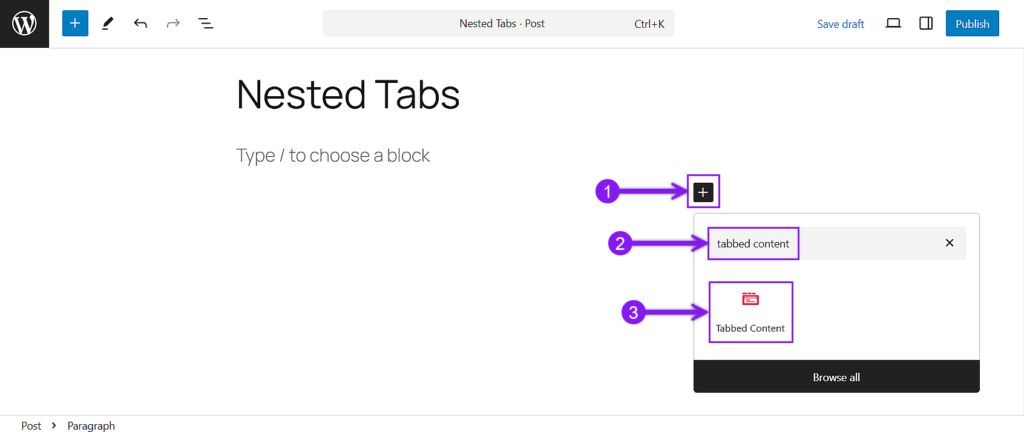
Open your post or page in the Gutenberg editor where you want to add your nested tabs. From the editor, click the + button, look for Tabbed Content, and insert it into your content. This will be the foundation of your tabbed layout.
Step 3: Build Your Tabs and Nested Tabs
Once the Tabbed Content block is added, you’ll have a single tab by default. To create multiple tabs in the first layer, click the “+” button and add as many as needed. You can rename each tab by clicking directly on the title and typing in the new name. Each tab acts as a container where you can insert text, images, or any other content blocks.
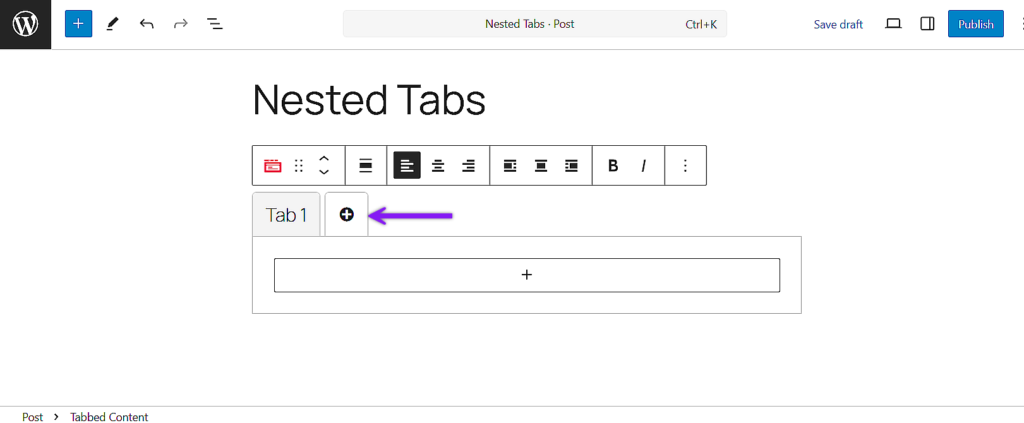
To create nested tabs, select a tab from the first layer and insert another Tabbed Content block inside it using the block inserter. This new block will function as a second-level tab system within the selected tab. You can repeat thie same process to add more nested layers to structure your content in multiple levels.

Step 4: Customize Until It’s Perfect
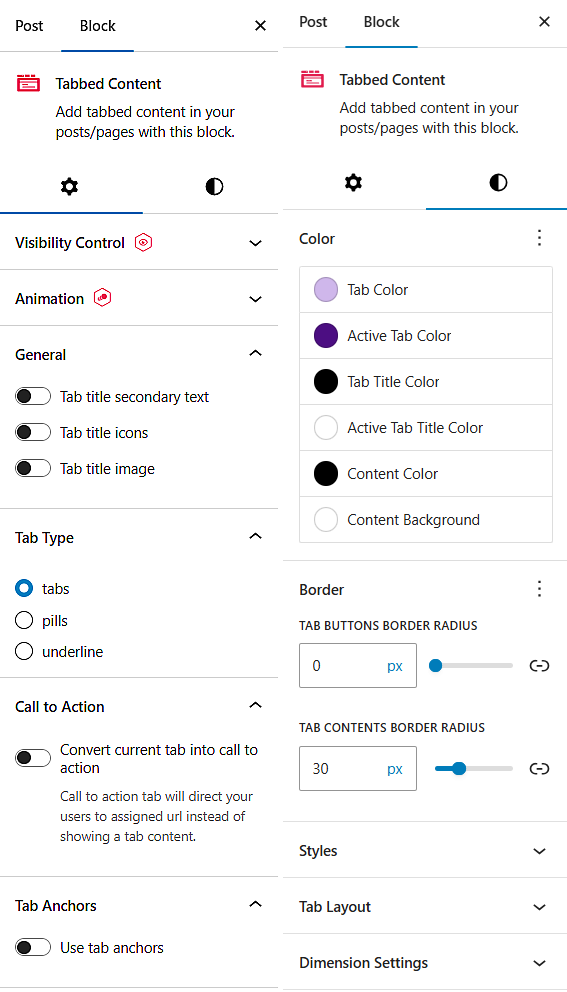
After you’ve placed your content within each tab, you might want to bring some changes to the outlook of your tabs. From the General Settings tab, you can change the tab type, add tab anchors, and, in the Pro version, include icons, images, and secondary texts with the title.
In Styles Settings, you can adjust the colors for tabs, titles, and content, change the tab layout to switch between horizontal and vertical tabs and customize the border and dimensions to match your design.
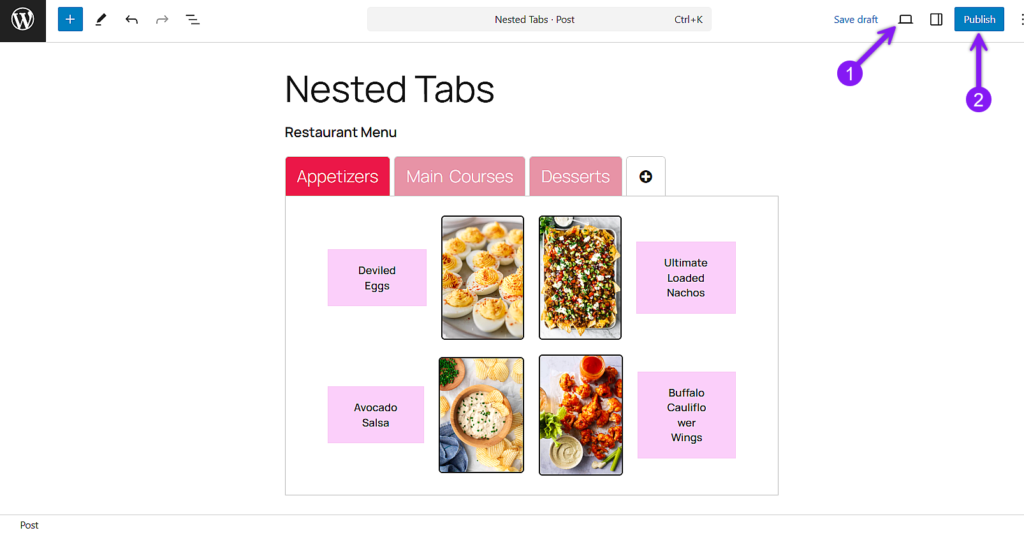
Step 5: Preview and Publish Your Nested Tabs
Before making your nested tabs live, click the Preview button to check if everything is working as expected. Make sure that every tab switches smoothly and that nested tabs display correctly. If any adjustments are needed, go back and tweak the settings. Once everything looks good, click Publish or Update to make your changes live.
Here is a quick demonstration of nested tabs in action.

Conclusion
Nested tabs make navigating layered content in WordPress more intuitive, and Ultimate Blocks offers a simple way to implement them in the Gutenberg editor. However, since it doesn’t support true nested tabs, you’ll need to manually insert Tabbed Content blocks within each other to achieve the effect. If you’re using a different editor, alternatives exist, but not all tab plugins support multi-level nesting by default. Test the method we’ve revealed in this article, see if it fits your needs, and if not, explore other plugins that might work better for you. Do not hold back and get to work now. Just start organizing your content and see the difference it makes.

