
Creating a pricing table is a must if you want to sell your products and services through your website. But to display multiple pricing plans that customers can compare easily without leaving the page, you must add the toggle feature to the table.
The toggle feature allows users to navigate or switch between different sets of pricing options, creating an interactive interface. For example, users can toggle between monthly, yearly, and lifetime subscription plans.
In this blog post, we’ll show you a step-by-step guide on how to create a WordPress pricing table with a toggle using Tableberg. Let’s begin.
Step 1: Install and Activate Tableberg
First, install and activate the Tableberg plugin on your WordPress site. If you haven’t installed it yet, get the plugin here.
Once installed and activated, you’re ready to start building your pricing table.
Note: Even though Tableberg has a free version, the toggle feature is only available in the pro version.
Step 2: Add the Toggle for Tableberg Block
Tableberg Pro comes with a powerful Toggle for Tableberg block that allows you to organize tables in tabs effortlessly.
To add this block:
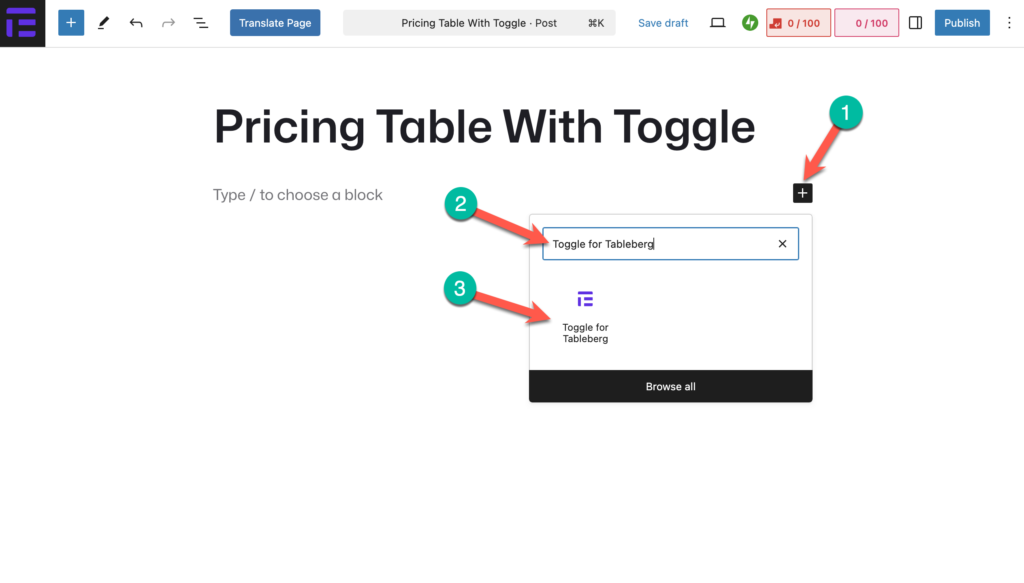
- Open the WordPress editor and click on the + button to add a new block.
- Search for Toggle for Tableberg and select it.
- The toggle block will be added to your editor.
Step 3: Create a Pricing Table in the First Tab
Inside the Toggle for Tableberg block, you can create a table from the scratch or choose a pre-built table. For the sake of this tutorial, we are choosing a pre-built one.
- Inside the Toggle for Tableberg block, you can
- Click the + button inside the tab and search for the Tableberg block.
- Define the number of rows and columns for your pricing table (e.g., 3×3 for three plans).
- The table layout will be generated instantly.
Step 4: Add/Edit Content to the Table
Now, it’s time to add or edit content to your pricing table.
# Add Column Titles
- Click on the first row and enter the pricing plan names (e.g., Basic, Standard, Premium).
- Align them centrally and increase their font size for better visibility.
# Add Pricing Plans
- In the second row, enter the pricing for each plan.
- Use the Highlight option to differentiate the pricing.
# List Product Features
- Each column should include a list of features for the respective plan.
- Tableberg allows you to insert a List block directly inside the table.
# Add CTA Buttons
- Use the Button block inside Tableberg to create call-to-action buttons (e.g., “Buy Now” or “Get Started”).
- Customize the button text, color, and style.
Step 5: Add Another Pricing Table to a New Tab
Click on the Tab 2 in the Toggle for Tableberg block to add a new table in another tab. Then repeat the same steps as above to create another pricing table for the new tab.
Once you complete these steps, your pricing table with toggle functionality will be ready. Preview your table to check that everything is working smoothly.
Step 6: Customize the Toggle for Tableberg Block
To make your pricing table more visually appealing and aligned with your brand, you can customize the Toggle for Tableberg block:
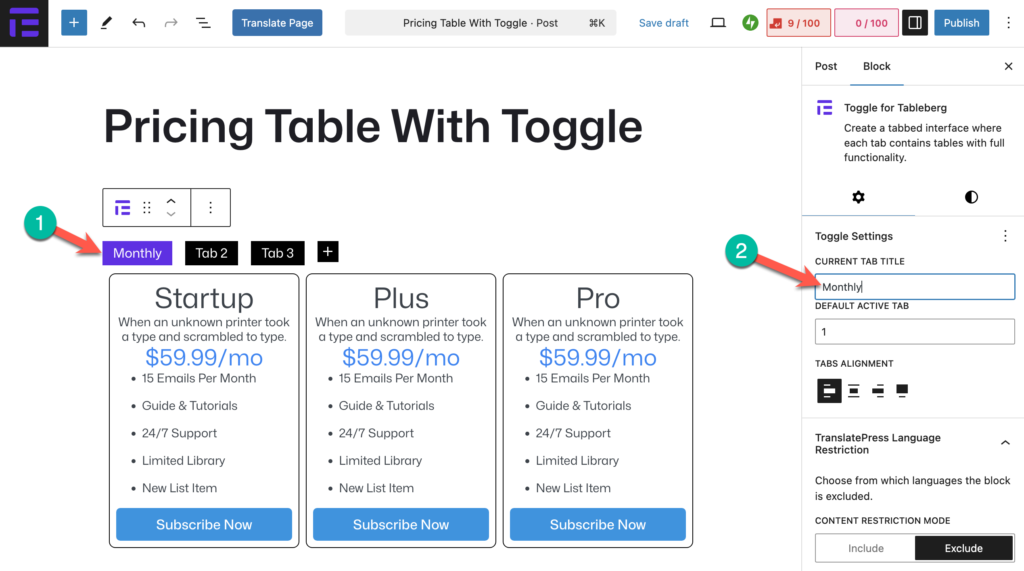
Rename the Toggles: Click on each tab and change its label to match your pricing plans, such as Monthly, Yearly, or Lifetime.
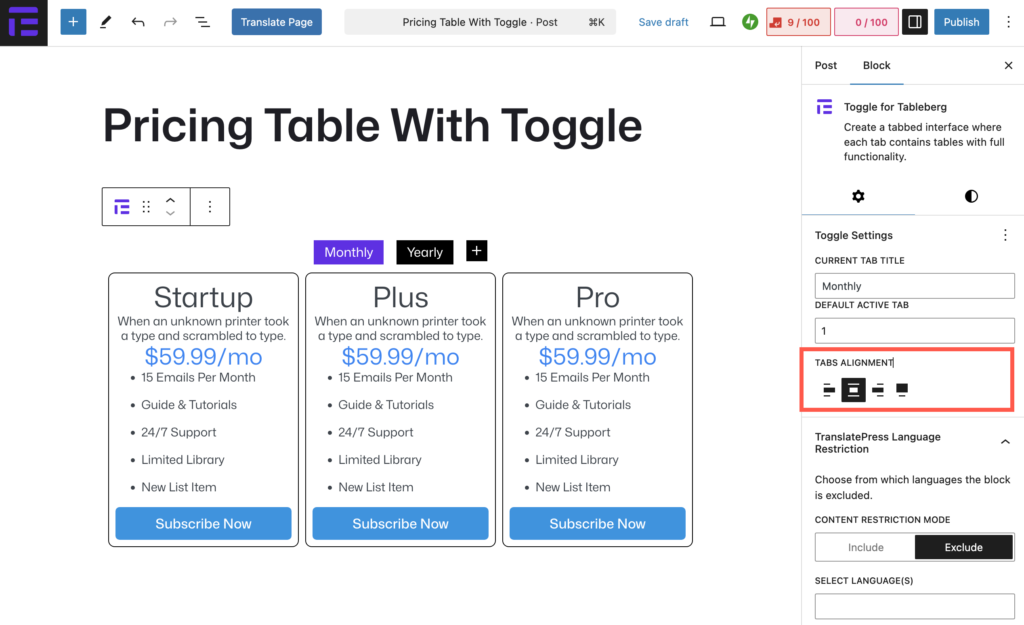
Change Tab Alignment: From the block settings panel, choose to align the tabs to the left, center, or right based on your design preference.
Style the Tabs: From the Styles tab, customize the background color, text color, and border of the toggles to make them visually consistent with your site’s design.
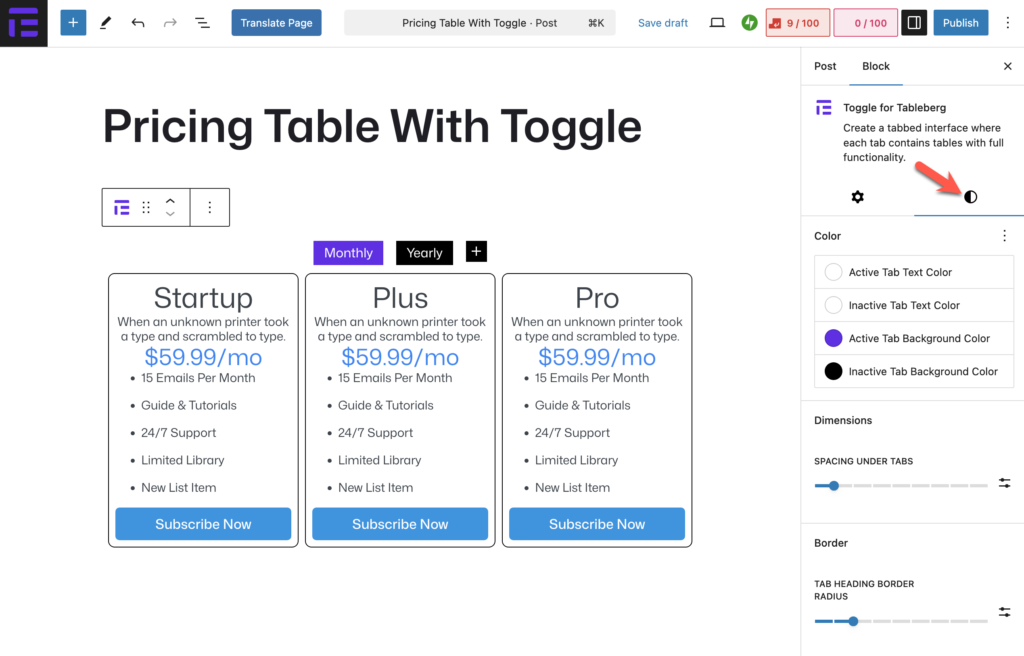
These simple customizations can greatly enhance the user experience and ensure your pricing table blends seamlessly with your website’s overall look and feel.
Conclusion
Creating pricing tables with a toggle feature is essential for a seamless user experience. With Tableberg Pro’s Toggle for Tableberg block, you can now build interactive pricing tables directly in WordPress without the need for extra plugins.
Give it a try and let us know your thoughts in the comments below!

