
Your tables can quickly lose their clarity if the content inside them isn’t properly aligned. Even with a solid layout, uneven cell heights or mismatched content lengths can make your table look unbalanced or hard to scan.
Vertical alignment will help you ensure every row stays organized by making sure content like text, buttons, or images appear exactly where they should, even when other cells in the same row are taller or shorter.
Take a pricing table where one feature list runs longer than the rest, or a team table where one member’s bio stretches out more than others. Without vertical alignment, buttons in the pricing table might sit unevenly, and team member photos could appear misaligned.
This is where your choice of consistent alignment will help your table to stay stable. In this article, we’ll walk you through how to apply vertical alignment so you can keep your tables clean and consistent. Time to begin.
Can We Vertically Align Content with the Default Table Block?
Unfortunately, the default Table block in WordPress doesn’t support vertical alignment. It only allows plain text inside cells, and there are no built-in settings to align that content to the top, middle, or bottom. This makes it difficult to maintain a clean structure when cell content varies in height.
To overcome this limitation, we’ll use the Tableberg plugin. Tableberg is a block-based table builder that supports vertical alignment and allows you to insert rich content like images, buttons, and icons inside cells. It’s a beginner-friendly solution that gives you more control over your layout without writing any code.
How to Apply Vertical Alignment (Using the Tableberg Plugin)
To apply vertical alignment using Tableberg, you only need a few simple steps. Follow the instructions below to create your table and adjust the alignment exactly the way you want.
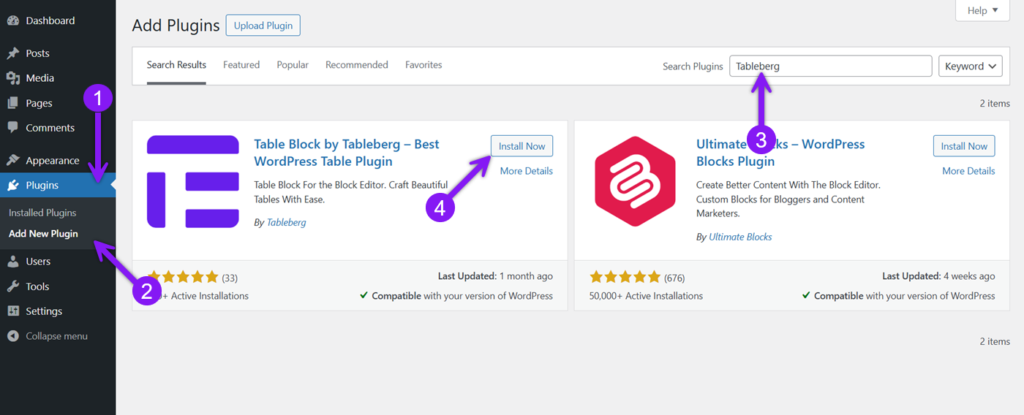
Step 1: Install and Activate the Tableberg Plugin
First, install and activate the Tableberg plugin from your WordPress dashboard. Go to Plugins → Add New, search for “Tableberg,” then click Install Now, followed by Activate.
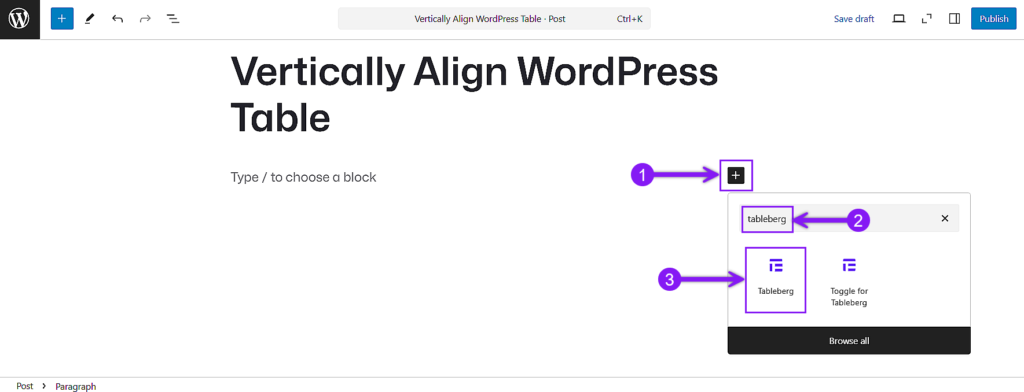
Step 2: Insert a Tableberg Block into Your Post or Page
Navigate or create a post or page, click the block inserter “+” icon, search for Tableberg, and insert the block. Next, choose the number of rows and columns you want to prepare your table.
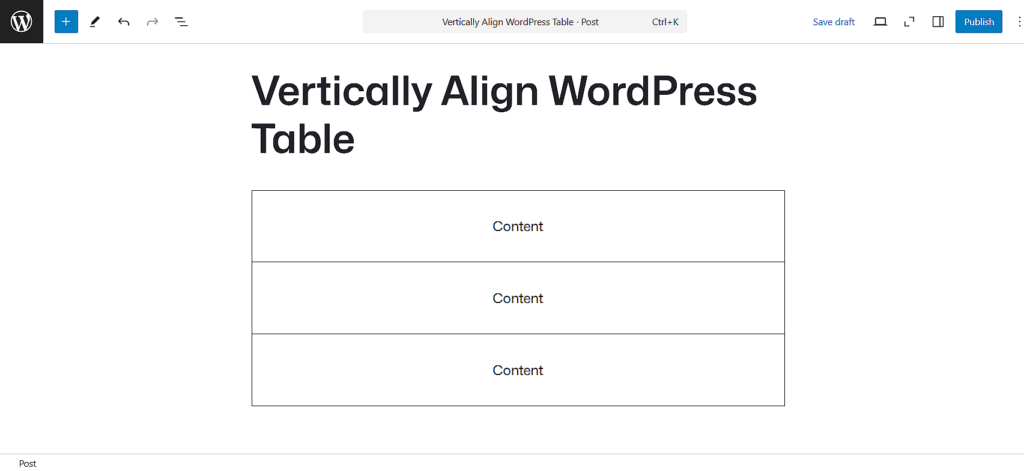
Step 3: Add Content to Your Table Cells
Continue by adding content to the cells. You can insert text, buttons, images, icons, or any other block inside each cell. By default, every content will be aligned to the middle of the cell.
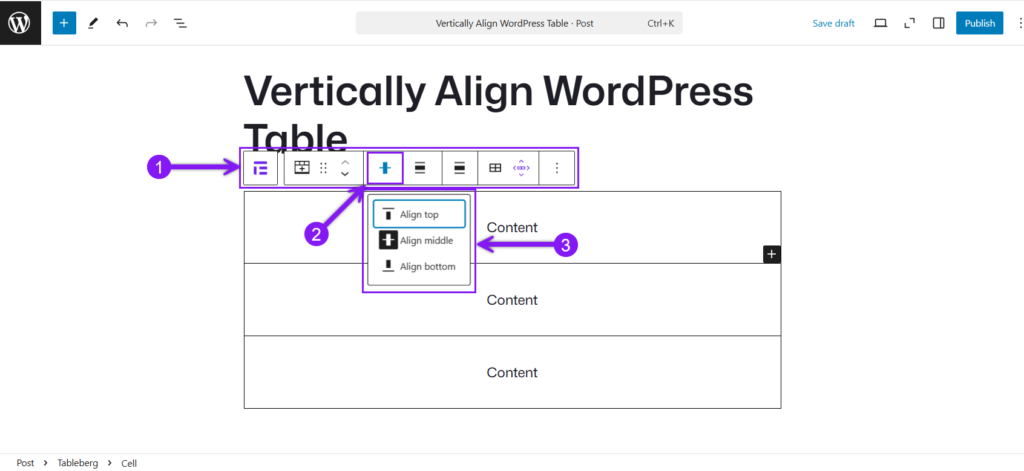
Step 4: Select Vertical Alignment from the Toolbar
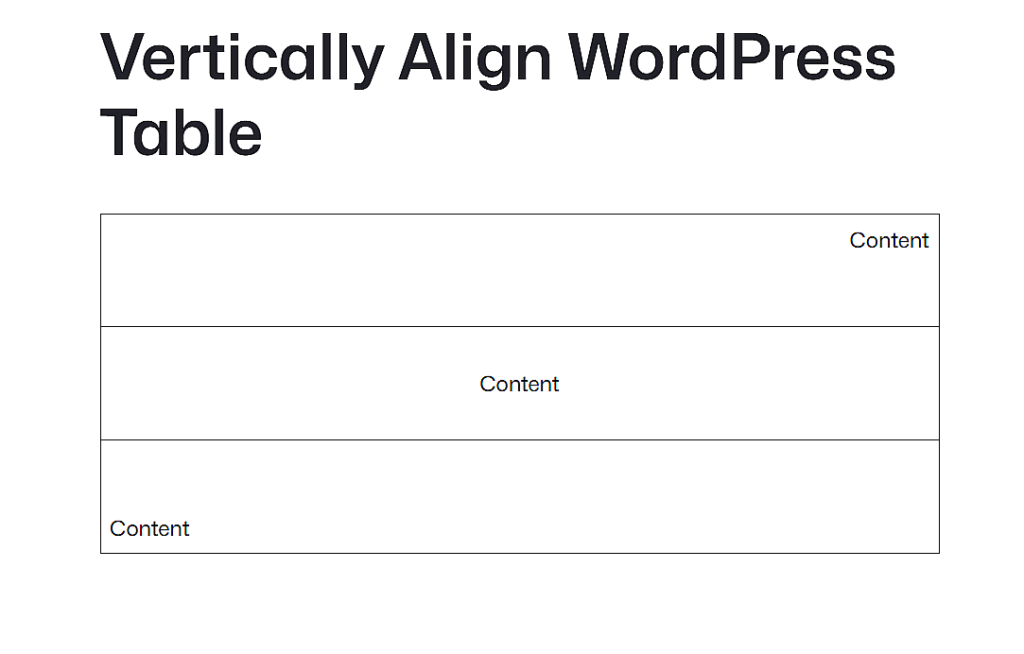
Select the particular cell that you’re waiting to align. Subsequently, click on the cell border to bring up the block toolbar. In the block toolbar that appears, click the Vertical Align icon and choose from Top, Middle, or Bottom.
Quick Note
You’ll see the effect of vertical alignment more clearly when a cell has extra vertical space. Also, since every content block inside a Tableberg cell has its own alignment controls, you can fine-tune the placement by aligning text to the bottom and positioning a button to the right for more precise layouts.
Conclusion
When table content looks misaligned, even the most well-structured layout can feel messy. Vertical alignment gives you the control to fix that by keeping everything in order, whether it’s a long text block, a centered button, or rows with uneven content. While the default Table block falls short in this area, Tableberg makes it easy to align content exactly where you want it without needing code or complicated steps. With the help of a few clicks, you can create cleaner and more consistent tables that look good on any screen.
Also Read:

