
A team member section is a dedicated space in a website where you can showcase talented people who make up your team and organization. It’s a place where you can highlight their expertise, achievements, and success stories.
The primary purpose of a website is not only to capture attention but also to connect people. Honestly, the human connection can leave a long-lasting impression. This is why most established organizations maintain a team section on their website.
If your website is on WordPress, it’s wonderful. In this blog post, we’ll show you an easy tutorial on how to create a team member section in WordPress without using any plugins. Be with us till the end.
Create Beautiful Tables
With Block Editor

How to Create a Team Member Section in WordPress
There are numerous page builders and custom block plugins that allow you to create a team member section on your site. But remember, the Gutenberg block editor offers over 95+ default blocks, which you can also use to create a team member section.
Once you have their usage, you won’t have to use additional plugins in many cases. This tutorial will be explained using these default blocks. Follow the steps with me.
Step 01: Write a Name for the Team Section Using the Paragraph Block
Every web section must have a name/heading so people can differentiate one section from another. Similarly, your team section must have a name, like
- Our Team
- Meet the Team
- Team Members
- The Team Behind
- Meet Our Experts
Write a title at the beginning using the paragraph block. Align the title centrally, make it bold, and increase its size.

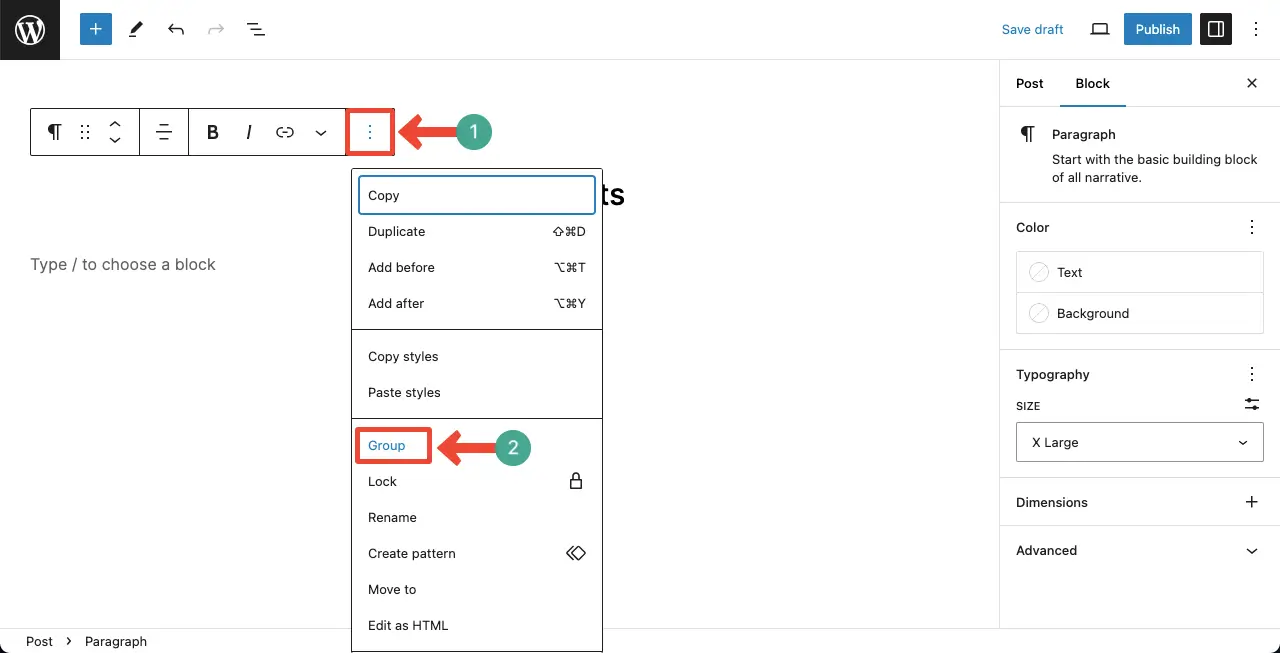
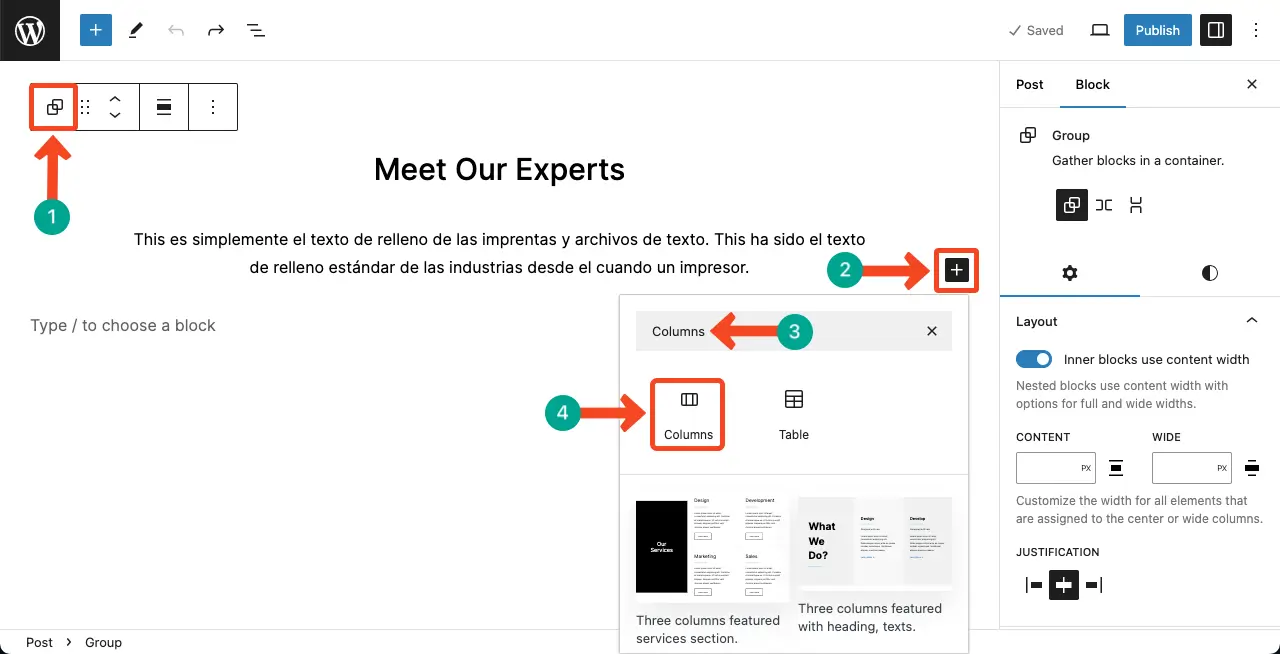
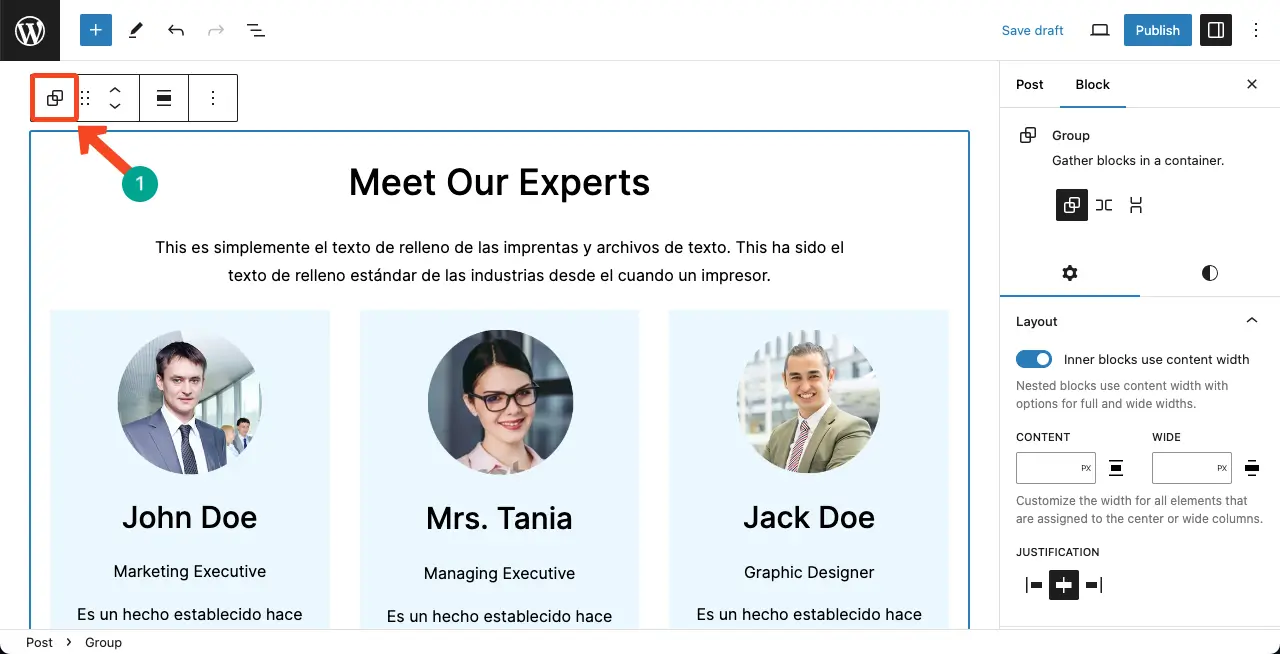
Step 02: Group the Block
By grouping the block, you can add multiple blocks one by one within the specified group section. The biggest advantage is that you can do extensive customization between them, which is not possible with normal ungrouped blocks.
Click the three-dot icon on the toolbar. Find and hit the Group option on the list.
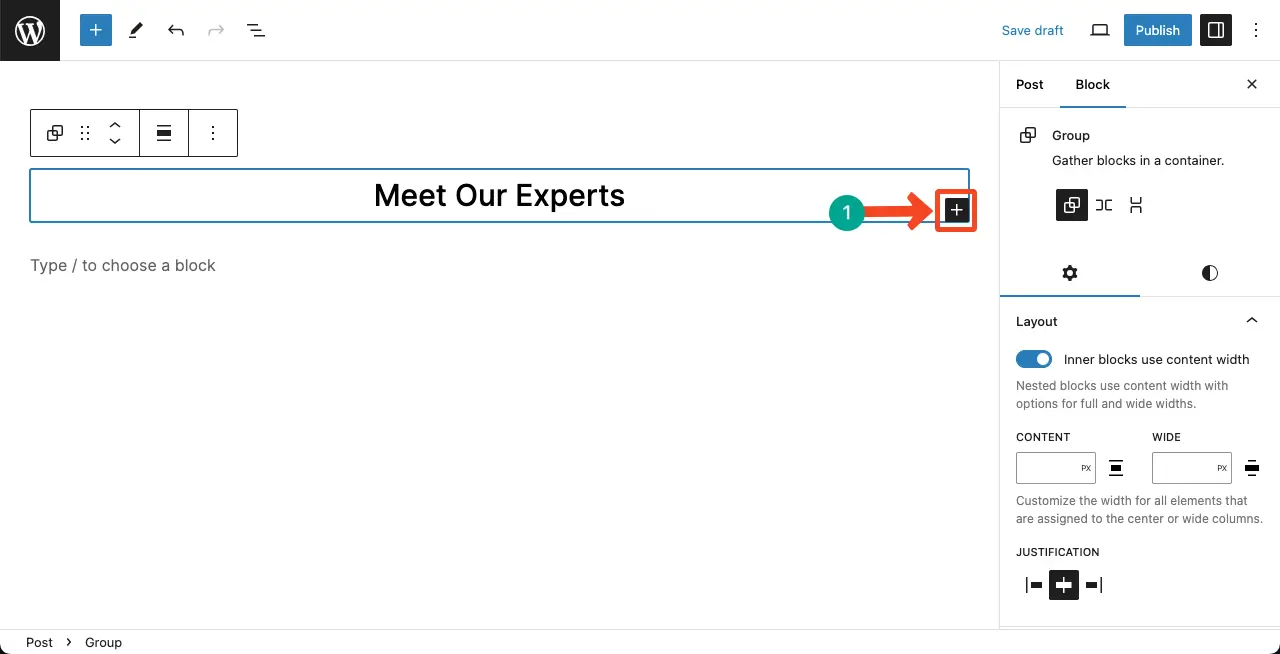
After the block is grouped, you’ll see the Gutenberg plus (+) icon within the group section. Now, you can add new blocks inside it.
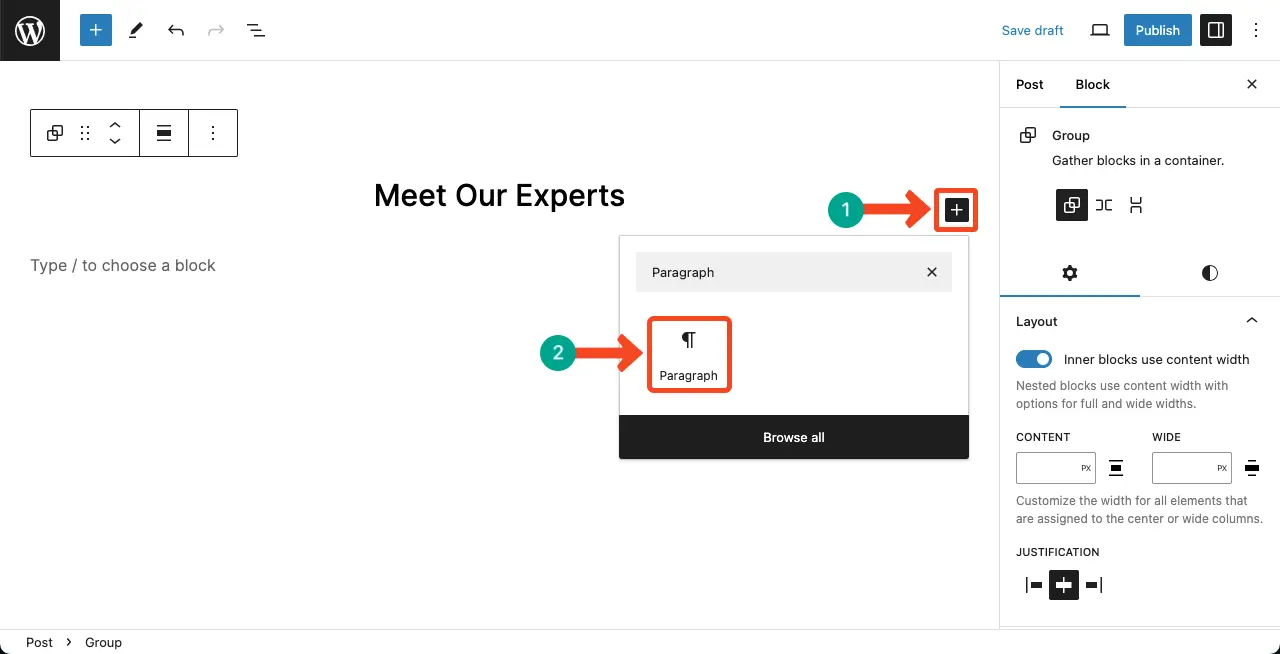
Step 03: Add a Brief Description of the Team Section
Adding a brief description of the team section will provide SEO benefits and help users understand the context of the section.
Add the Paragraph block within the group section.
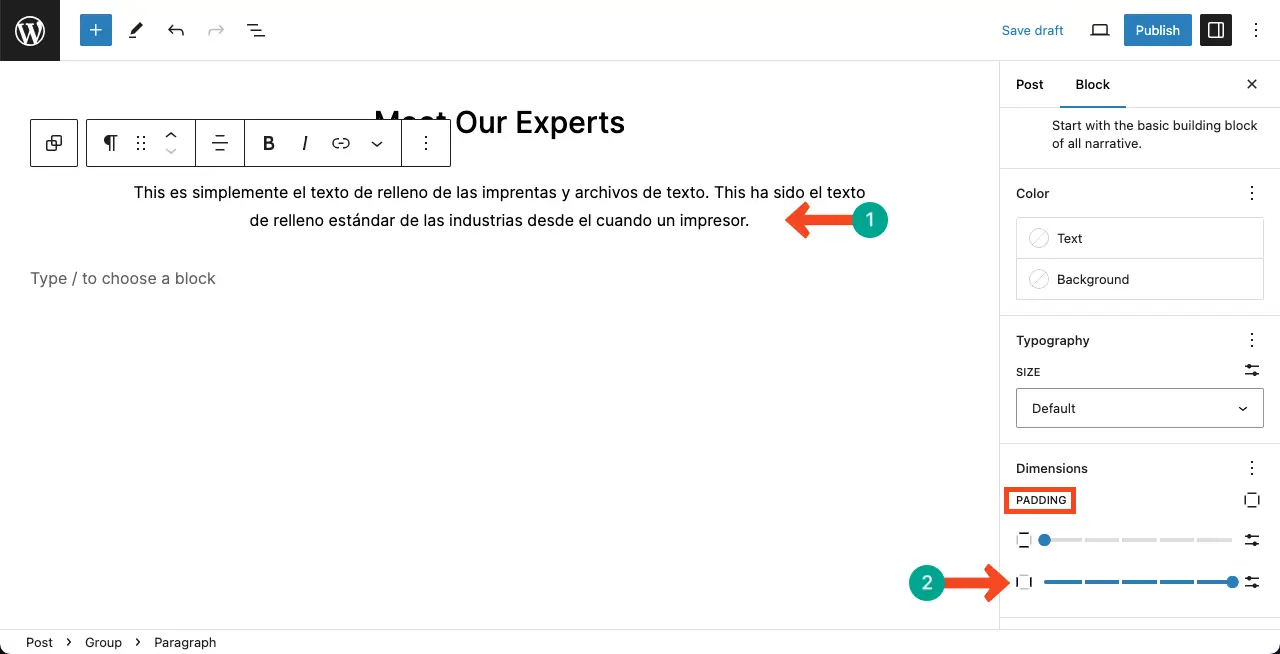
Simply write what you want to describe about the section. You can lessen the width of the content in the block by using the padding option.
You can customize each block immediately after adding it. But we will do that after the complete layout is ready.
Step 04: Add Team Members
Now, you need to create a separate layout within this section to display your team members. You can display them in different ways. We have seen so far most websites showcase their team sections in row, column, and box formats.
So we will also present our team section in the column-box format. Select the entire group by clicking the Group icon on the toolbar. Hit the plus (+) icon.
Find and add the Column block.
Select the number of columns based on how many team members you want to show. As we will show three members, we are selecting three columns.
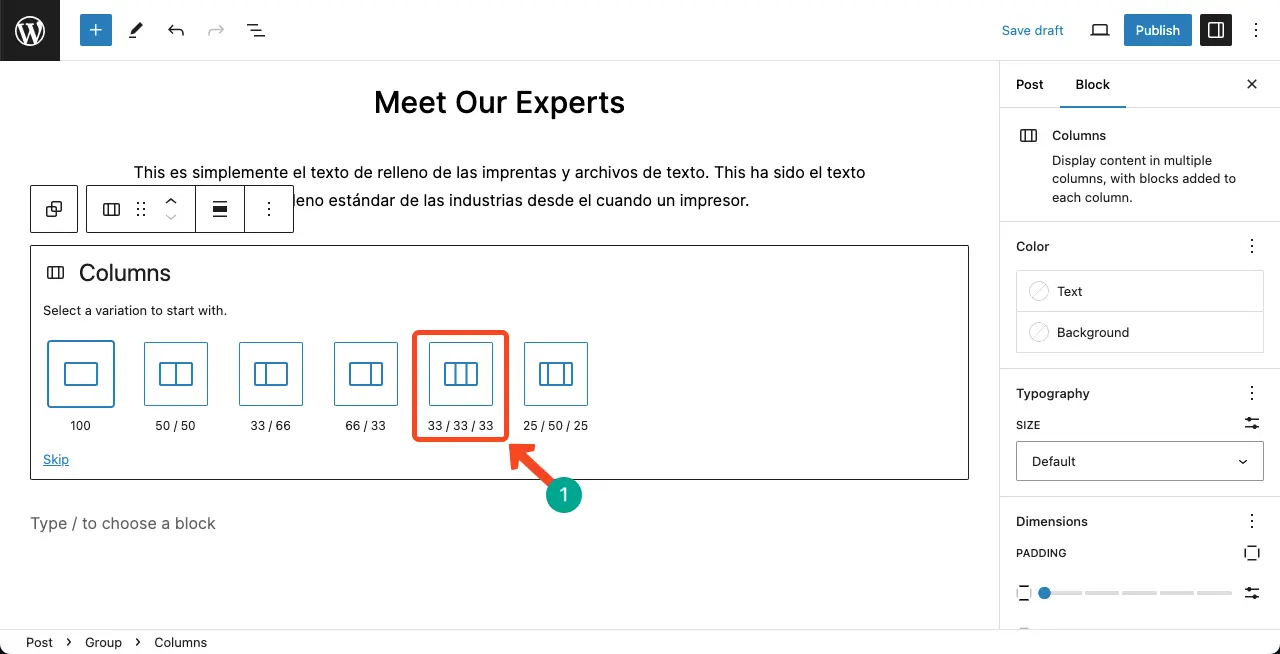
Although we mentioned three columns, you may be surprised that there is only one column after the block is added. Don’t get worried! The columns will appear as you alternately hover your mouse and click on the white space on the right.
See the video below.
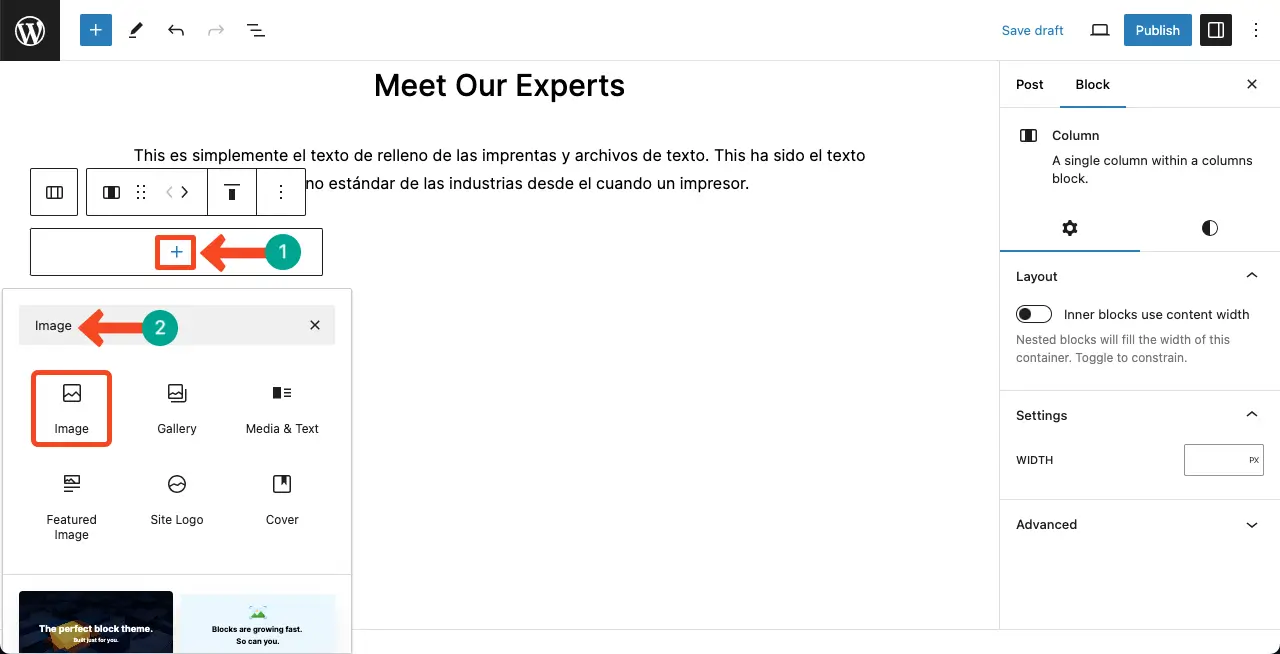
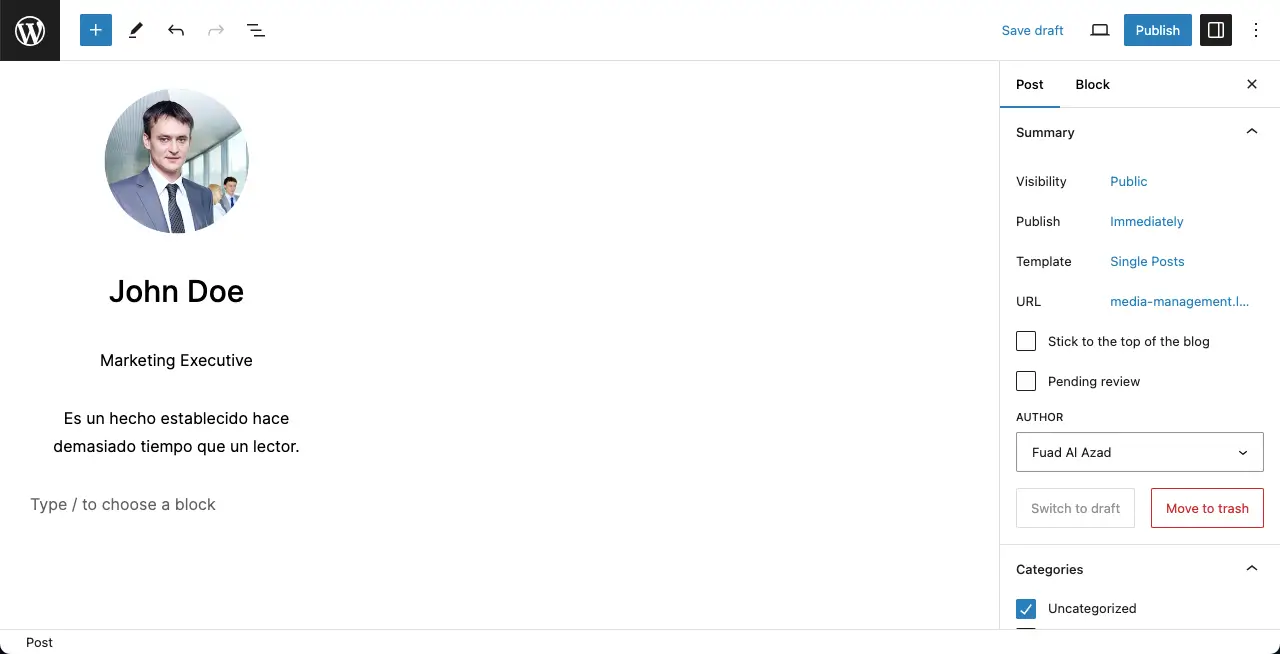
You can add new blocks within the parent block. Come to the first column. Add the Image block within it. After that, you can upload an image from the media library or your local drive.
You can see that we have already added an image. We have centrally aligned it. You can resize the image using the Edge circles.
Once done with the image, hit the Enter button on your keyboard to get the new block-adding option. By default, the paragraph block will appear.
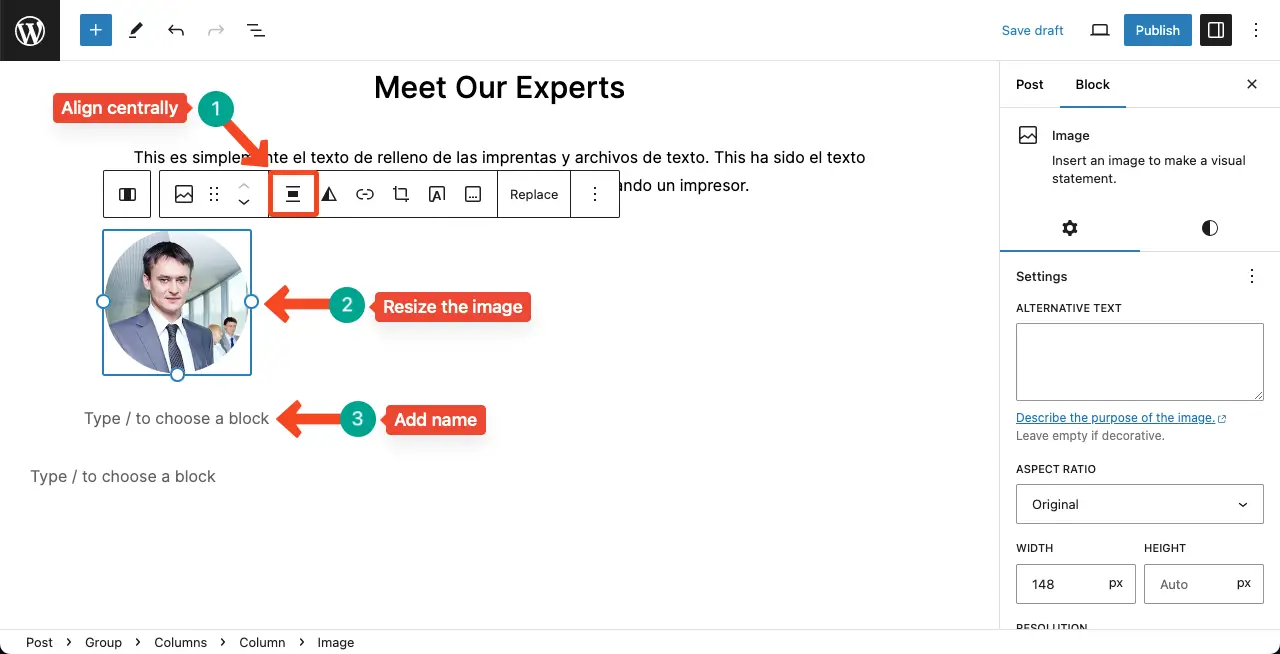
Add the team member’s name, his designation, and a short intro about him. We have added them using the paragraph block.
We will now link the personal social profiles of the team members in the same column through social blocks.
We will link four popular profiles here. So, create four more columns inside the parent column using column blocks.
Add the Social Icons block within the parent column under the team member’s name and intro.
The Social Icon block integrates all the popular social media platforms. Once the Social Icon block is added, you’ll have the flexibility to choose the blocks you like by clicking the plus (+) icon. The video attached below explains the process.
Click the social icons one by one. You’ll get a box where you can copy-paste the respective social profile links. Complete the social section this way.
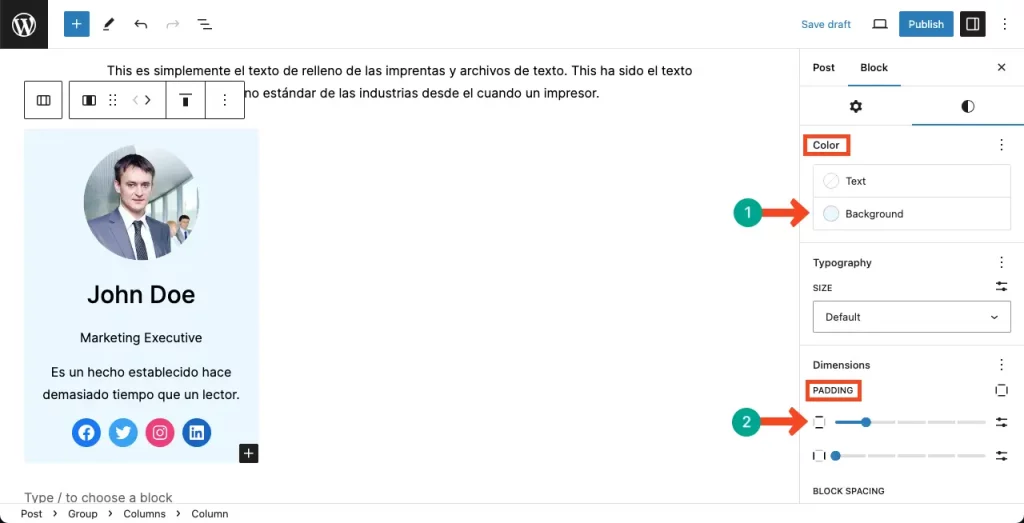
Select the entire parent column. Come to the Styles tab. Remove unnecessary spaces between the blocks you have added horizontally using the Block Spacing option.
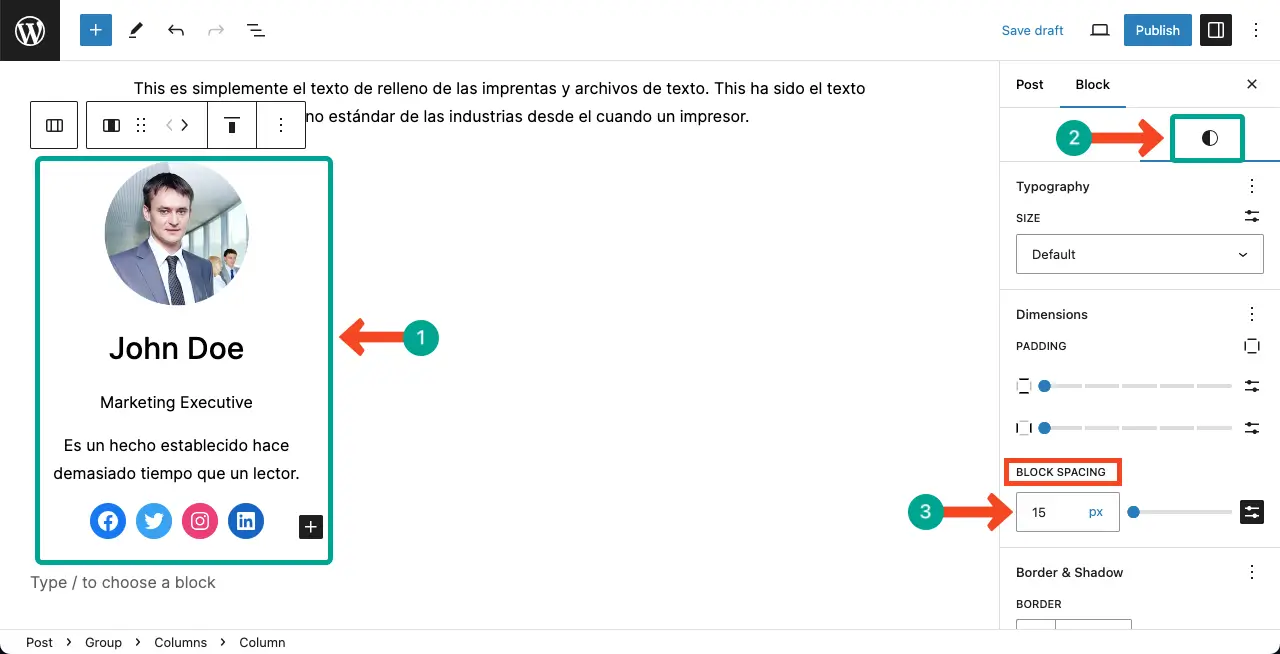
Add a background color to the team member’s column. For a better appearance, add horizontal padding to add some additional space around the column.
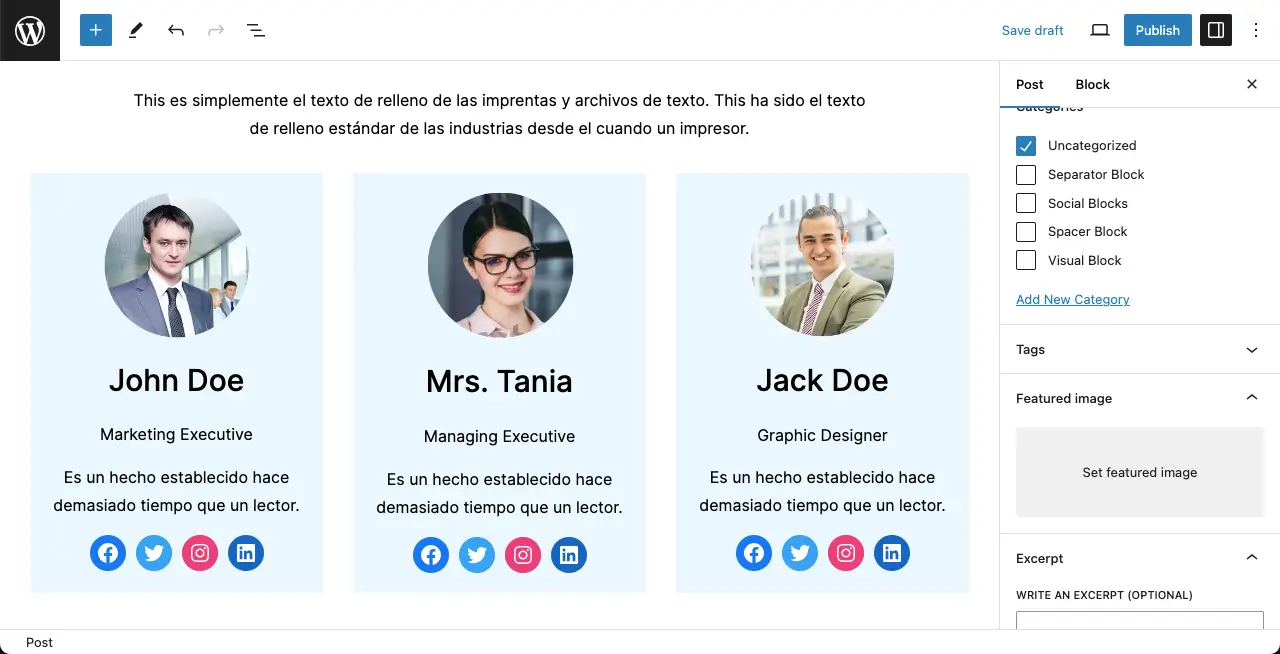
Similarly, complete the other two columns on the right side by adding new team members.
You can see that we have filled up all three columns with three team members and their information.
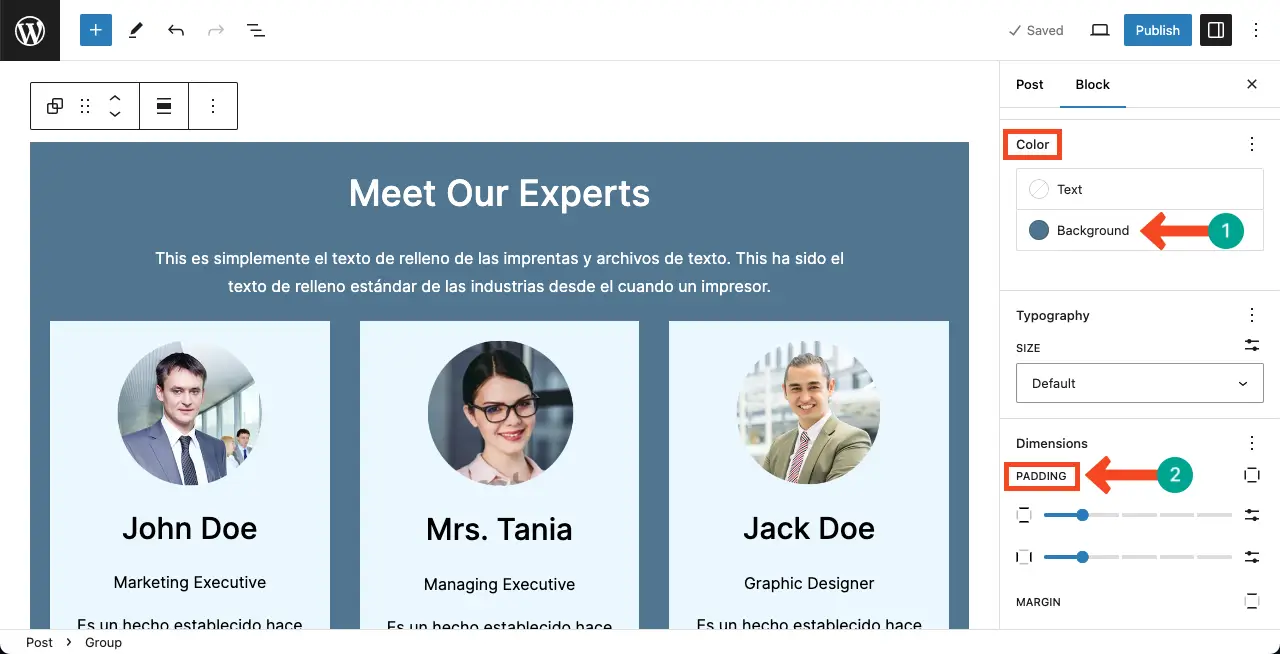
Step 05: Stylize the Entire Team Member’s Section
Select the entire team member section by clicking the Group icon on the toolbar.
Add a background color to the team section that sounds suitable to you. After that, you may change your text color individually, selecting the respective paragraph blocks one by one.
Next, add some padding both vertically and horizontally to create some white space around the entire section.
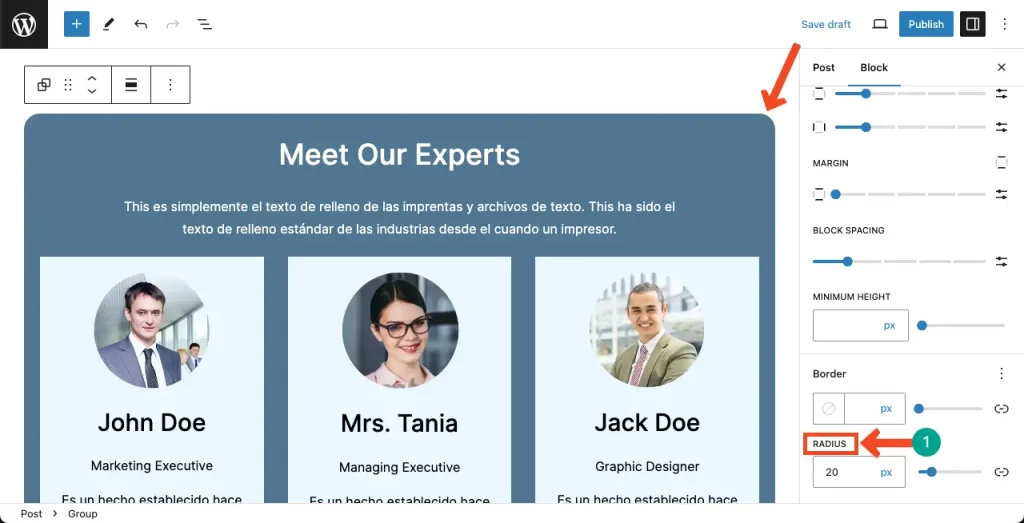
Finally, add a radius to the team section so the border corner has a semi-round shape. This will give a different beautiful look to the section.
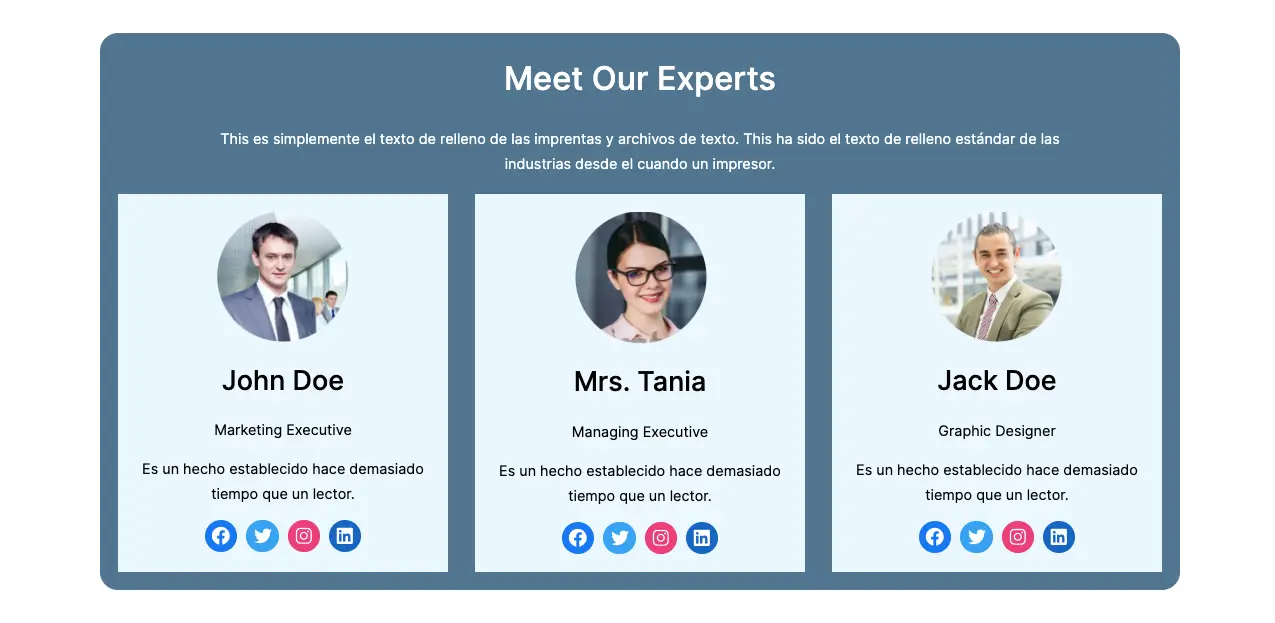
Step 06: Preview the Team Section on the Frontend
Finally, come to the frontend of the page and see how the team section looks.
Conclusion
You can create and customize the team member section in various different ways as well. We have just presented here a basic process from which you can take inspiration to create and realize more wonderful designs.
If you ever face any problem anywhere in the entire tutorial, don’t hesitate to let us know through the comment box. Finally, before moving away from our site, spare a few minutes to explore this post on how to create a content box in WordPress.

