A timetable is one of those things most people don’t notice until it’s missing. Suddenly, it’s the only thing they care about. Whether it’s a fitness studio mapping out weekly classes, a film festival listing screenings across venues, or an online academy coordinating virtual sessions, schedules are essential to how people interact with services.
Most of these organizations publish their timetables as static visuals. A JPG posted on the homepage or a PDF uploaded each week. While that works to some extent, it’s not ideal. You can’t edit it easily. Visitors can’t copy or search the content. And if the design doesn’t look good on mobile, you’re out of luck.
In this article, we’ll show you how to create a clean, editable, and responsive timetable layout right inside WordPress using a table plugin.
A Lightweight Solution for Timetables with Tableberg
WordPress provides numerous dedicated timetable plugins filled with advanced features like dynamic filters, booking systems, and recurring event management. These solutions work well for complex operations. However, most websites don’t require this level of functionality for their scheduling needs.
Tableberg may be a general table plugin, but it’s often the better choice for building simple, flexible schedules inside the block editor. Instead of locking you into a preset format, it gives you full control over layout and styling.
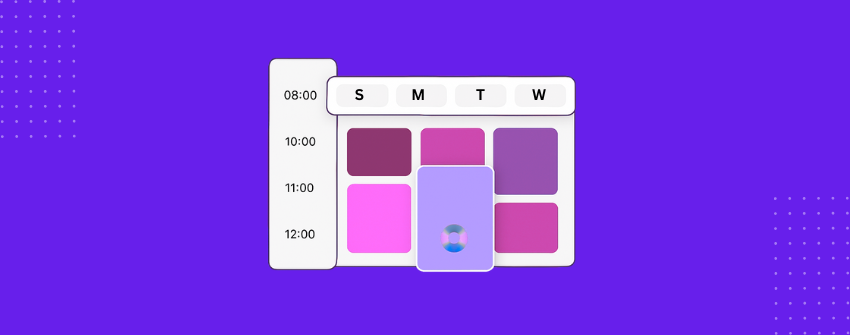
You can add or remove columns for days, insert rows for time slots, and merge cells for longer sessions. You can also alter the overall look with background colors, font tweaks, or alignment adjustments.
One of the biggest advantages is rich content support in Tableberg. You’re not limited to plain text. You have icons, images, lists, buttons, ribbons, and more to highlight important details in your schedule. This is something dedicated timetable plugins often restrict or only allow in rigid formats. And because Tableberg is inherently responsive, your schedule will remain legible on mobile devices and tablets.
In short, using Tableberg for a timetable gives you a practical, reader-friendly solution when you don’t need the heavyweight features of a specialized scheduling plugin.
Create a Timetable in WordPress Using Tableberg
The process using Tableberg is simple. You’ll start by adding the table, then fill it with your schedule, and finally style it to match your layout. Here’s how it works from start to finish.
Step 1: Set Up Tableberg
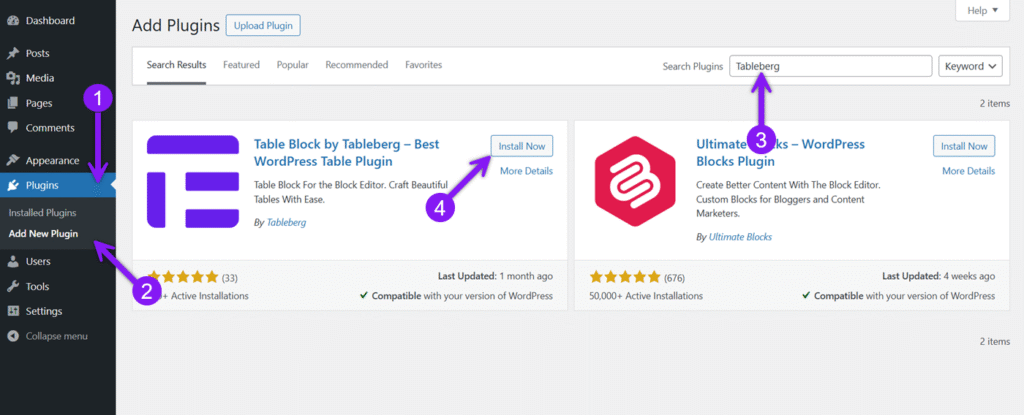
Start by installing the Tableberg plugin from your WordPress admin area. In the Plugins section, click Add New, search for “Tableberg”, and once you see it in the results, click Install followed by Activate.
Step 2: Add a Tableberg Table to Your Page or Post
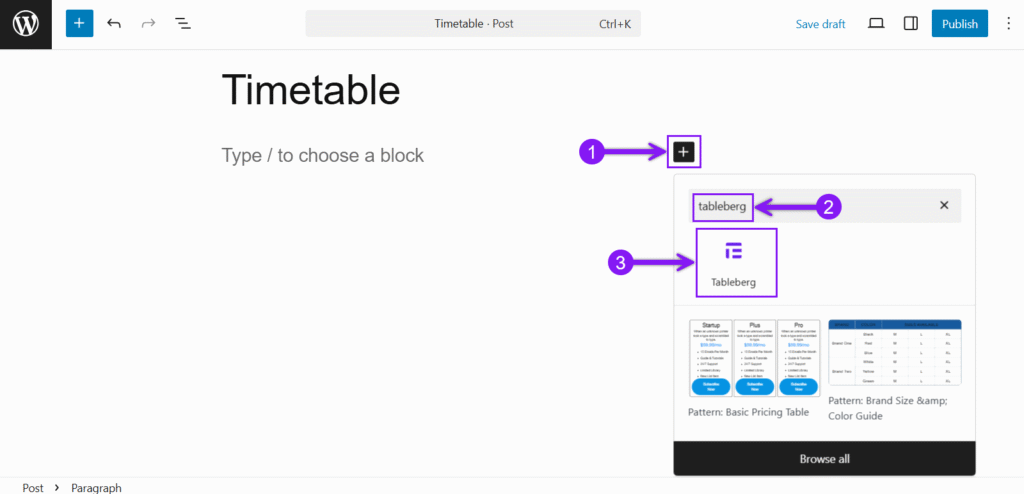
Create or edit the page where you want your timetable. In the block editor, click the + icon, search for Tableberg, and add the Tableberg Table block. When prompted, choose the number of columns and rows as your schedule needs. You can always adjust this later.
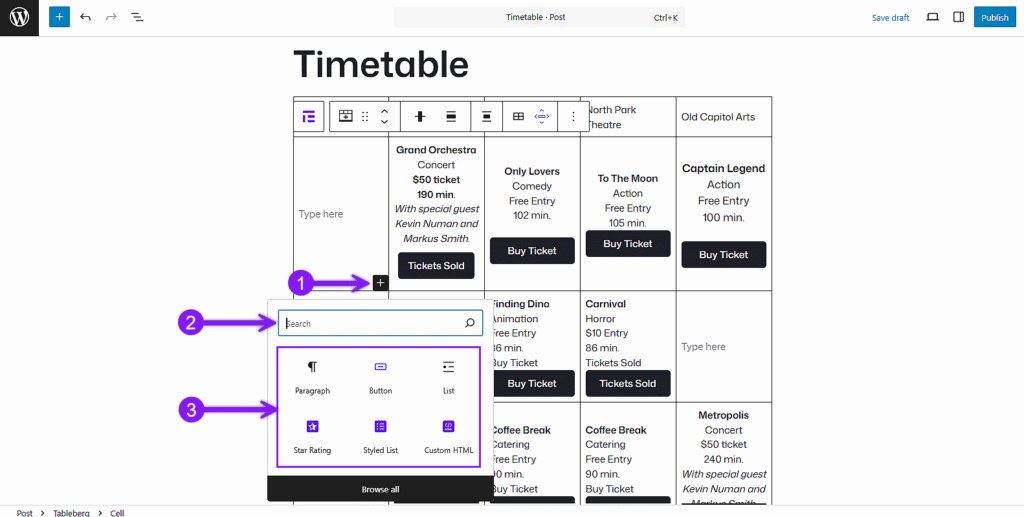
Step 3: Add Content Inside Each Cell
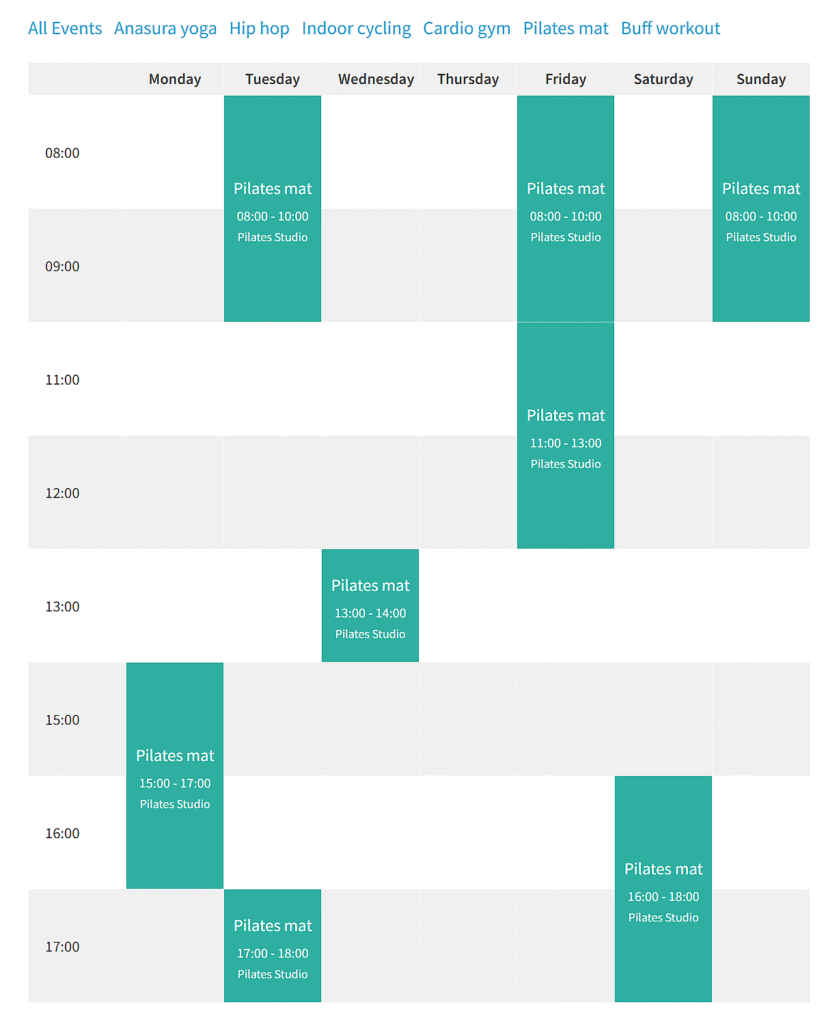
Once your table is in place, start filling in the program details into their corresponding time and venue cells. With Tableberg, you’re not limited to plain text. Simply click on the particular cell and use the block inserter (+ icon) to input your preferred element inside those cells. You can use images, icons, lists, buttons, ratings, and ribbons, whichever you deem necessary for your timetable.
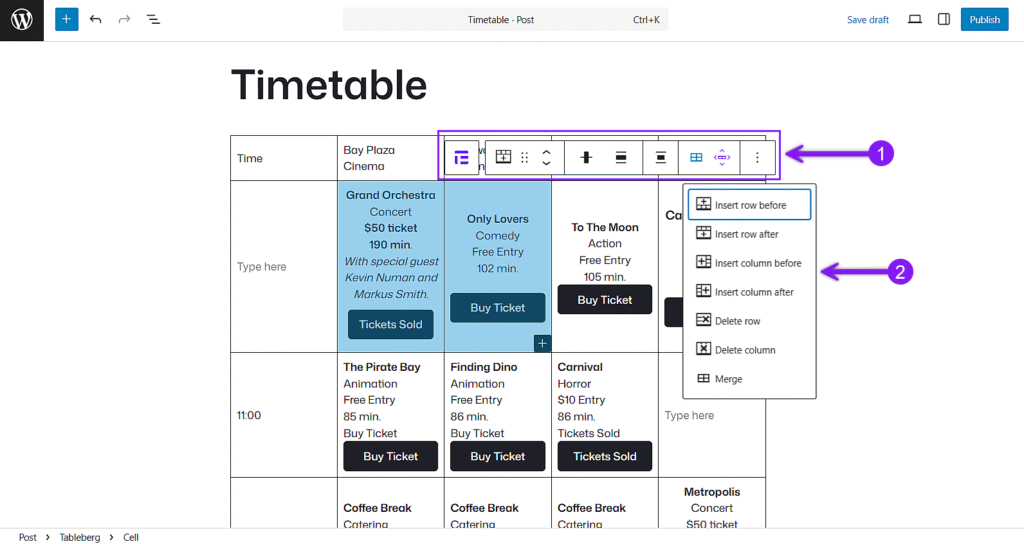
Step 4: Use the Table Toolbar for Layout Adjustments
Click on any cell to reveal the table toolbar. From there, you can insert or remove rows and columns, move them around, or duplicate content. If a program spans multiple time slots or venues, you can also merge cells by selecting the starting cell and choosing Edit Table → Merge Cells from the toolbar dropdown.
Step 5: Customize the Table
Simply click inside any cell and select the whole block by clicking the Tableberg icon from the block toolbar. There you’ll find two different settings tabs to customize the overall table. You can start with the General tab. From there, you can define header and footer rows, enable sticky headers for long schedules, and control column width or responsive behavior.
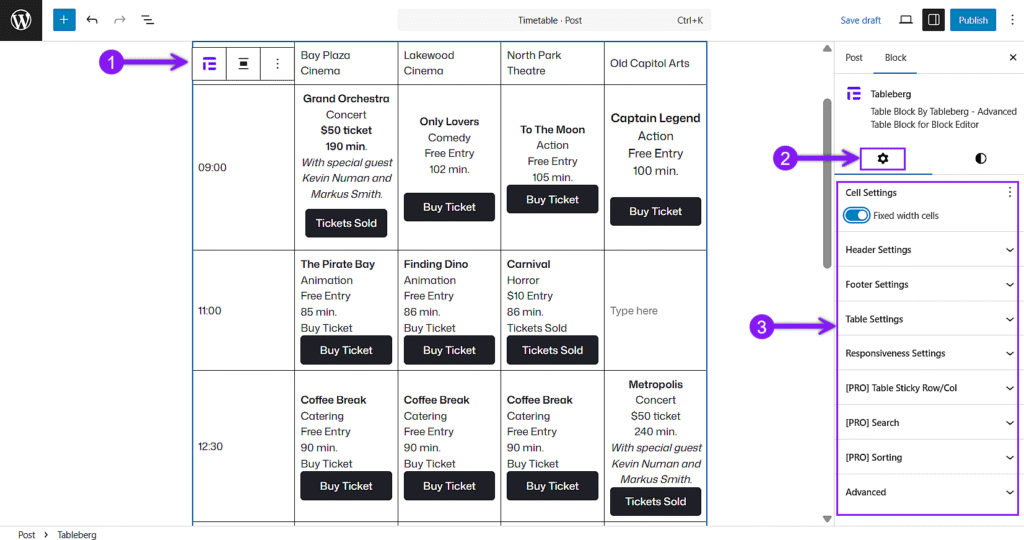
Next, switch to the styles tab to personalize the appearance. You can color-code rows or columns by theme, highlight special sessions, or use alternating row colors. You can also set text alignment, font size, and border styles directly from the sidebar.

If you want to style the individual blocks used inside a cell, you can similarly modify them by clicking the sub-blocks first.
Step 6: Preview and Publish
Use the Preview button to check how the timetable looks across desktop and mobile. Once satisfied, click Publish to make your schedule live.

Need multiple timetables?
If you need multiple timetables together, you can always use the Toggle for Tableberg block to separate your timetables. Just place each timetable in its own tab and let users switch between them easily.
Final Thoughts
If your goal is to display a clear and flexible schedule without relying on complex booking tools, Tableberg gives you exactly what you need. It lets you build your timetable visually, style it freely, and update it whenever your plans change. Whether you’re sharing daily sessions, multi-venue events, or a weekly class plan, you stay in full control of how everything looks and works.

