
Want to split content into multiple pages without using any plugins? Well, you can do that using the WordPress Page Break Block. This block allows users to break up a post or page into sections to improve readability and better website navigation.
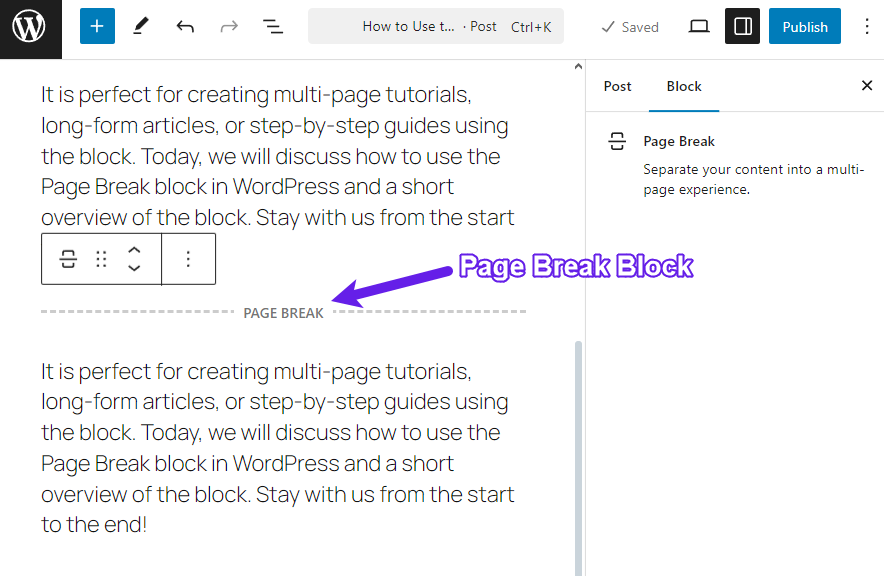
It is perfect for creating multi-page tutorials, long-form articles, or step-by-step guides using the block. Today, we will discuss how to use the Page Break block in WordPress and a short overview of the block. Stay with us from the start to the end!
How to Use the Page Break Block in WordPress?
We will not use any third-party plugin to use the page break block. We will use the core Page Break block offered by WordPress. Follow the steps below and master all its functionalities.
Go to your post or page where you want to add this block.
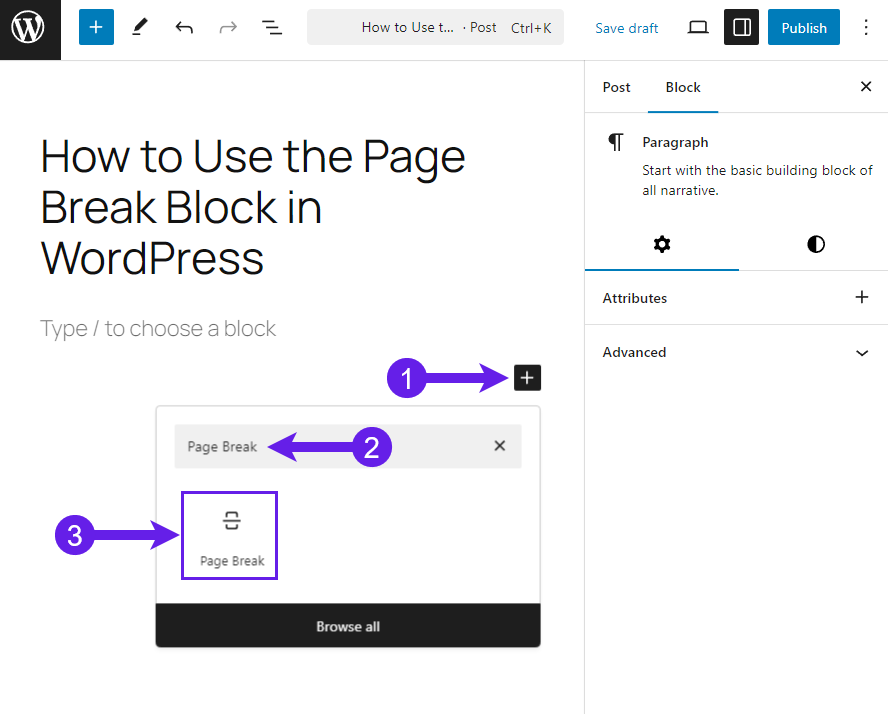
Now, hit the “+” icon (Add Block) (1), type “Page Break” in the search box (2), and click on the Page Break block (3).
Try to add the block in between your content. So, decide first where you want to add the block.
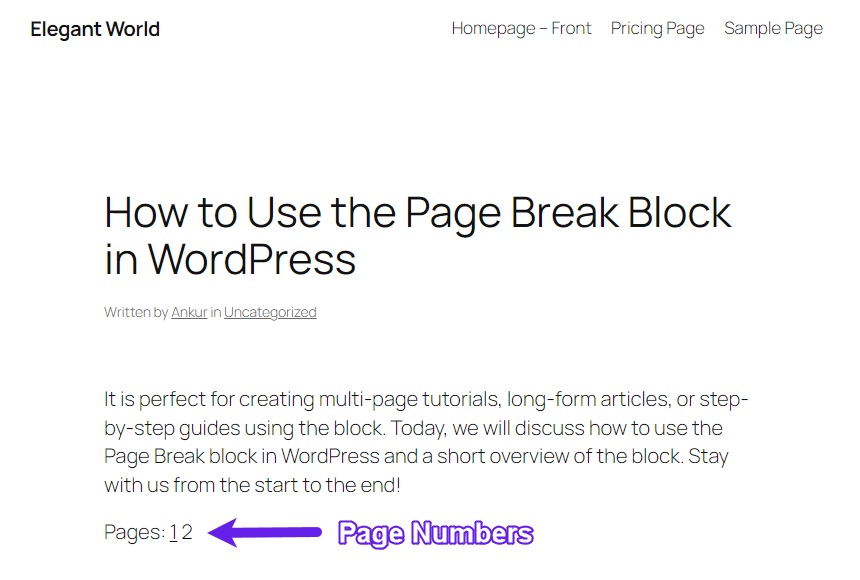
The more page break blocks you add, the more page numbers you create. As I have added only a single-page break block, it is showing 2 pages.
After adding the block, make sure to check it in the preview. Then, you must save or publish your post or page.
No customization is included in the block. So you cannot customize it.
So that’s how you add a page break to your post or page.
Overview of the Block
What is the Page Break Block?
The Page Break block is a core WordPress block designed to divide content into separate pages. When added to a post, it automatically inserts pagination at the bottom, allowing users to navigate through different sections of your content.
What are the Key Features of the Page Break Block?
The key features of the page break block are below.
-
Automatic Pagination: WordPress generates numbered page navigation at the bottom of the post when the block is added.
-
Enhanced User Experience: Helps prevent long scrolling and organizes content into digestible sections.
-
Built-in Compatibility: Works seamlessly with most themes, ensuring a smooth navigation experience.
What are the Toolbar Features of the Page Break Block?
Unlike other content blocks, the Page Break block has minimal toolbar options since its main function is to divide content. Here’s what you can do with it:
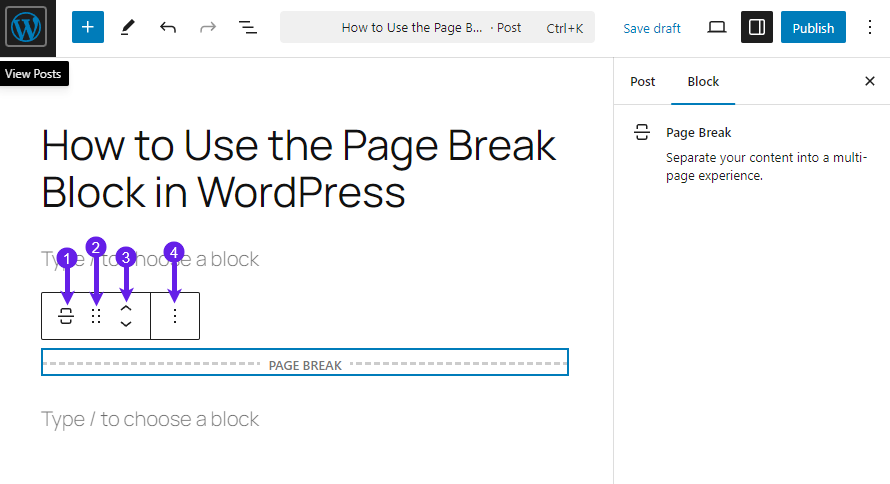
- Transform To: It lets you transform your block into the Details, Columns, and Group blocks.
- Drag: It allows you to drag the block to any position you like.
- Move Block Position: Use the up and down arrows in the block toolbar to rearrange the page break position.
- Options: It includes handy features like Copy, Duplicate, Add Before, etc.
Final Thoughts!
The Page Break block is handy for adding paginations or navigation to any page or posts to your website. It lets you divide the bigger information into several pages that readers can easily comprehend.
I hope the post has helped you understand how to use the block and how it works. Let me know if you had trouble understanding any part of the tutorial. I would be happy to help.
Read More!

