
Info boxes are now a common tool for websites that need to share important information clearly and attractively. Basically, if you want to draw attention to a particular promotion, drive your viewer’s attention to key details and important notices, or encourage your users toward fruitful CTAs, info boxes offer a simple solution to make your messages stand out.
Info boxes not only break down important information into smaller, easy-to-read sections but also play an important role in guiding user navigation. With the addition of info boxes, it will be easier for you to lead your visitors through essential points without overwhelming them and in an organized, clean, and friendly format.
Now, if you’re here to read this article, it means you’re already familiar with the concept of info boxes or just learning about them for the first time. However, there might still be one question going through your head, and that’s how you create an info box. That’s why we’ve prepared a step-by-step guide to walk you through the basics of how to create info boxes in WordPress. Here, we’ll provide you with two different approaches to help you pick the most suitable option. So, why wait? Let’s get straight to them.
Method 1: Utilizing The Column Blocks
The Column Block in the Gutenberg editor is a simple way to create info boxes if you want to do it without the help from plugins. It allows you to arrange basic content in a structured format. Here’s how to set up an info box using this approach:
Step 1: Add A Column Block To The Editor
Create a new post or page in WordPress and open it in the Gutenberg editor. Proceed to add a Column Block by clicking the “+” icon and then select “Columns” from the block options.
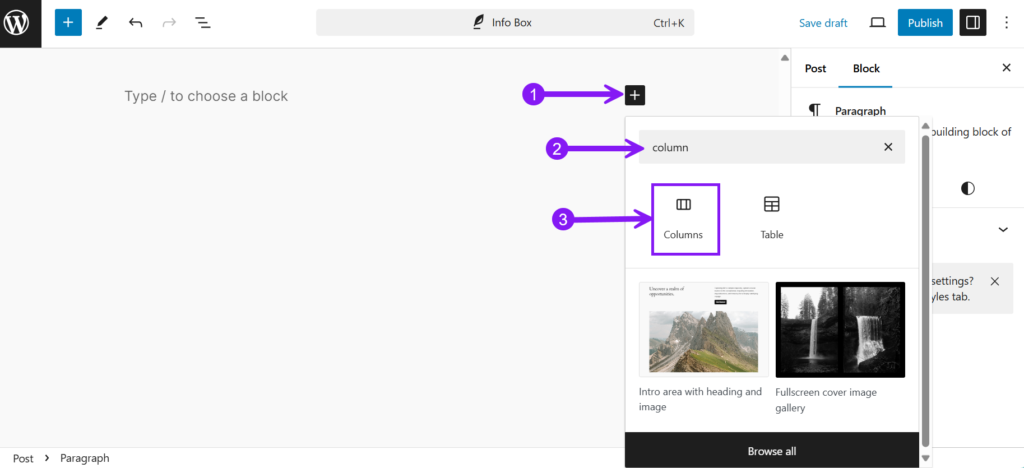
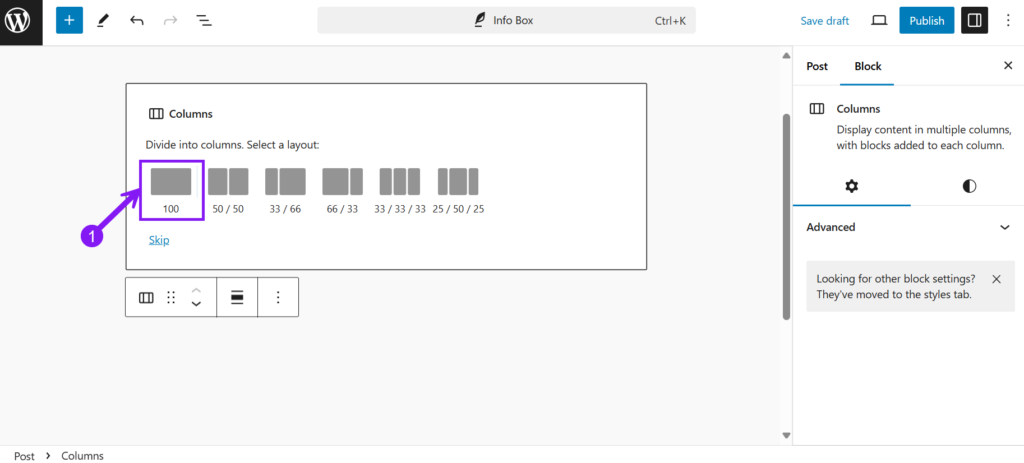
Now, choose a layout with a single column or multiple columns, depending on how you want the info box to appear. For the beginner’s convenience, we’ve chosen a single column to create our info box.
Step 2: Add Different Blocks To Add Content
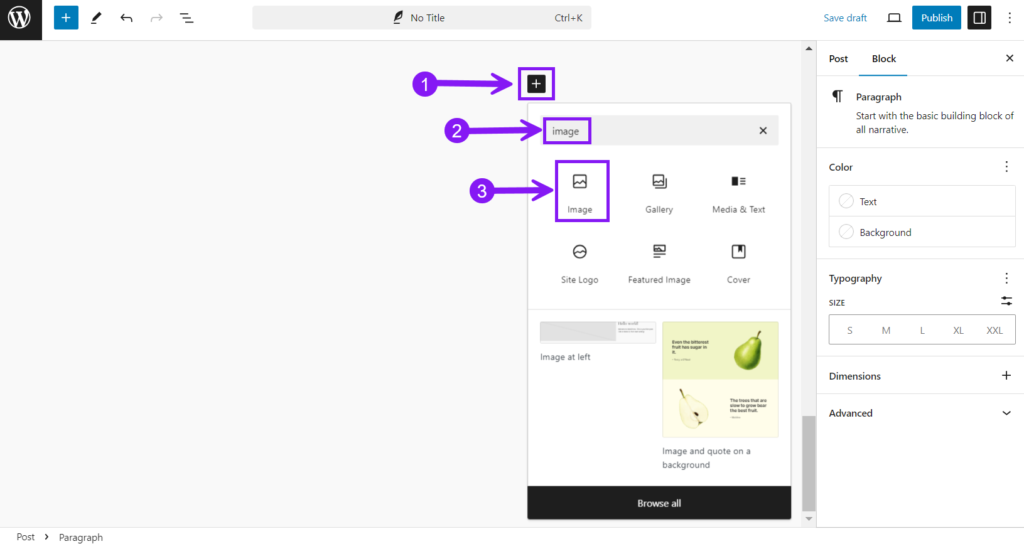
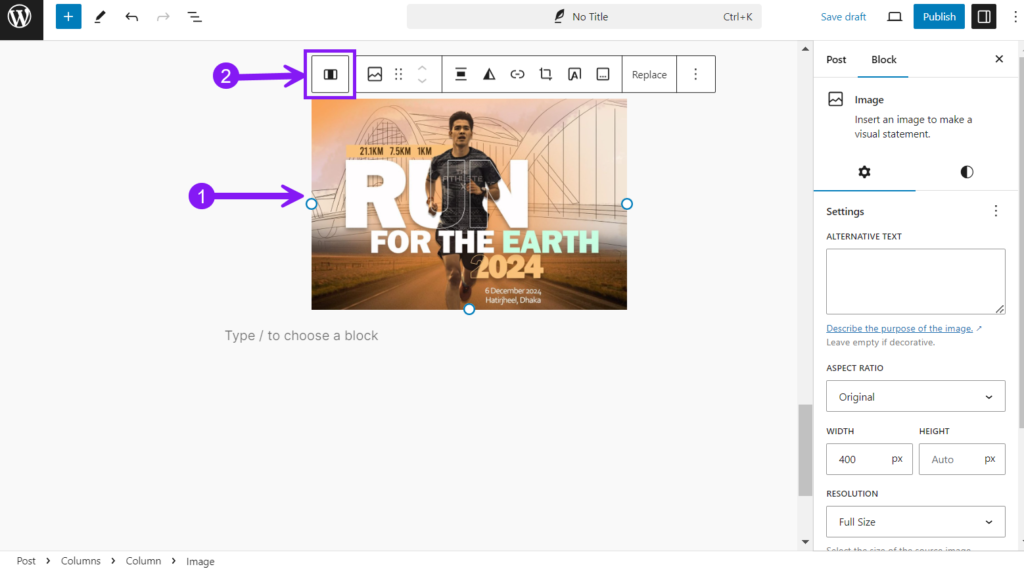
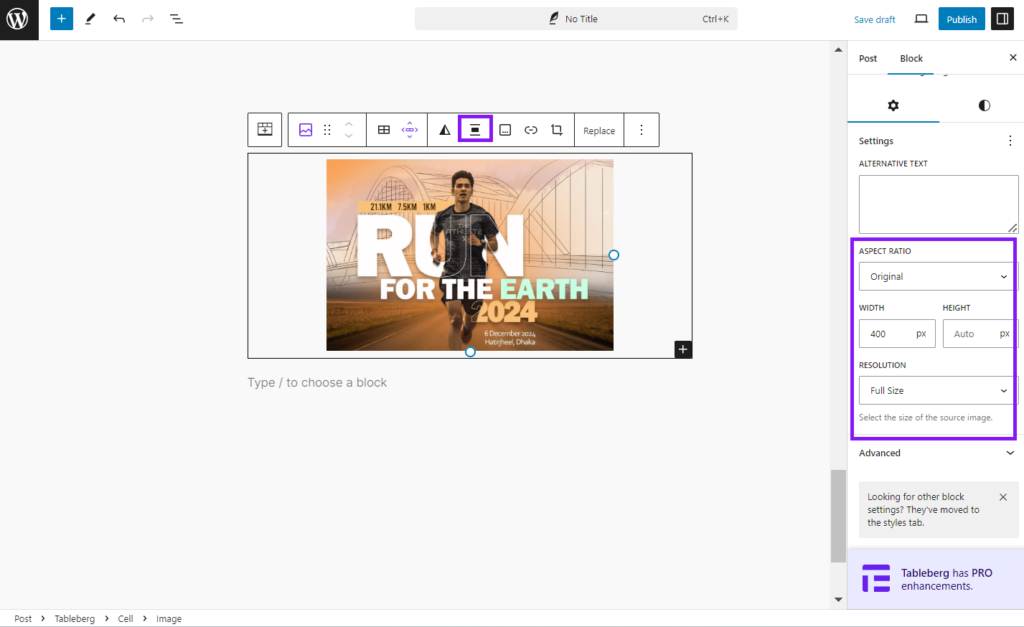
Next, add content to the column block to create a visually distinct info box. Click the “+” icon to add your preferred block. This, in turn, will guide you to the Gutenberg block library. For example, we start with an image on the top of our info box. So, search for the Image block in the library and select it. Continue to upload your image from the media library or upload it from your device.
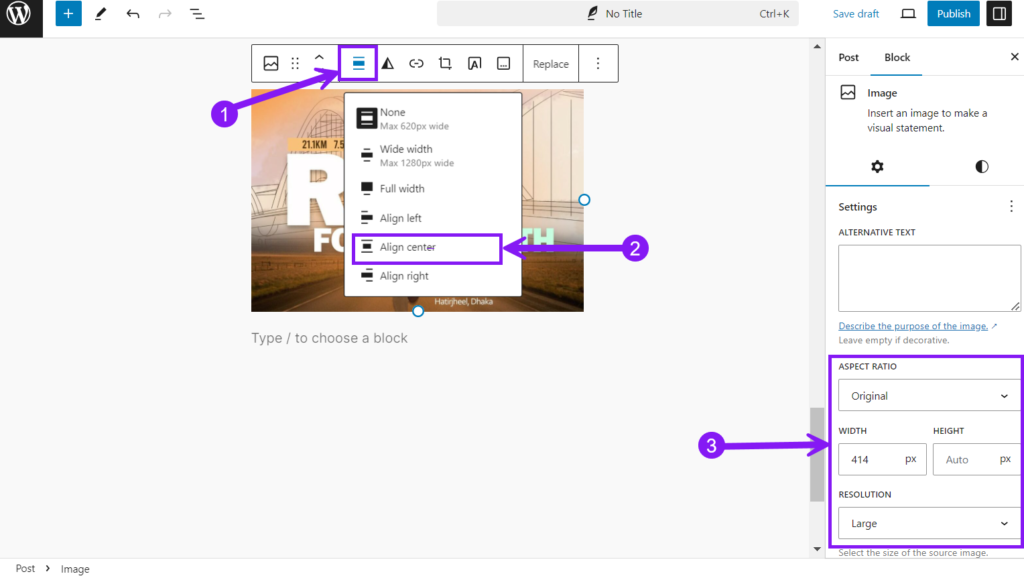
Once you’ve uploaded your image, you can adjust the alignment of your image and customize the size of it. You can align the image to the left, center, or right. Here, we’ve aligned the picture in the center but kept the size the same.
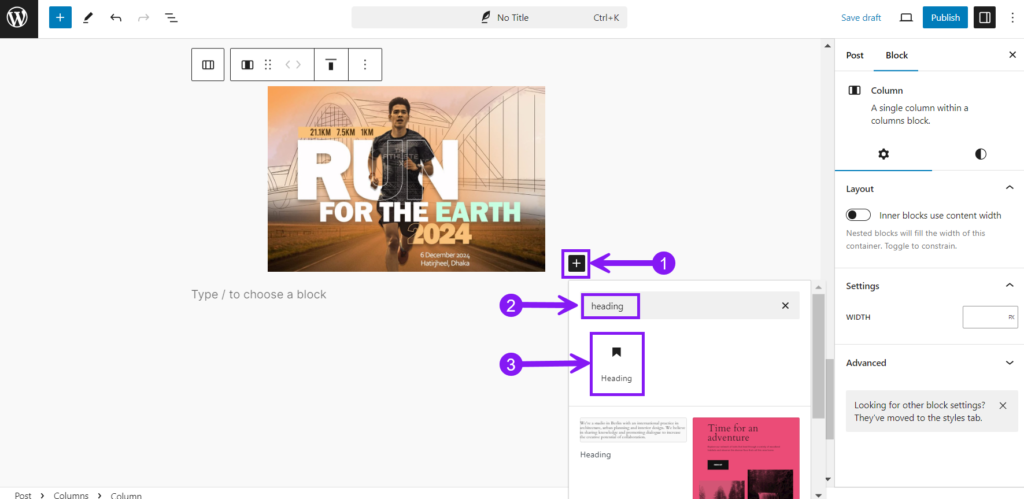
Now, we need a proper heading to highlight our image. To add a Heading block, start by selecting the image, which will open the toolbar, and from there, select the parent block.
Once you’ve selected the parent block, the + icon will appear. So, hit the + icon, search for the Heading block and click on it. Continue to add the texts in the Heading block and align them the way you like.
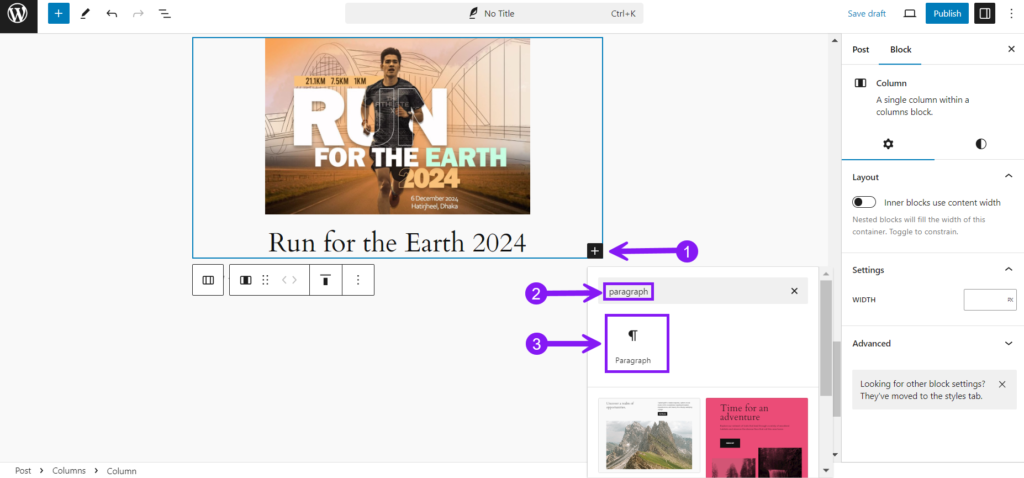
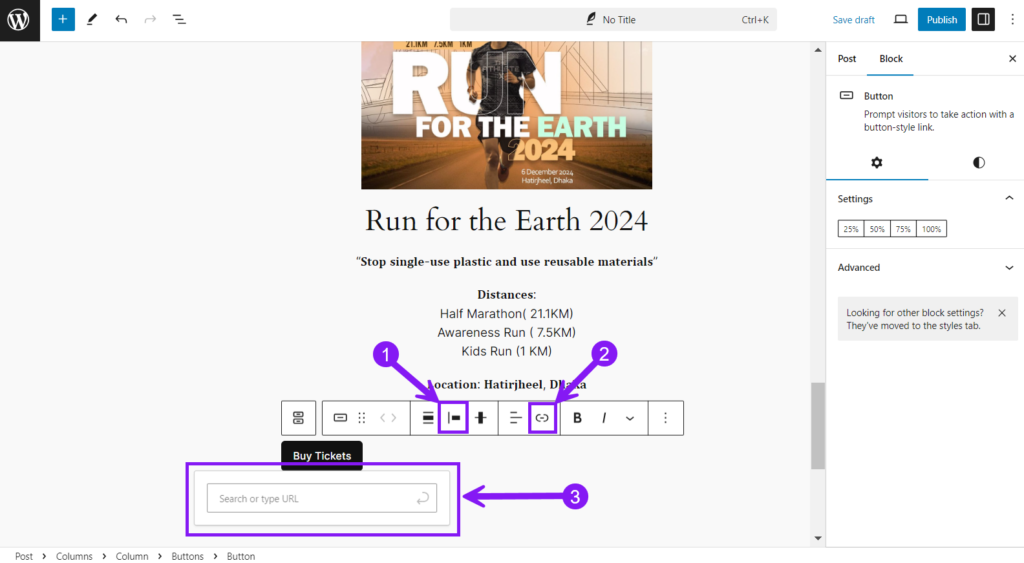
Once you’re done, repeat the previous procedure of adding blocks. Here, we’ve added a paragraph block and a button block one after another. First, choose the paragraph block and add the necessary text. Align those texts the way you seem necessary.
The next task is buttons. Find the Button blocks from the library, select the block, and add texts to go in that button.
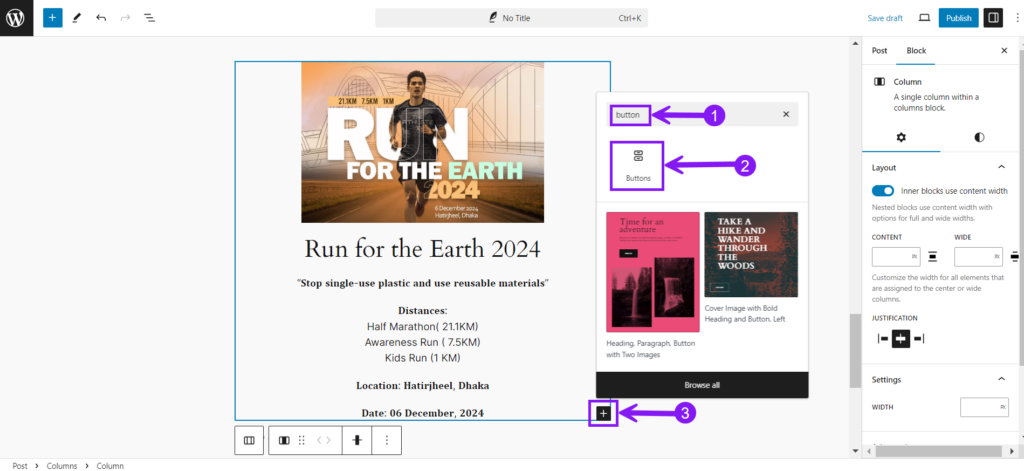
Once you’re done, align your buttons the way you like and then add links to your button.
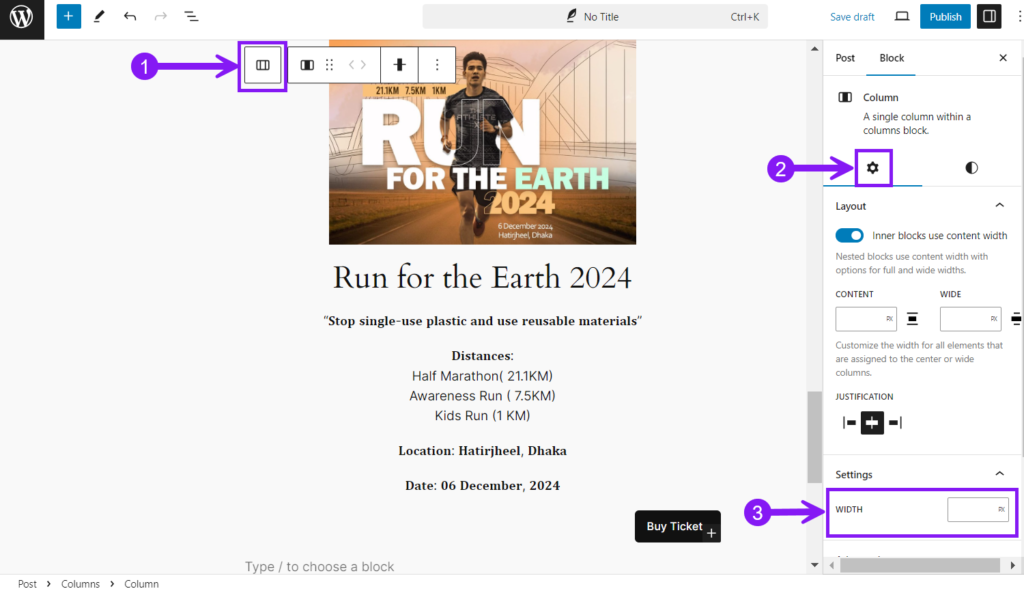
Step 3: Customize The Entire Block
Customization options allow you to adjust various aspects for a polished look. Select your entire column section by clicking on the column icon on the toolbar. Now, you can start your customization by adjusting the width of the column to ensure it fits well within your page layout.
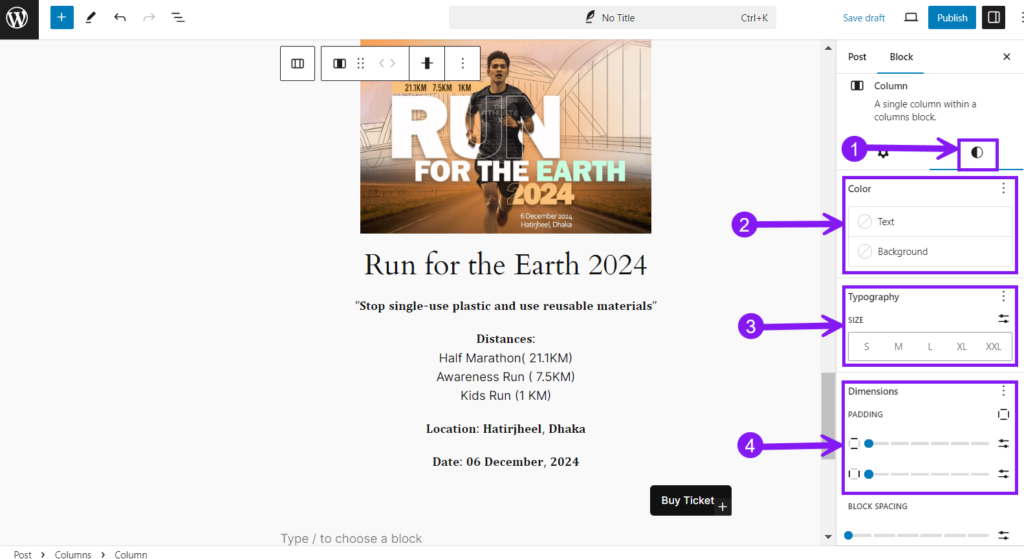
Next, move to the Styles tab. From here, you can choose the color of the texts, links, and backgrounds; you can alter typography and customize the block’s dimensions.
If you scroll further down, you will find the settings to add Block Spacing and Border, and Shadows.
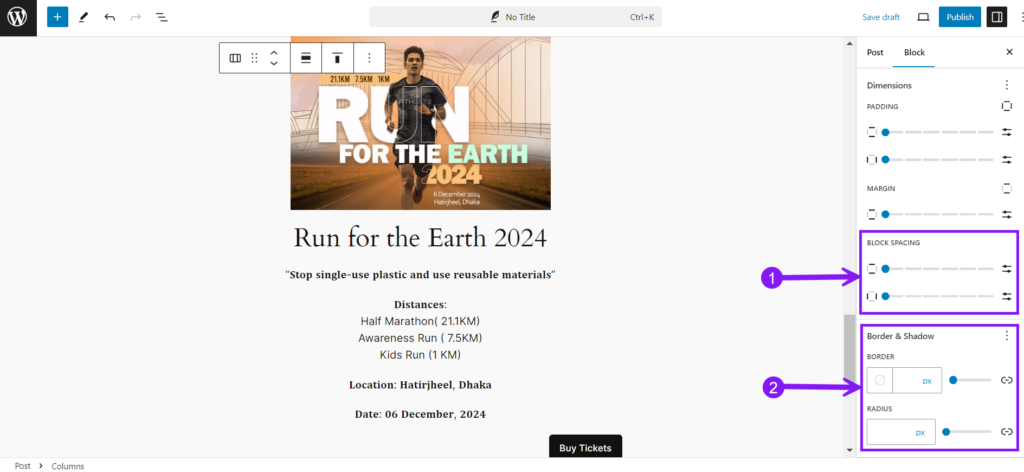
We have changed the text and background color, altered the padding, and introduced some borders and radius. Once the info box is published, we will have the end result.

Method 2: Using the Tableberg Plugin
The Tableberg plugin, primarily used for creating tables, can also be leveraged to design info boxes with a structured format. Here’s how to create an info box using Tableberg:
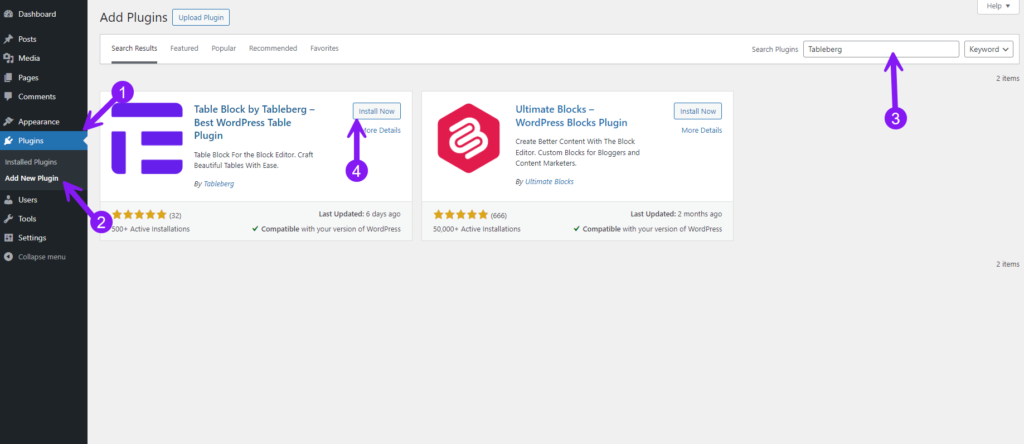
Step 1: Install and Activate the Tableberg Plugin
Go to your WordPress dashboard, navigate to Plugins > Add New, search for “Tableberg,” and click Install Now. Once installed, click Activate to enable the plugin.
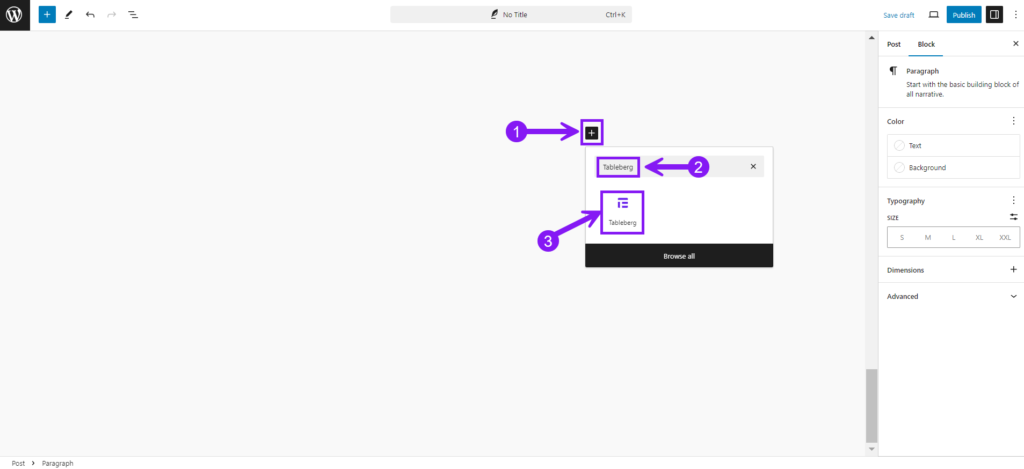
Step 2: Create a New Table
Click the + icon from your editor and search for the Tableberg plugin from the library. Once you find it, click on it.
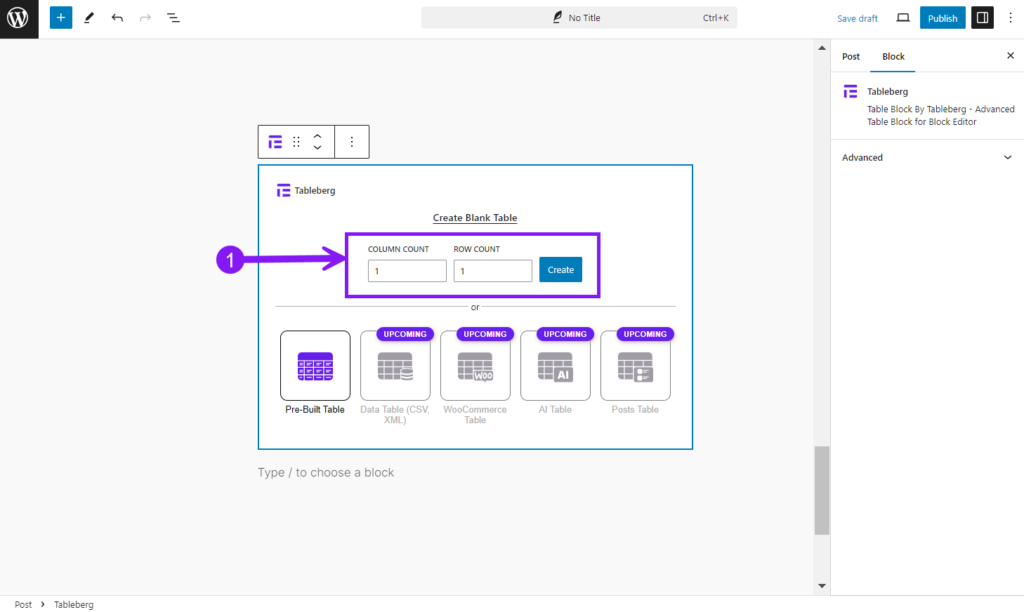
Now, you need to select the number of columns and rows for your info box. Here, we will create a single-column box; that’s why we’ve selected 1 row and 1 column.
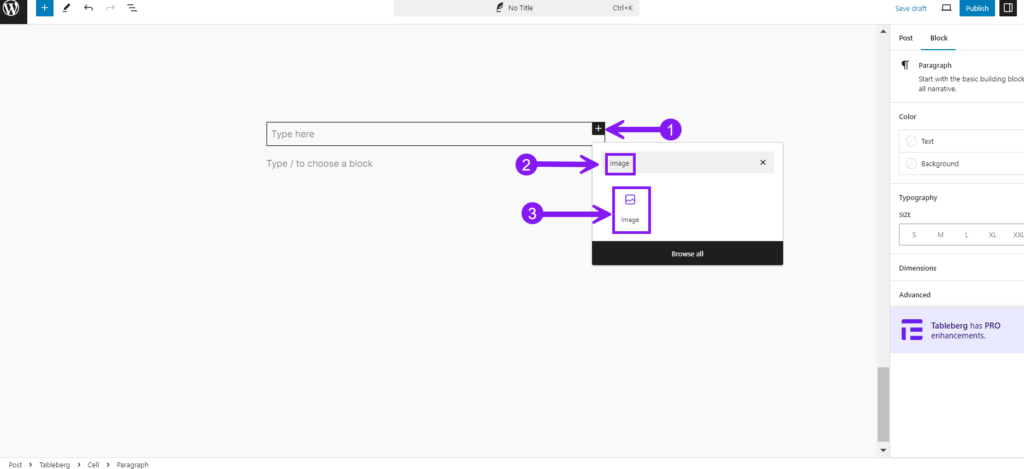
Step 3: Add Content to the Table
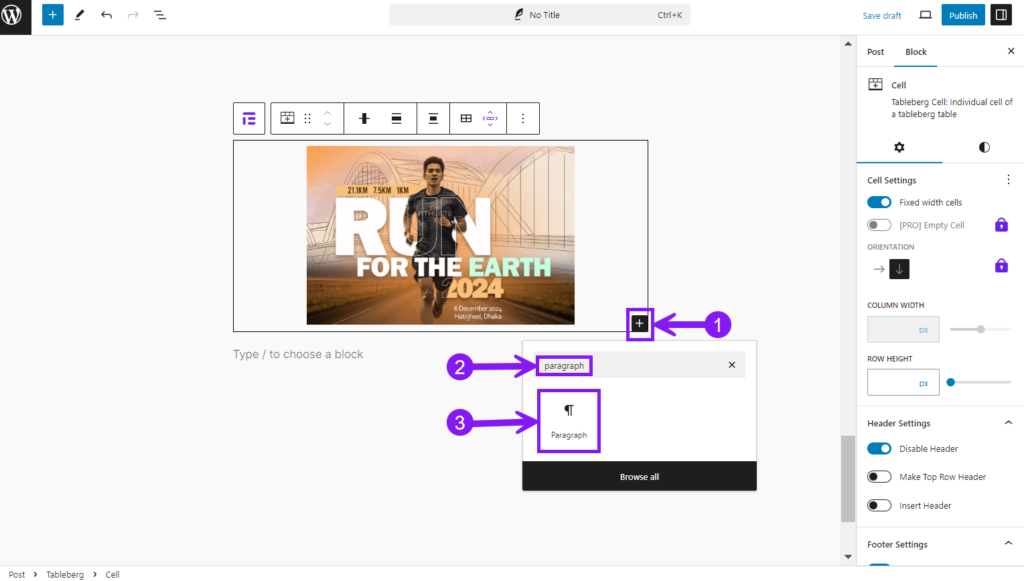
As we did in the first method, we’ll start by adding images in our info box. Hit the + icon, search for the Image block, and add it to your posts. Then, upload the image from your device or media library.
Again, if you need any adjustments in the alignment and size, do the same as shown in the picture below.
Next, we’ll put the text after the image by adding a Paragraph block. Click the + sign, search for the paragraph block, and add it. If you think any change in alignment is necessary, do it.
The last task is adding buttons. Select the parent block, find the + icon, search for buttons, and add it to the editor.
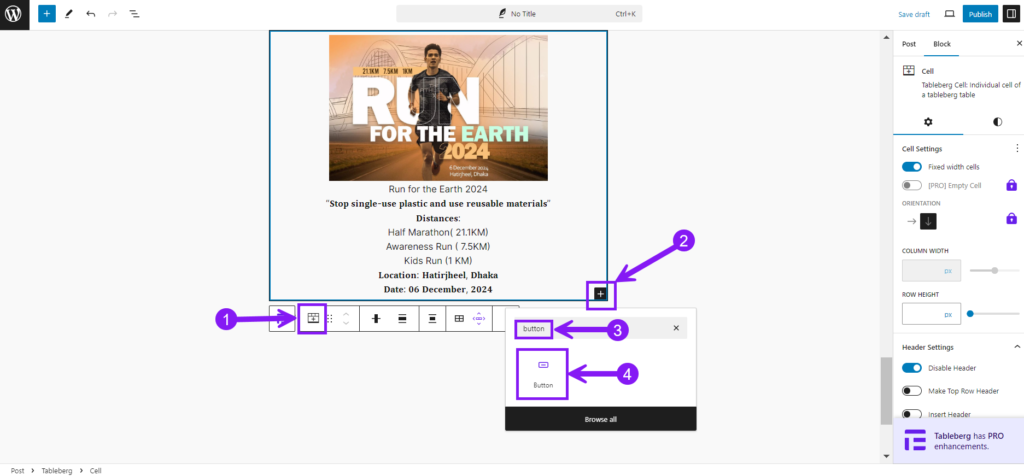
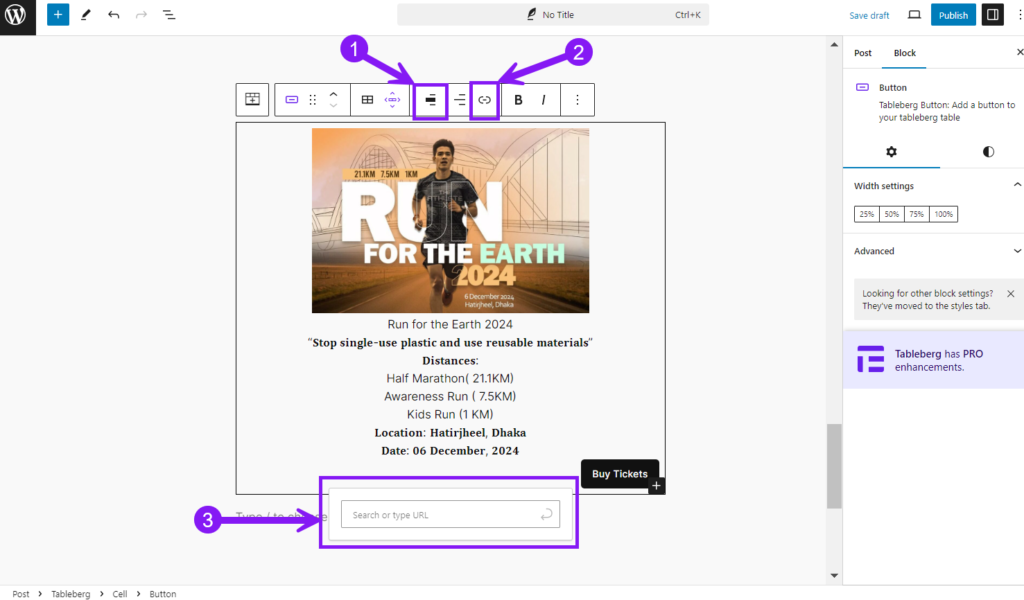
Once you’ve completed this, add text to your buttons, check the alignments of your button, and add links to it.
Step 4: Customize your Table
After setting up the Tableberg box with your content, you can proceed to customize and style the box as a whole. But keep in mind you can also customize every individual block we’ve used here. For now, we are sticking with the whole table.
First, click the Tableberg icon in the toolbar to select the entire box. Then, slide to the Settings Tab and adjust the width of the box to fit the layout of your page or post.
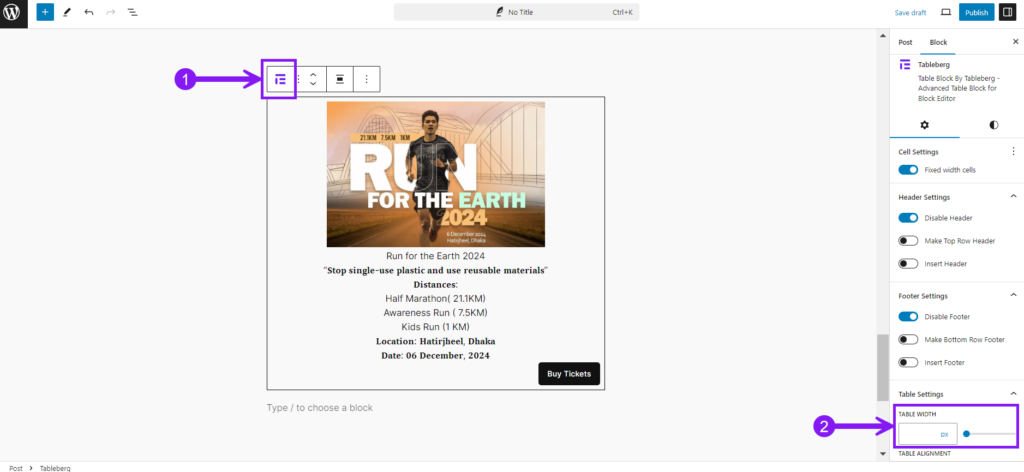
Then, move to the Styles Tab to customize the box’s background color, padding, margin, and space.
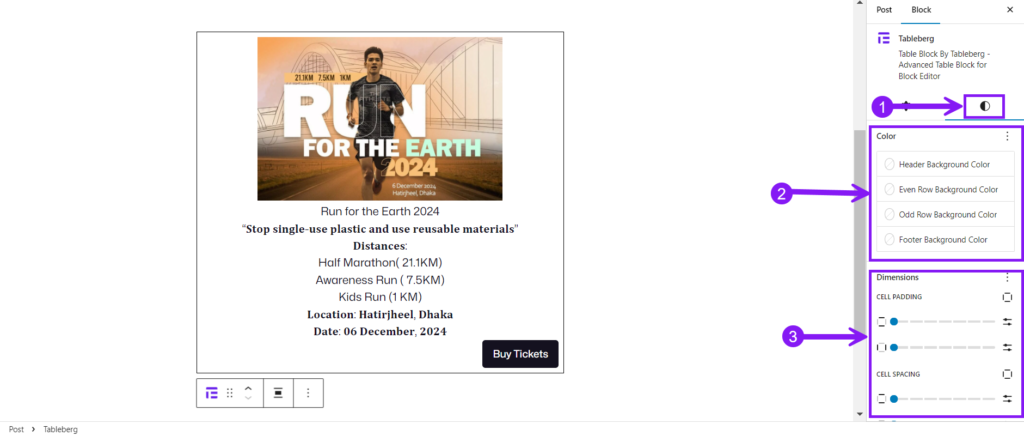
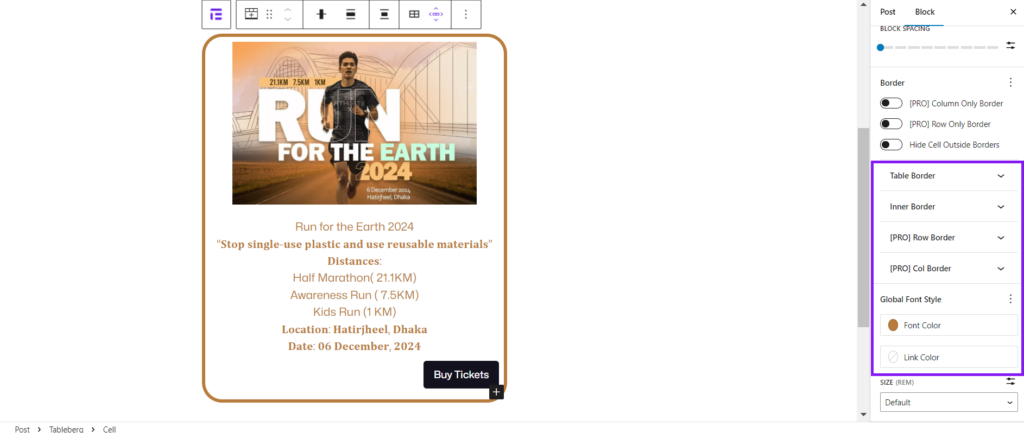
If you scroll down further, you will find more options to change the table, inner and column border, global font color, and more.
This is how you can make a perfect info box. If you need more than one info box, just alter the number of columns and rows and then follow the same procedure.
Conclusion
And there you have it, your Tableberg info box styled to perfection. With just a few tweaks, your content can shift from ordinary to eye-catching, pulling attention right where it matters. The customization possibilities are endless, so let your imagination run wild. Experiment with colors, play around with borders and add finishing touches that make every box a visual delight. Let your info boxes not only convey information but also add a touch of flair to your entire website.

